NOTE: This guide expects you to have followed Before Install! If you haven't, go do it!
You will need the Ubuntu Server installation ISO to follow this guide. This guide follows the Ubuntu Server 20.04.2 LTS install process, however differences should be minimal.
Connect your USB install drive and open Rufus. Configure Rufus like below:

Select your Ubuntu Server ISO by clicking the CD Drive icon on the right under Format Options.
Ensure (triple check!) you have the correct device selected, because selecting the wrong device could wipe out another device with your data on it!
Click start. You will be asked what mode you wish to use:
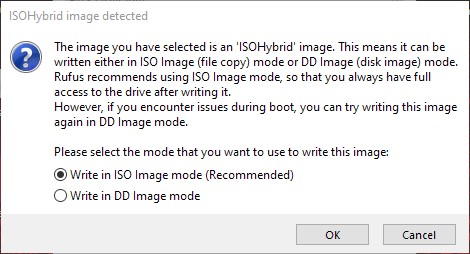
Choose ISO mode and click OK.
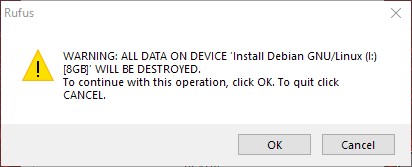
READ!! and accept the warning.
Now we need to make a modification to the boot menu of the installer. Open file explorer and navigate to the USB:

Navigate to /boot/grub:

Open grub.cfg in your editor:
On line 14, you can see the default boot entry:
menuentry "Install Ubuntu Server" {
	set gfxpayload=keep
	linux	/casper/vmlinuz   quiet  ---
	initrd	/casper/initrd
}
Add a new entry above it, and configure it like so:
menuentry "Serial Console Install Ubuntu Server" {
	set gfxpayload=keep
	linux	/casper/vmlinuz vga=off --- console=ttyS1,115200n8
	initrd	/casper/initrd
}
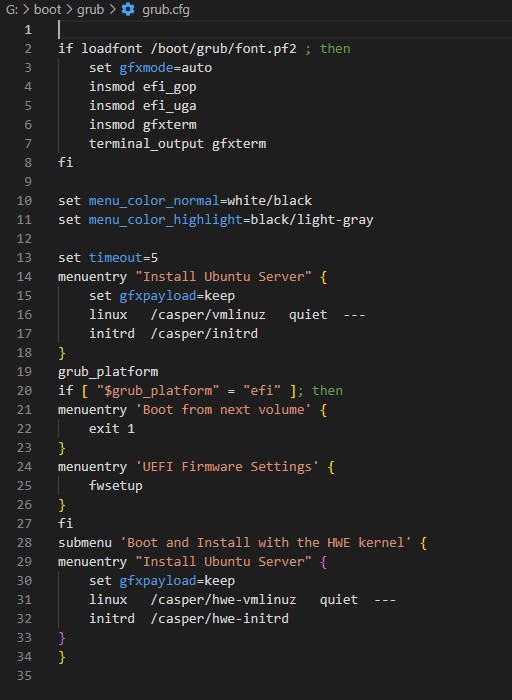
At the top of the config on line 7, set terminal_output to gfxterm console
Your config will now look like so:

Ensure no hard disks are in the 4 bays of the DX4000.
Into USB port 1 plug your empty USB onto which we will install Ubuntu.
Into USB port 2, plug in your USB hub. Plug your USB keyboard and your Ubuntu install USB into the hub.
Plug in power on power port 1 and network on network port 1.
With PuTTY open, press the power button. Spam the DEL key on the USB keyboard (NOT on your PuTTY window using your normal keyboard) You will be presented with the BIOS:

Go to Save & Exit and select Restore Defaults

Select Save Changes and Exit:

Spam DEL again to enter the BIOS.
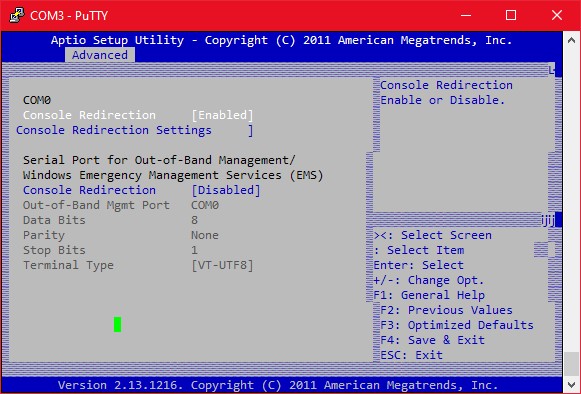
Go to Advanced and ensure the settings at the top are configured like so:

Under Advanced select IDE Configuration and modify the settings to match below:

Hit ESC once to go back to the Advanced menu, select Serial Port Console Redirection and modify the settings to match below:
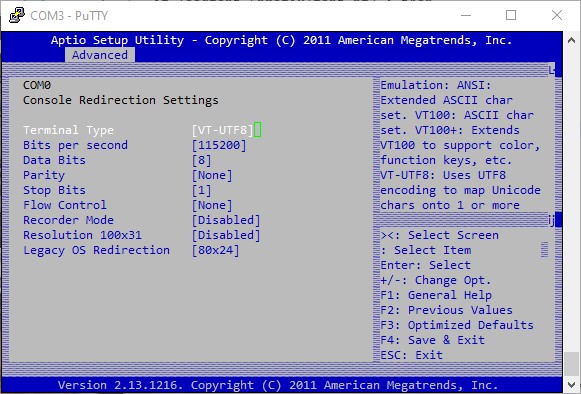
Now select Console Redirection Settings and modify the settings to match below:
Hit ESC twice to go back to the Advanced menu.
Scroll to Boot and modify the settings to match below:
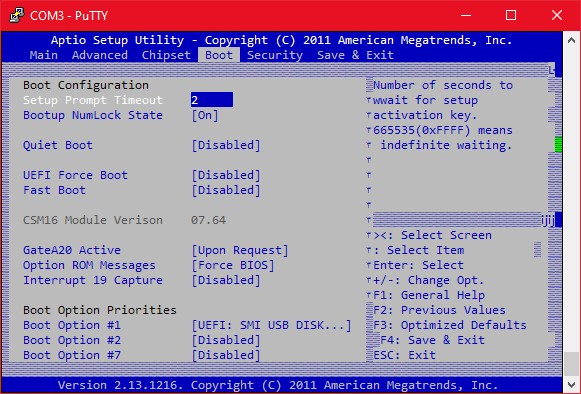
Please note that Boot Option #1 must be configured to the UEFI mode of your Ubuntu installer USB! All other boot options must be disabled.
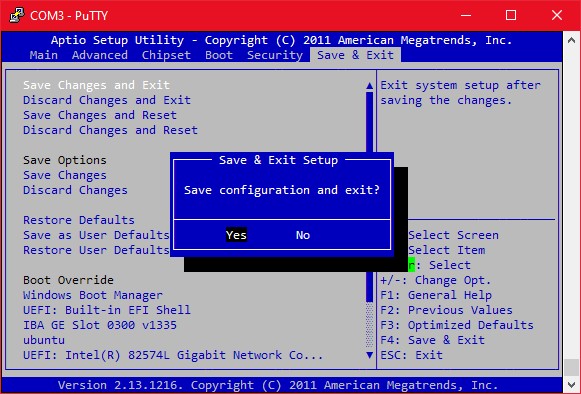
Go to Save & Exit and select Save Changes and Exit:
When your NAS reboots, you will be presented with the Ubuntu Installer GRUB menu:

Place your USB keyboard aside (don't unplug). We are now going to use your normal keyboard with PuTTY.
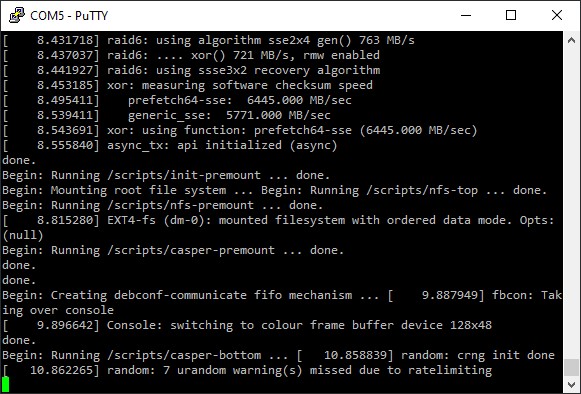
Press enter on the Serial Console Install Ubuntu Server option. The screen will clear for about a minute, but things are happening in the background, give it up to 5 minutes.
You may thing the machine has locked up when you see one of these screens. It has not, let it sit:
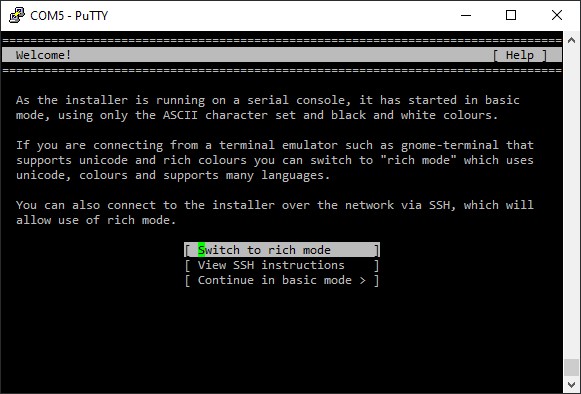
You'll be presented with a question screen for how you should proceed to install. For the purposes of this guide, I will be using Rich mode over the serial console:
You will now be presented with the normal Ubuntu Server installer, select your language and keyboard layout:


For networking, I advise you get as close to your final network config as possible, to avoid having to mess with the Netplan configuration later. For me, I am setting up a static IP on port 1 and disabling port 2. You should disable any ports you are not using, do not leave them on DHCP, otherwise Netplan will expect to get a DHCP address on the interface every boot and hang your entire system for 3 minutes before giving up, not fun:

You can leave proxy address blank, unless you know you need it:

You can leave the mirror address blank, unless you know how and why to change it:

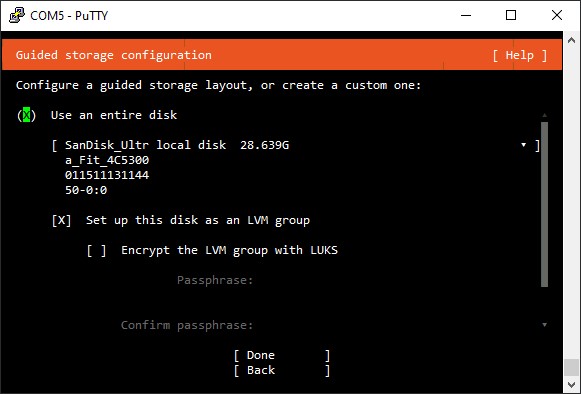
You can now set up your disk partitions. Ensure you select the correct place to do your install, don't accidentally select your installer USB. Defaults were correct for me:
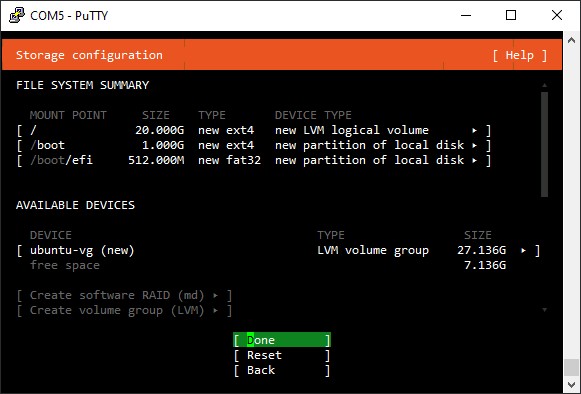
Double check and confirm the new partition layout:

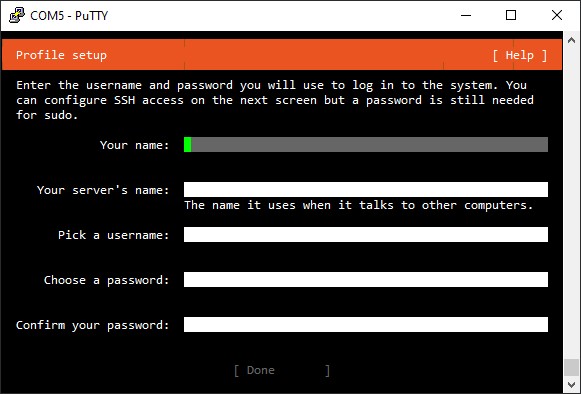
Configure your personal account:
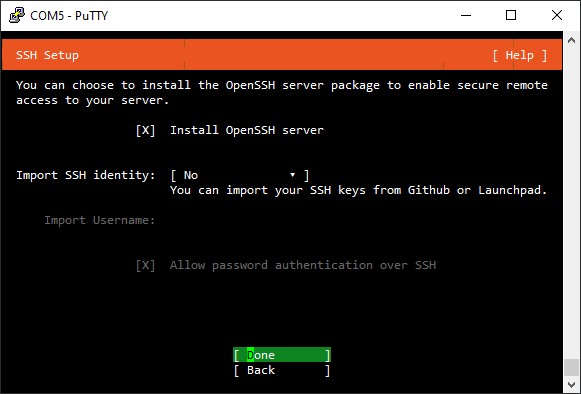
You will most likely want SSH enabled, so press space on the checkbox to enable it like so:
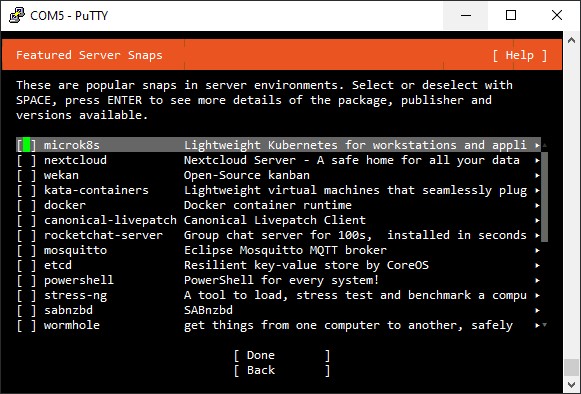
If you want any additional services to be installed for you, select them here:
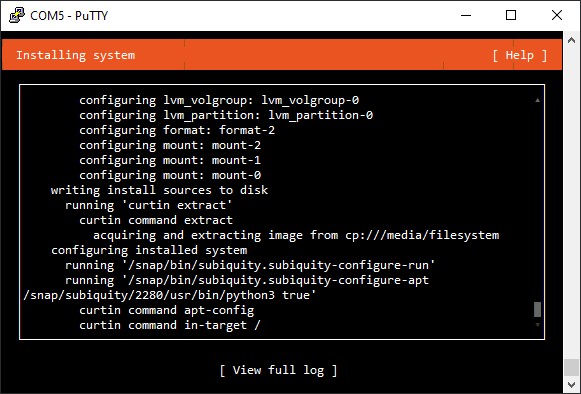
You will now be able to watch the install and update:
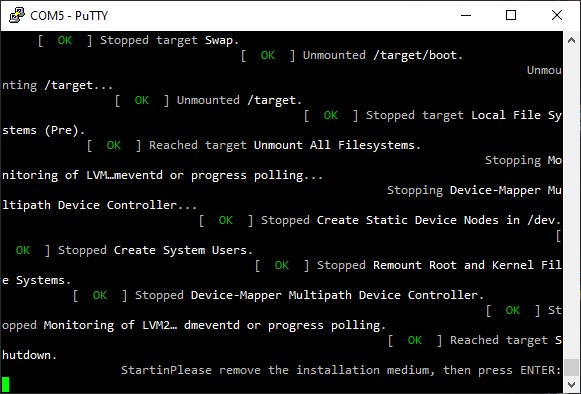
It appears curtin hook keeps spinning even after install completion, so you can select reboot anyway:

You will be asked to unplug your install USB and reboot with a press of enter:
Now switch back to the USB keyboard and spam DEL once the system restarts to enter the BIOS once again.
You'll notice the BIOS looks much nicer due to the configuration changes we made earlier:

Go to Boot and configure the boot order to match below:

Go to Save & Exit and select Save Changes and Exit:
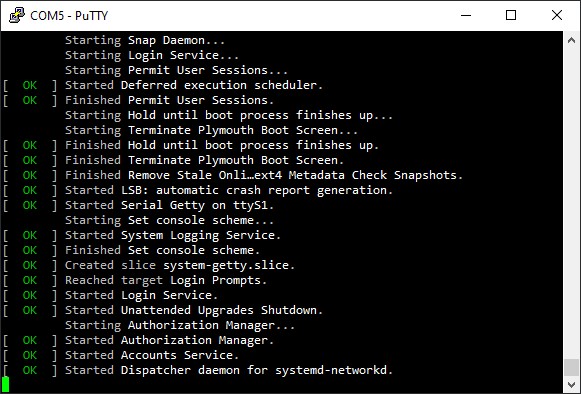
You will now boot into Ubuntu! Remember, it may take a moment before you start to see console output, but you will be presented with a console which you need to control with PuTTY and your normal keyboard. You can now SSH to your system too, it's all yours!
For the sake of it, you can use the command shutdown -h now to shut your DX4000 down, then turn it back on yourself and see it spring to life with no intervention! One Ubuntu server for you to run whatever you want!
Please return to README for links to other guides, such as setting up 4 hard drives with the 4 bays in the NAS!