-
Notifications
You must be signed in to change notification settings - Fork 1
1. HTML
HTML is the abbreviation of HyperText Markup Language. It is the standard markup language to build the web pages; in other words, a language designed for browsers to read and render the elements to visible.
The appearance of the plain of html elements are boring. To make them look better, there is a tool called Cascade Style Sheet which allows you to style the elements whatever you want.
The current version of HTML is 5 which was completed in October, 2014. The previous version, HTML 4, was released on 1997, almost 20 years old.
The HTML 5 has much more advanced features than HTML4. Richer Markups, Powerful APIs, a potential candidate for cross-platform mobile applications... Those features truly make HTML5 an glamorous tools for making web applications.
To see further information about HTML5, please click here to read more information.
HTML consists of Markups which make it a markup language. The HTML Markup has several crucial components, including tags, tags' attributes, character-based data types, character references and entity references. There is the document type declaration component which triggers standards mode rendering. ( is the most famous one for triggering the browsers to render HTML5.)
<tag attribute="value">tag's content</tag>
The above one is how we describe a tag and its attributes. The tag syntax, however, will be
HTML Markup has nested structure as an example below:
<!DOCTYPE html> <-- Document type declaration -->
<html>
  <head>
    <title>This is a title</title>
  </head>
  <body>
    <p>The born of my first web page</p>
  </body>
</html>
From the above HTML document, we see a Document Type Declaration tells the browser that this HTML is made of HTML5.
Besides the , The html tag starts at <html> and end at </html>. Elements inside it are all included in the html tag which also called being nested. Likewise, the title tag is nested in the <head></head>, the p tag is nested in the <body></body>.
Elements who nest others are called parent of the those nested; elements who are nested are called children of the nesting.
Nest structure not only shows the inheritance relation between tags but also defines the coding style for HTML. We will indent the tags with tab key according to the number of the parents they have. If it owns a parent, we indent it with 1 tag indentation at its beginning; if it owns two, we give it two and so forth.
From the view of the markup language, tag is a syntax. But from the view of the browsers, tag indicates an element allowing them to style it with Cascade Style Sheet or script it with Javascript.
There are lots of elements we can use. We can divide them into three different levels.
- Basic
- Intermediate
- Advanced
In this section, we will introduce those elements:
- Title
- Paragraph
- Headings
- Lists
- Link
- Images
- Table
- Form
<head>
    <title>This is a title</html>
</head>
<body>
    ....
</body>
The head element is before the body element. The head contains the about information of the page; in contrast, the body contains the information page wants to display.
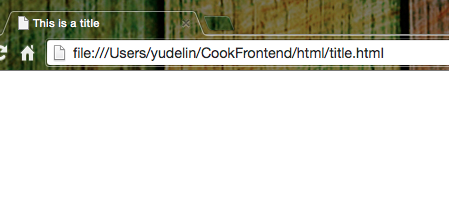
Element title is always inside the head element. It is charge with displaying the title of the web page. There are lots of about stuff you can add between head tags. But the title is the most important one everyone should not forget.
With a defined title element, you can see the title's content on the browsers' page tab. (See the picture below)
<p>paragraph</p> helps to group the content into different paragraphs. What does than mean? Let's see the example code.
An Example code:
<!DOCTYPE html>
<html>
    <head>
    <title>This is a title</title>
    </head>
    <body>
    The born of my first web page.
    It's a hard work.
    </body>
</html>
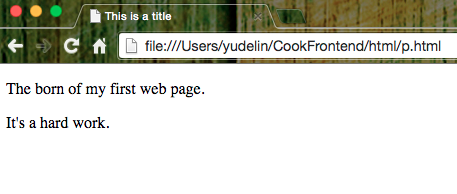
We expect the text can be separated into two paragraphs with a line-break. However, here is the true fact.

What's happening? Well, the browser don't take any notices about the spaces and line spaces. (Only a space between words is noticed by browsers.)
Use <p>text</p> to solve the problem.
<!DOCTYPE html>
<html>
    <head>
    <title>This is a title</title>
    </head>
    <body>
        <p>The born of my first web page.</p>
        <p>It's a hard work.</p>
    </body>
</html>
Here come's the new result:
What if I just want to make a line-break? Well, adding an <br>tag might be reach your demand.
<!DOCTYPE html>
<html>
    <head>
    <title>This is a title</title>
    </head>
    <body>
    The born of my first web page.<br>
    It's a hard work.
    </body>
</html>
View the affect:

If I building a web page is really a hard work and I want to emphasize it to others. How can I do?
The <em> and <strong>tags might fulfill your need. The differences is <em> emphasizes content with italic and <strong> emphasizes content with bold type.
<!DOCTYPE html>
<html>
    <head>
        <title>This is a title</title>
    </head>
    <body>
        The born of my <em>first web page</em>.
        It's a <strong>hard work</strong>.
    </body>
</html>
Build a web page is truly a hard work.

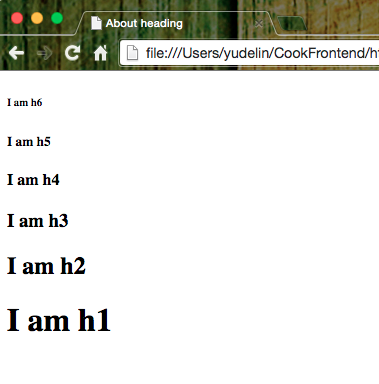
Heading are often used for marking the title of the articles or paragraphs. There are 6 types for heading: <h6>..</h6> <h5>...</h5> <h4>...</h4> <h3>...</h3> <h2>...</h2> <h1>...</h1>. The bigger the heading number, the smaller its font-size be.
<!DOCTYPE html>
<html>
    <head>
    <title>About heading</title>
    </head>
    <body>
    <h6>I am h6</h6>
    <h5>I am h5</h5>
    <h4>I am h4</h4>
    <h3>I am h3</h3>
    <h2>I am h2</h2>
    <h1>I am h1</h1>
    </body>
</html>
See the result:
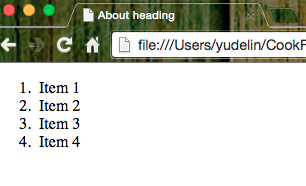
HTML also provides two ways two do listing, one is <ol> and the other is <ul>. The <ol> is an ordered list which serializing the item with numbers or characters. The other one <ul> is an unordered list. The items of the list are marked with <li> tag.
An example snippet for an ordered list:
<!DOCTYPE html>
<html>
    <head>
        <title>About heading</title>
    </head>
    <body>
        <ol>
            <li>Item 1</li>
            <li>Item 2</li>
            <li>Item 3</li>
            <li>Item 4</li>
        </ol>
    </body>
</html>
Display an ordered list:
An example snippet for an unordered list:
<!DOCTYPE html>
<html>
    <head>
        <title>About heading</title>
    </head>
    <body>
        <ul>
            <li>Item 1</li>
            <li>Item 2</li>
            <li>Item 3</li>
            <li>Item 4</li>
        </ul>
    </body>
</html>
Check the unorder result:

List can contains another list too. Just put the whole children list into a list item of parent list.
<!DOCTYPE html>
<html>
    <head>
        <title>About heading</title>
    </head>
    <body>
        <ul>
            <li>
                <ol>
                    <li>Item 1</li>
                    <li>Item 2</li>
                    <li>Item 3</li>
                </ol>
            </li>
            <li>
                <ol>
                    <li>Item 1</li>
                    <li>Item 2</li>
                    <li>Item 3</li>
                </ol>
            </li>
        </ul>
    </body>
</html>
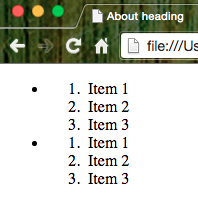
The result of the nested list.
In HTML, we use anchor tags <a> to build the links on the page.
When we set up an anchor tag to link our resources, we will define the destination in the anchor's href attribute and write the description about the link in the a tag.
<!DOCTYPE html>
<html>
    <head>
        <title>About heading</title>
    </head>
    <body>
        <a href="http://www.google.com">Google</a>
    </body>
</html>
A link does not have to link to the URL resource. It can link to any file anywhere on the web with absolute path or relative path.
<!DOCTYPE html>
<html>
    <head>
        <title>About heading</title>
    </head>
    <body>
        <a href="p.html">p</a>
    </body>
</html>
When you click the p, the browser will redirect to the p.html in the folder.
<img src="path-img" width="img width pixels" height="img height pixels" alt="img description" />
The img tag is to catch the image from the defined source on the web page.
The src attribute tells the browser where to find the image. The value of the src can be absolute, or relative.
The width and height attributes are necessary. Otherwise the browser will tend to calculate the size as the image loads, instead of when the page loads, which will cause the discomfort when users reading the page. (See the below example snippet and result)
<!DOCTYPE html>
<html>
    <head>
        <title>About heading</title>
    </head>
    <body>
        <img src="https://www.google.com/images/srpr/logo11w.png" width="100px" height="100px" alt="google"/>
        <img src="https://www.google.com/images/srpr/" width="100px" height="100px" alt="google failed"/>
    </body>
</html>
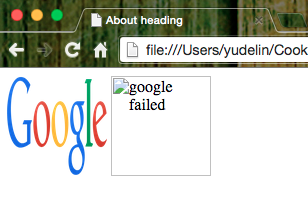
The alt attribute is the alternative description which will display if the image is not loaded successfully.
The img element does not enclose any content, no closing tag is required.
What kinds of image formats are acceptable for browsers? There are lots of images formats but only three types are commonly used: jpeg (Typically used by photos), gif ( 256 colors only but maintains the original color well and allows transparent pixels) and png (a advanced version for gif, has 16 million colors and allows transparent, not supported by the older browsers).
From my experience though, only jpeg and png are practical.
The snippet for a table.
<table>
    <tr>
        <td>Row 1, cell 1</td>
        <td>Row 1, cell 2</td>
        <td>Row 1, cell 3</td>
    </tr>
    <tr>
        <td>Row 2, cell 1</td>
        <td>Row 2, cell 2</td>
        <td>Row 2, cell 3</td>
    </tr>
    <tr>
        <td>Row 3, cell 1</td>
        <td>Row 3, cell 2</td>
        <td>Row 3, cell 3</td>
    </tr>
    <tr>
        <td>Row 4, cell 1</td>
        <td>Row 4, cell 2</td>
        <td>Row 4, cell 3</td>
   </tr>
</table>
Check the result first.
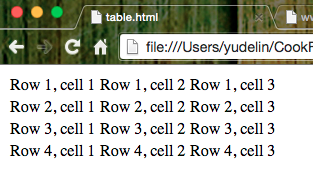
A <table></table> tag defines the table; a <tr></tr> tag defines a table row; a <td></td> tag defines a data cell. td elements must be enclosed by tr element.
When it comes to table, the headers are important elements that help us to read the table by defining the columns meaning.
Here is another example table snippet with headers.
<table>
    <tr>
        <th>Header 1</th>
        <th>Header 2</th>
        <th>Header 3</th>
    </tr>
    <tr>
        <td>Row 1, cell 1</td>
        <td>Row 1, cell 2</td>
        <td>Row 1, cell 3</td>
    </tr>
    <tr>
        <td>Row 2, cell 1</td>
        <td>Row 2, cell 2</td>
        <td>Row 2, cell 3</td>
    </tr>
    <tr>
        <td>Row 3, cell 1</td>
        <td>Row 3, cell 2</td>
        <td>Row 3, cell 3</td>
    </tr>
    <tr>
        <td>Row 4, cell 1</td>
        <td>Row 4, cell 2</td>
        <td>Row 4, cell 3</td>
   </tr>
</table>
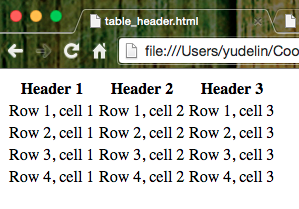
The table looks much more formal right? <th> tag likes <td>, it has to be enclosed by <tr></tr>.
Truth be told, there is no meaning to create a table with pure HTML and CSS. In practical, form is always bound to a backend processing the inputted information by users. However, a frontend tutorial needs to teach you to create the "Layout" of the form.
In the form, we can put some elements for users to input their data. Here are elements like:
- Input
- Textarea
- Select
They are various input types as follow:
-
<input type="text">or simply<input>is a standard textbox. This can also have a value attribute, which sets the initial text in the textbox. -
<input type="password">is similar to the textbox but with hidden input. -
<input type="checkbox">is a checkbox, which can be toggled on and off by the user. This can also have a checked attribute ( - the attribute doesn’t require a value). -
<input type="radio">is similar to a checkbox, but the user can only select one radio button in a group. This can also have a checked attribute. *<input type="submit">is a button that when selected will submit the form. We can set up the display text by value attribute.
Textarea is a block, comparing to input's textbox, users can put multiple lines of text inside it.
<textarea rows="5" cols="20">Please enter the words you mant to complain</textarea>
rows and cols are used for defining the size of the textarea. But most of time, we prefer defined it with css.
In the textarea, sometimes we want to give them some hints to guide users inputting correct information. we can put some text to hint the users what information they could enter. However, I prefer use the placeholder attribute instead.
<textarea rows="5" cols="20" placeholder="Please enter the words you mant to complain"></textarea>
The hint will be vanished once the user starts to enter the information or there are inputted words left inside.
We can use the placeholder attribute for iuput elements as well. Just do it with the following syntax:
<input type="text" placeholder="Put the data"></input>
The select tag works with the option tag to make drop-down select boxes as the following shows:
<select>
    <option>Option 1</option>
    <option>Option 2</option>
    <option value="third option">Option 3</option>
</select>
Once the user fill the form, he or she will submit the data. Hence, we have to define the form's method attribute to tell the form how the data is going to be sent or get the related results. There are two major methods: "get" and "post". "get" will fetch the data from the backend according to the form and "post" will create the new data storing in the backend. But there are further details about these two http methods. We won't discuss them now.
Test the following code below for learning:
<title>Form example</title> <p>Name:</p>
<p><input type="text" name="name" placeholder="Your name"></p>
<p>Account Name</p>
<p><input type="text" name="name" placeholder="Enter Your Account"></p>
<p>Password</p>
<p><input type="password" name="name" placeholder="Enter Your Password"></p>
<p>Reconfirm your Password</p>
<p><input type="password" name="name" placeholder="Cofirm Your Password"></p>
<p>Are you:</p>
<p><input type="radio" name="areyou" value="male"> Male</p>
<p><input type="radio" name="areyou" value="female"> Female</p>
<p><input type="radio" name="areyou" value="hermaphrodite"> An hermaphrodite</p>
<p><input type="radio" name="areyou" value="asexual"> Asexual</p>
<select>
<option>Option 1</option>
<option>Option 2</option>
<option>Option 3</option>
</select>
<p>Comments: </p>
<p><textarea name="comments" rows="5" cols="20" placeholder="Your Comments"></textarea></p>
<p><input type="checkbox">Do you agree the license?</input></p>
<p><input type="submit"></p>
</form>
</body>
Test the snippet in browser to check the result yourself :)
HTML is all about applying meaning to content. Whereas most HTML tags apply meaning (p makes a paragraph, h1 makes a heading etc.), the span and div tags apply no meaning at all. However, we often use them to section the web pages.
The difference between span and div is that a span element is in-line and usually used for a small chunk of HTML inside a line (such as inside a paragraph) whereas a div element is block-line (which is basically equivalent to having a line-break before and after it) and used to group larger chunks of elements.
In HTML5, HTML introduces more meaningful tags to do section such as article, header, footer etc. But still, div plays an important on layout.
<!DOCTYPE html>
<html>
   <head>
        <title></title>
   </head>
   <body>
        <div style="border: 1px solid #000;">This is <span style="color: red;">span</span> in <span style="color: green;">div1</span></div>
        <div style="border: 1px solid #000;">This is <span style="color: red;">span</span> in <span style="color: green;">div2</span></div>
   </body>
</html>
Result:

<abbr title="Abbreviation"> Abbr </abbr>
Abbreviation (abbr) is used to markup an abbreviation, a shortened form of a word or phrase.
The expanded phrase that the abbreviation represents can be defined in the value of the title attribute. This is optional but recommended.
<q> All men are created equa </q>
<blockquote>
    We hold these truths to be self-evident, that all men are created equal, that they are endowed by their Creator with certain unalienable Rights, that among these are Life, Liberty and the Pursuit of Happiness. That to secure these rights, Governments are instituted among Men, deriving their just powers from the consent of the governed;
</blockquote>
blockquote and q are used for quotations. blockquote is generally used for standalone often multi-line quotations whereas q is used for shorter, in-line quotations.
If the source of the quotation can be found on the Web, the cite attribute can be used to point to its origin.
<p>The <cite>Bible</cite> written: <q>God resisteth the proud, but giveth grace unto the humble.</q></p>
Citation is used for marking something creative. We found the information from MDN which lists the use cases.
When you are using these elements, somehow you think they do not have significant effects on the web page. Why do you need to study them? From my view, it's all about maintainability. Writing HTML is not a pure text work, it's a kind of engineering takes lots of brains. With those meaningful tags, it's much friendly for other programmer to understand the structure and content of the HTML.
A Snippet you may want to practice:
<!DOCTYPE html>
<html>
<head>
	<title></title>
</head>
<body>
    <blockquote cite="https://www.linkedin.com/pulse/20140925075058-3449352-quote-s-by-the-ceo-of-evernote">
        <p>
    	"People have this vision of being the CEO of a company they started and being on top     of the pyramid. Some people are motivated by that, but that's not at all what it's     like.
        </p>
        <p>
        What it's really like: everyone else is your boss – all of your employees, customers, partners, users, media are your boss. I've never had more bosses and needed to account for more people today.
	    </p>
        <p>
    The life of      most CEOs is reporting to everyone else, at least that's what it feels like to me and mos     t CEOs I know. If you want to exercise power and authority over      people, join the military or go into politics. Don't be an entrepreneur."
        </p>
        <p> -- <span>Phil Libin, <abbr title="Chef Execute Officer">CEO</abbr> of <cite>Evernote</cite></span></p>
    </blockquote>
</body>
</html>
Rowspan and Colspan are used to abjust the size of the table cell like th and td. That's it.
<!DOCTYPE html>
<html>
<head>
<title></title>
<style type="text/css">
    table, tr, th, td {
    	border: 1px solid #000;
    }
</style>
</head>
<body>
    <table>
        <tr>
            <th colspan="2">Header 1</th>
            <th>Header 2</th>
            <th>Header 3</th>
        </tr>
        <tr>
            <td colspan="2">Row 1, cell 1. I expand to 2 cols</td>
            <td>Row 1, cell 2</td>
            <td>Row 1, cell 3</td>
        </tr>
        <tr>
            <td>Row 2, cell 1</td>
            <td rowspan="2">Row 2, cell 2. I have 2 rows</td>
            <td>Row 2, cell 3</td>
        </tr>
        <tr>
            <td>Row 3, cell 1</td>
            <td>Row 3, cell 2</td>
            <td>Row 3, cell 3</td>
        </tr>
        <tr>
            <td>Row 4, cell 1</td>
            <td>Row 4, cell 2</td>
            <td>Row 4, cell 3</td>
       </tr>
    </table>
</body>
</html>

Well, I will do it if I have free time....
address should be used specifically for the contact details relating either to the entire web page (and so only used once) or to an article element.
<!DOCTYPE html>
<html>
    <head>
        <title></title>
    </head>
  <body>

  <h3>Contact details</h3>
  <address>
       <ul>
           <li>0900-000-000</li>
           <li>[email protected]</li>
           <li>http://www.donotbotherme.com/contactme/</li>
        </ul>
    </address>
    </body>
</html>
dfn is a definition term and is used to highlight the first use of a term and its title attribute can be used for describing.
<p><dfn title="The Father of Modern China">Sun Yat-sen</dfn>once said: 革命尚未成功,同志仍需努力!</p>
There is an interesting tab called Bi-directional text which can reverse its content. Its direction attribute called dir can decide the reverse direction. rtl represents right to left and ltr means left to right.
Try the below snippet to reverse the words.
<!DOCTYPE html>
<html>
<head>
    <title></title>
</head>
<body>
    <p>
        <bdo dir="rtl">Bi-directional text</bdo>
    </p>
    <p>
        <bdo dir="ltr">Bi-directional text</bdo>
    </p>
</body>
</html>
We often use traditional word processor-based to edit the docs and sometimes we don't want to remove the all modified parts. Because there are some circumstances we have to review the edit history, we use underline and strikethough to deliver the tracking. We commonly use the underline to emphasize the words we added recently and use the strikethrough to mark those be modifed. HTML provides the Editorial tags to satisfy our needs. The insert tag, <ins>, does the same thing as underline in word processor; the delete tag, <del> does the strikethrough.
Try the below snippet for fun.
<!DOCTYPE html>
<html>
    <head>
      <title></title>
    </head>
    <body>
      <p>We change the <del>strikethough</del> to <ins>underline</ins></p>
    </body>
</html>
Sectioning is vital if you want to structure your web elements. Semantic tags like articles, headers, footers and navigation can help developers define the specific parts of a page.
An article element can be used to mark up a standalone section of content. Use it once.
A section element represents a more general section and could be used to split up an article like the chapters for a novel.
header and footer provide further specialized, self-descriptive sections. header is the topest part of the parent section and footer is the bottom part.
<!DOCTYPE html>
<html>
    <head>
      <title></title>
    </head>
    <body>
        <article>
            <header>
            	<h1>The first Article</h1>
            	<p>Introduction and other bull shit</p>
            </header>
        	<section>
        	    <h1>Section 1</h1>
        	    <p>The Content of Section 1</p>
        	</section>
        	<section>
        		<h1>Section 2</h1>
        		<p>The Content of Section 2</p>
        	</section>
        	<section>
        		<h1>Section 3</h1>
        		<p>The Content of Section 3</p>
        	</section>
        	<footer>
        		All rights reserved
        	</footer>
        </article>
    </body>
</html>
When we get into a website, we usually see a bar indicating the classifications of web's content on the top of the page (Not always on the top, but it's quite often). It gives netizens an easy way to overlook the sitemap and surf the information they want to read.
<!DOCTYPE html>
<html>
    <head>
      <title></title>
    </head>
    <body>
        <nav>
            <ul>
                <li>Item 1</li>
                <li>Item 2</li>
                <li>Item 3</li>
            </ul>
        </nav>
    </body>
</html>
But when you implement the above snippet, you will wonder why the items don't display as columns like other websites. The reason is that the li items have default display property. We can use the css to overwrite their display value with block-inlnie and inline. More detail about CSS' display will be discussed in the CSS.
Here is modified code:
<!DOCTYPE html>
<html>
    <head>
      <title></title>
    </head>
    <style type="text/css">
    nav li {
        display: inline-block;
    }
    </style>
    <body>
        <nav>
            <ul>
                <li>Item 1</li>
                <li>Item 2</li>
                <li>Item 3</li>
            </ul>
        </nav>
    </body>
</html>
Meta tags are used to describe the web page so they are located at the head tag. They don’t do anything to the content presented in the browser either. But they are used by the search engines to catalogue information about the web page. Simply to say, rich meta tags will help a website to get good score on SEO.
Meta tags own lots of attributes for developers to describe. Such as charset, name, http-equiv, and content.
The name attribute can be anything you like. The most commonly used names are author, description, and keywords. author is used to explicitly state one of the HTML page’s authors and description is often used by search engines (such as Google) to display a description of a web page in its search results.
The http-equiv attribute can be used instead of the name attribute and will make an HTTP header, which is information sent to the server where the web page is held. But most of the time, name attributes are enough to use.