Floodgate
Floodgate is an online queue, designed to allow students with questions during course contact hours to get help. The queuing system prioritises students based on whether they are signed onto the currently running session, how long they have been waiting in the queue, and how many questions they have asked that day already. It is also easily configurable, allowing options such as a dual-queue system (where there is a separate queue for long and short questions).
Once Floodgate has been deployed (as described here), the desired queues for a given course can be configured to suit the needs of the course. Once this has been done, the queue should be ready for use in contact hours.
When accessing the queue through a UQCloud Zone, the firs screen encountered will be the standard UQ Authenticate page, which is what the various applications documented here use for authentication. Users should be able to log in with any valid UQ credentials.
The first page users should encounter when accessing the queue web page is as follows:

The logged in user's name will be displayed in the top right hand corner of the screen. The main part of this screen displays all of the queue pages which this user is the owner of. Each queue page has an ID field which will be used to distribute queues to students. This is discussed further in a later section.
To create a new queue, the Page Title field at the bottom of the list can be filled out. Each entry in this list is really a page that can contain multiple queues (for example, a long and a short queue)

After entering a name for the new queue, clicking the New Page button will add this new queue page to your list of owned queues.

The next step is to actually add queues to this page. To do this, the Settings icon (indicated by a cog) for the page should be clicked. This should display the following page:

Let's first add a Short Queue to our CSSE1001 queue page, to allow for quick questions from students. To do this, we can enter a Queue Title
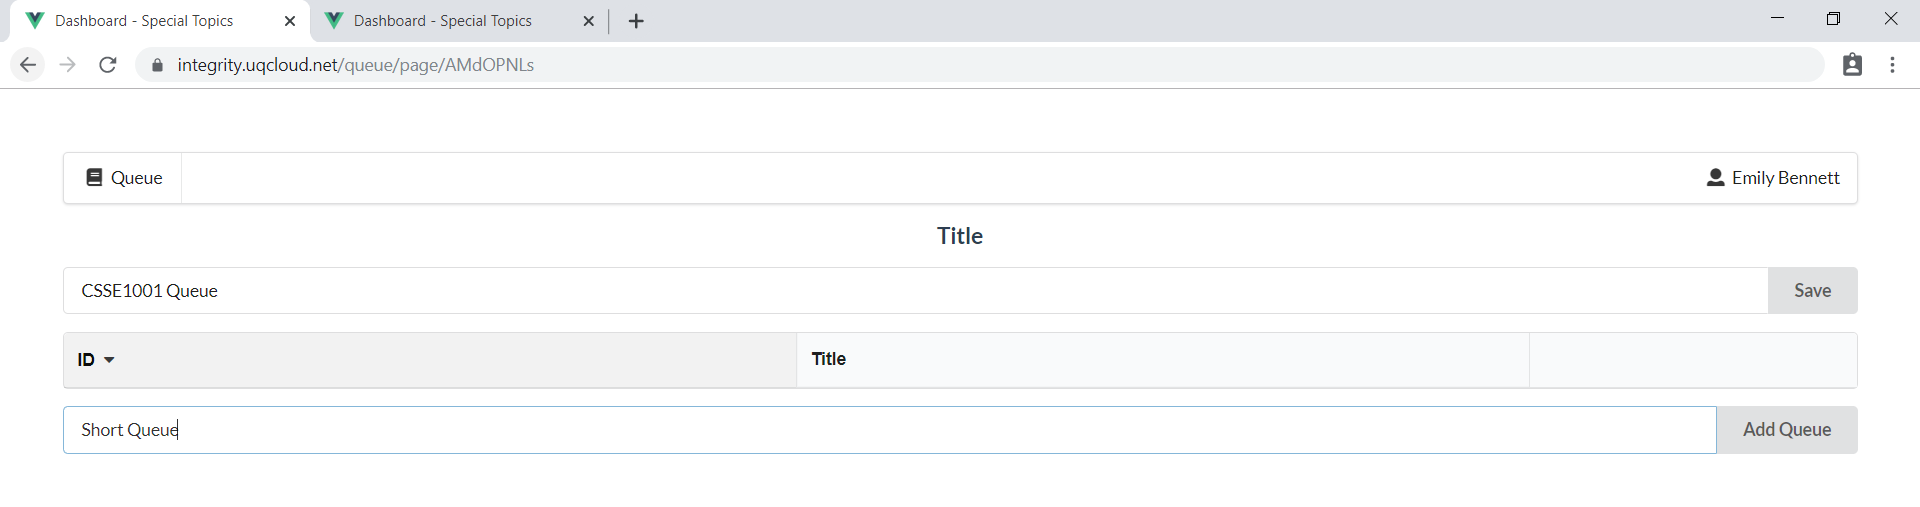
and then click Add Queue, which should update the list to contain a Short Queue.
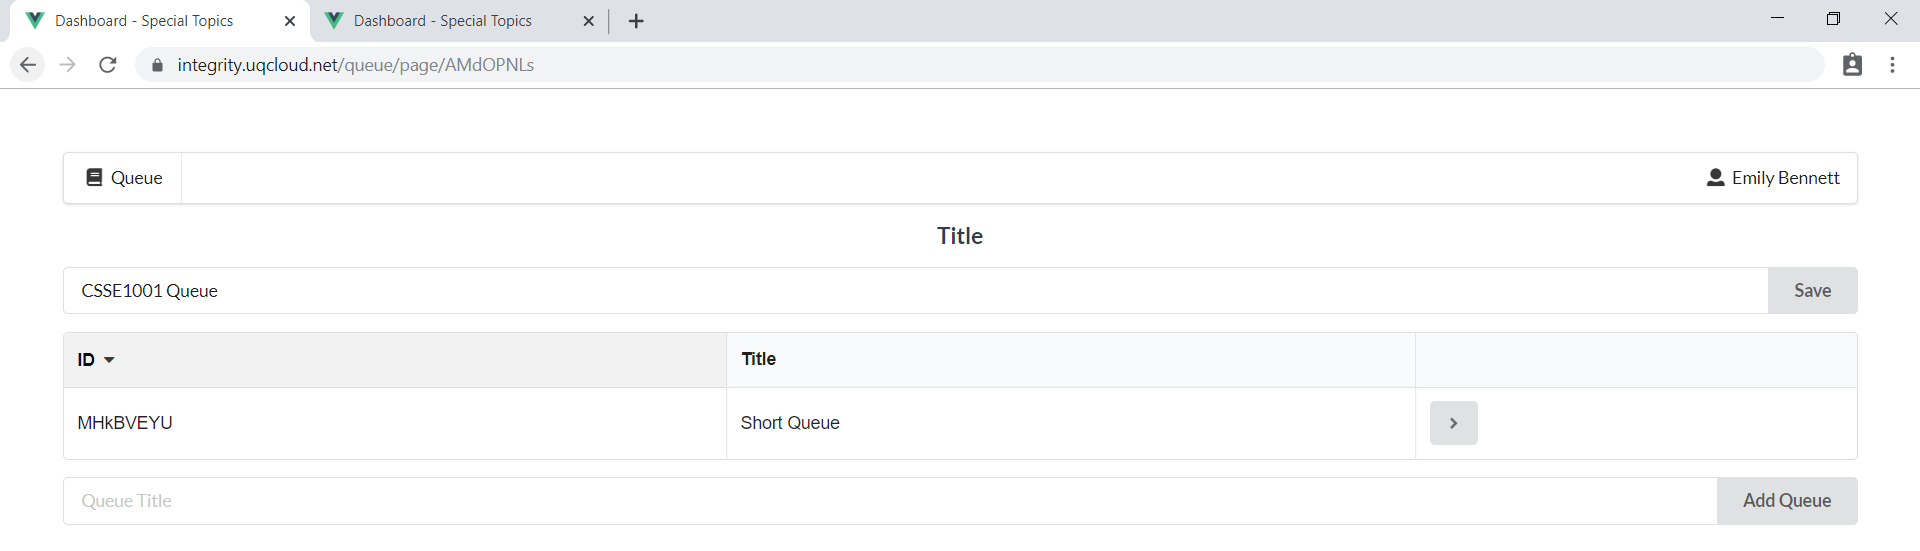
This queue also has an ID, and can be customised by clicking the small arrow on the righthand side of the entry. This is discussed further in the next section.
To go back to the original list of queue pages, the Queue button in the top lefthand corner of the screen can be clicked, followed by the List option.

We can then have a look at the queue we just added to our CSSE1001 Queue page by clicking the small arrow to the right of its entry. This should display a queue similar to the following:

To add, for example, a Long Queue to this queue page, the same procedure described above can be followed, and both queues will be displayed on this same page.
To customise a queue, navigate to the main list of queue pages, then click the Settings icon (cog) for the queue page which needs to be customised. From there, a list should appear of the queues available for customisation within that page.
If, for example, we choose to customise the Short Queue created for the CSSE1001 Queue page described above, then the configuration page may look something like the following:
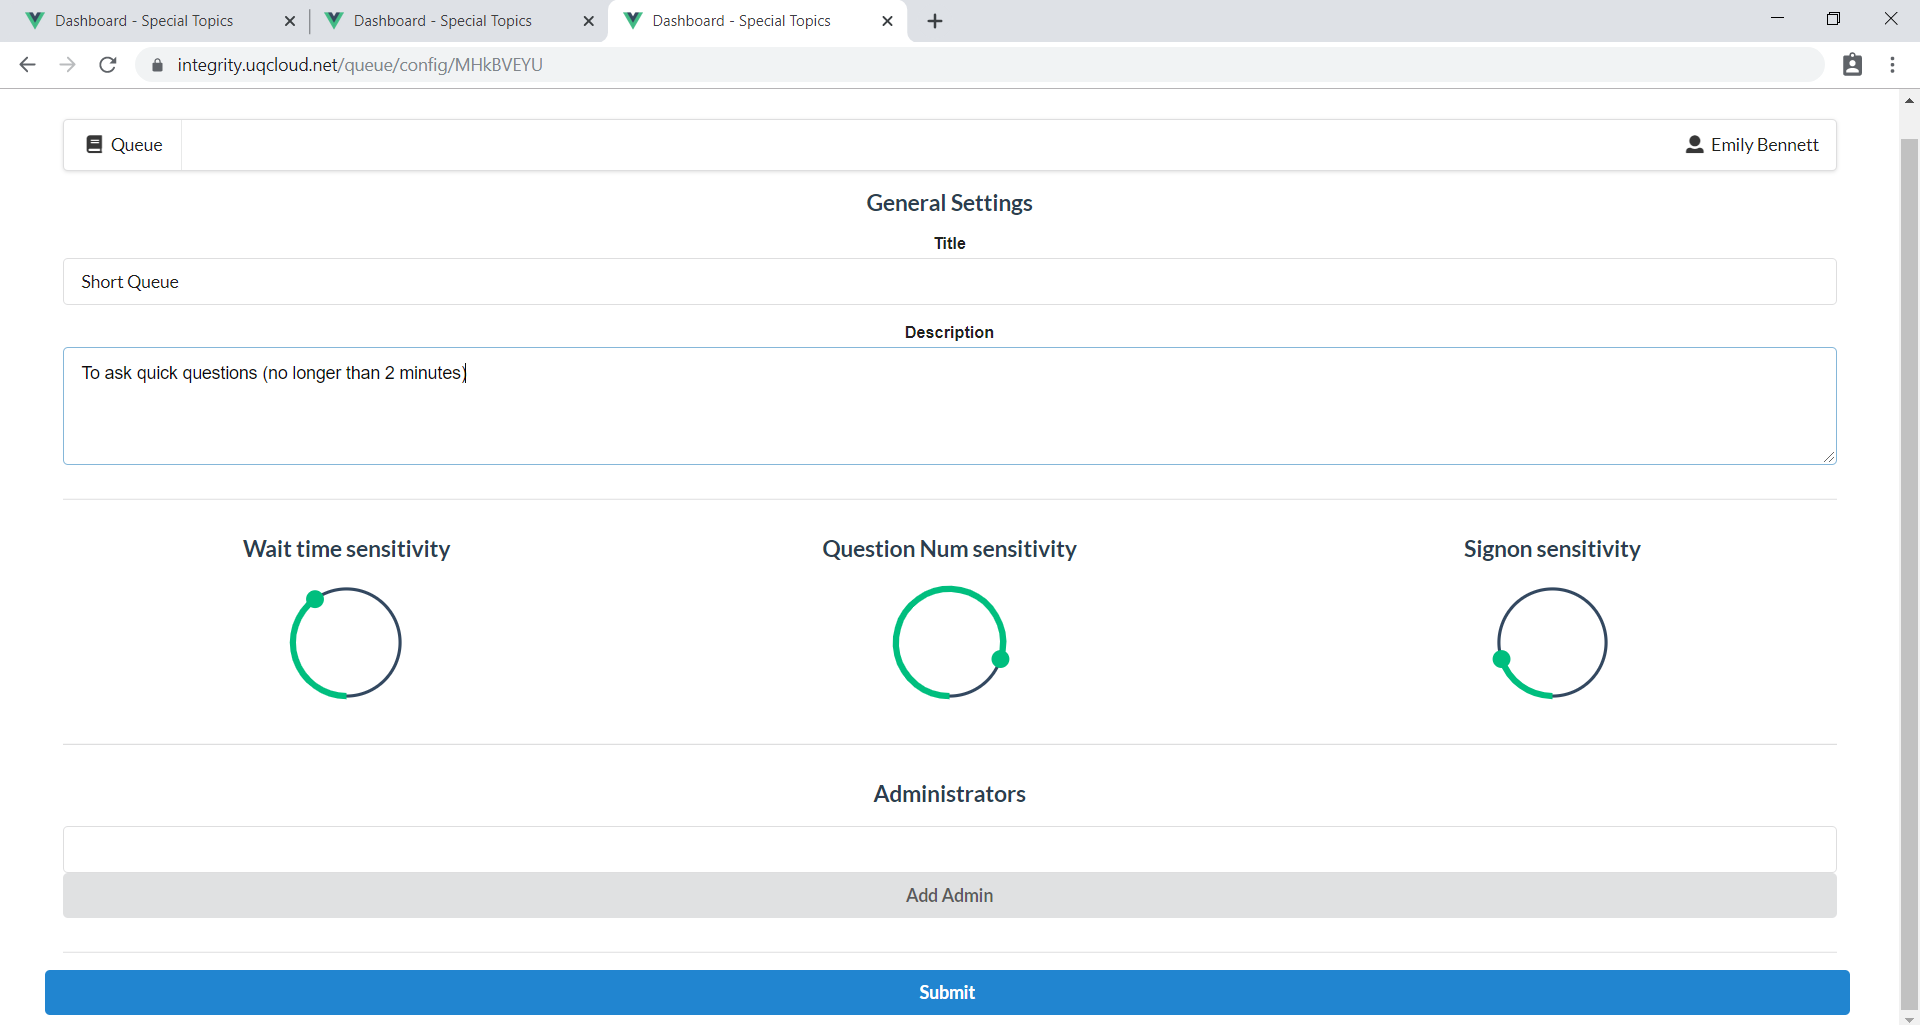
Near the top of the page, information such as the name of the queue (currently Short Queue) and the description of the queue (currently To ask quick questions (no longer than 2 minutes)) can be edited.
Further down is the customisation of the ordering of the queue. Students can be given preference based on how long they have been waiting in the queue, how many questions they have asked that day, and whether or not they are signed on to the current contact session. These preferences are controlled using sliding scales (where the more of the circle is coloured in, the higher the sensitivity to that particular metric is).
Administrators can also be added to queues by filling in the relevant field with a staff/student number and clicking the Add Admin button. Admins of a queue are able to remove people from the queue.
Finally, when customisation is complete, the submit button can be clicked to save the changes to the queue.
In order to join an existing queue (for example, the CSSE1001 Queue created and customised above), they simply need a link to this queue. This link can be created using the ID field of the queue page, as seen in the list of queues.
Specifically, the URL which the students will need is
https://<CLOUD_NAME>.uqcloud.net/queue/queue/<ID>
where CLOUD_NAME is the UQCloud Zone which the application is running on, and <ID> is the ID field of the queue which you would like the students to have access to. In the case of the following queues
if students need to be given access to the CSSE1001 Queue page, then the relevant URL to distribute would be https://integrity.uqcloud.net/queue/queue/AMdOPNLs (since the application is running on integrity.uqcloud.net, and the ID field is AMdOPNLs).
Once students have access to this queue, they can join and leave it using the relevant buttons.
