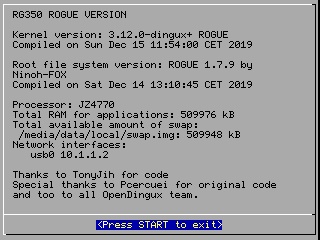
RG350 "Rogue" firmware
Changelog:
1.7.9:
- Changed the boot logo (again), OpenDingux logo removed out of respect to the original creator of the system.

- All references to OpenDingux removed, except in the system information as thanks for the original base system.

- Gmenu2x now read and write all from home.
- Esoteric added as an optional launcher in the system. (Thanks to Podulator https://github.com/podulator/esoteric).
- Updated the RG350Tests app in sd_image (thanks to https://github.com/RafaVico).
- Now sd_image too in .opk file, you can now reflash the sdcard without open the console (note: this erases everything on the internal sdcard).
- Now works with update and flash .opk files in another launchers as well.
Instructions:
NOTE: If is your first time installing this CFW, the file to use is sd_image.bin or flasher opk, afterwards you can use always use opks update files for future releases. Using the sd_image.bin or flasher opk erases all data on the sdcard!! If you're updating from another CFW you may want to make a backup of the folders local/home and local/app first to preserve emulators/apps, their settings, and your game saves.
Instruction for updating from an OPK update file (No need to open the console):
- Place the update opk file in /media/data/apps or /media/sdcard/apps.
- Run from your preferred launcher.
- Allow process to complete.
- Reboot.
- If the system fails to boot, press Y to boot to the last working kernel, or X to boot to the last working rootfs. X+Y will load your previous OS version.
Instructions for a clean update / fix internal sdcard:
NOTE: This method erases the microsd, so backup of all your files beforehand as mentioned above.
- Place the flasher opk file in /media/sdcard/apps.
- Run from your preferred launcher.
- Allow process to complete.
- Reboot.
Instructions when changing the internal sdcard, i.e. using a bigger/new sdcard:
NOTE: This method erases the microsd, so backup of all your files beforehand as mentioned above.
- Download the base system "sd_image.bin" from the Releases page.
for Windows:
- Format the new sdcard / internal sdcard with SD FORMATTER 5.0.1 ( https://www.sdcard.org/downloads/formatter/ ) two times.
- Download Win32 disk imager ( https://sourceforge.net/projects/win32diskimager/ ) and flash (write) the FW base image to the sdcard.
4. DO NOT RESIZE THE EXT4 PARTITION IN WINDOWS OR LINUX!!
just put the sdcard inside the console and follow the on-screen instructions.
for Linux:
-
Format the new sdcard / internel sdcard with gnome-disk-utility.
-
Flash the FW base image in the sdcard with gnome-disk-utility.
Or type in a terminal:sudo dd if=sd_image.bin of=/dev/[sdcard mount point]
4. Not resize!! Just put the internal sdcard inside the console and follow the on-screen instructions.
Intructions for recovery or external update:
thanks to https://github.com/gcwnow wiki
This works for GMENUNX.
You can copy the kernel or rootfs to the internal SD card of the RG350 using FTP, SFTP or SCP. I recommend SCP since it is just one line on the command prompt. It does require setting up SSH keypair authentication beforehand though.
for the kernel
scp vmlinuz.bin [email protected]:/media/system/
scp modules.squashfs [email protected]:/media/system/update_m.bin
for the rootfs
scp rootfs.squashfs [email protected]:/media/system/update_r.bin
Reboot the RG350 to activate the new kernel or rootfs. Don't use the reset button as part of the kernel or of the rootfs may not have been flushed from the write cache yet.
You can use:
ssh [email protected]
RG350:media/data/local/home# reboot