SAML Authentication in Yandex Cloud via OpenAM
To configure SAML authentication, there are the following prerequisites:
- Docker platform installed and running Docker Engine
- Locally running OpenAM instance. To launch OpenAM, run the following command.
docker run -h openam.example.org -p 8080:8080 --name openam openidentityplatform/openamDetailed description of the installation and initial configuration of OpenAM at this link
- Open the administration console
- Goto desired realm
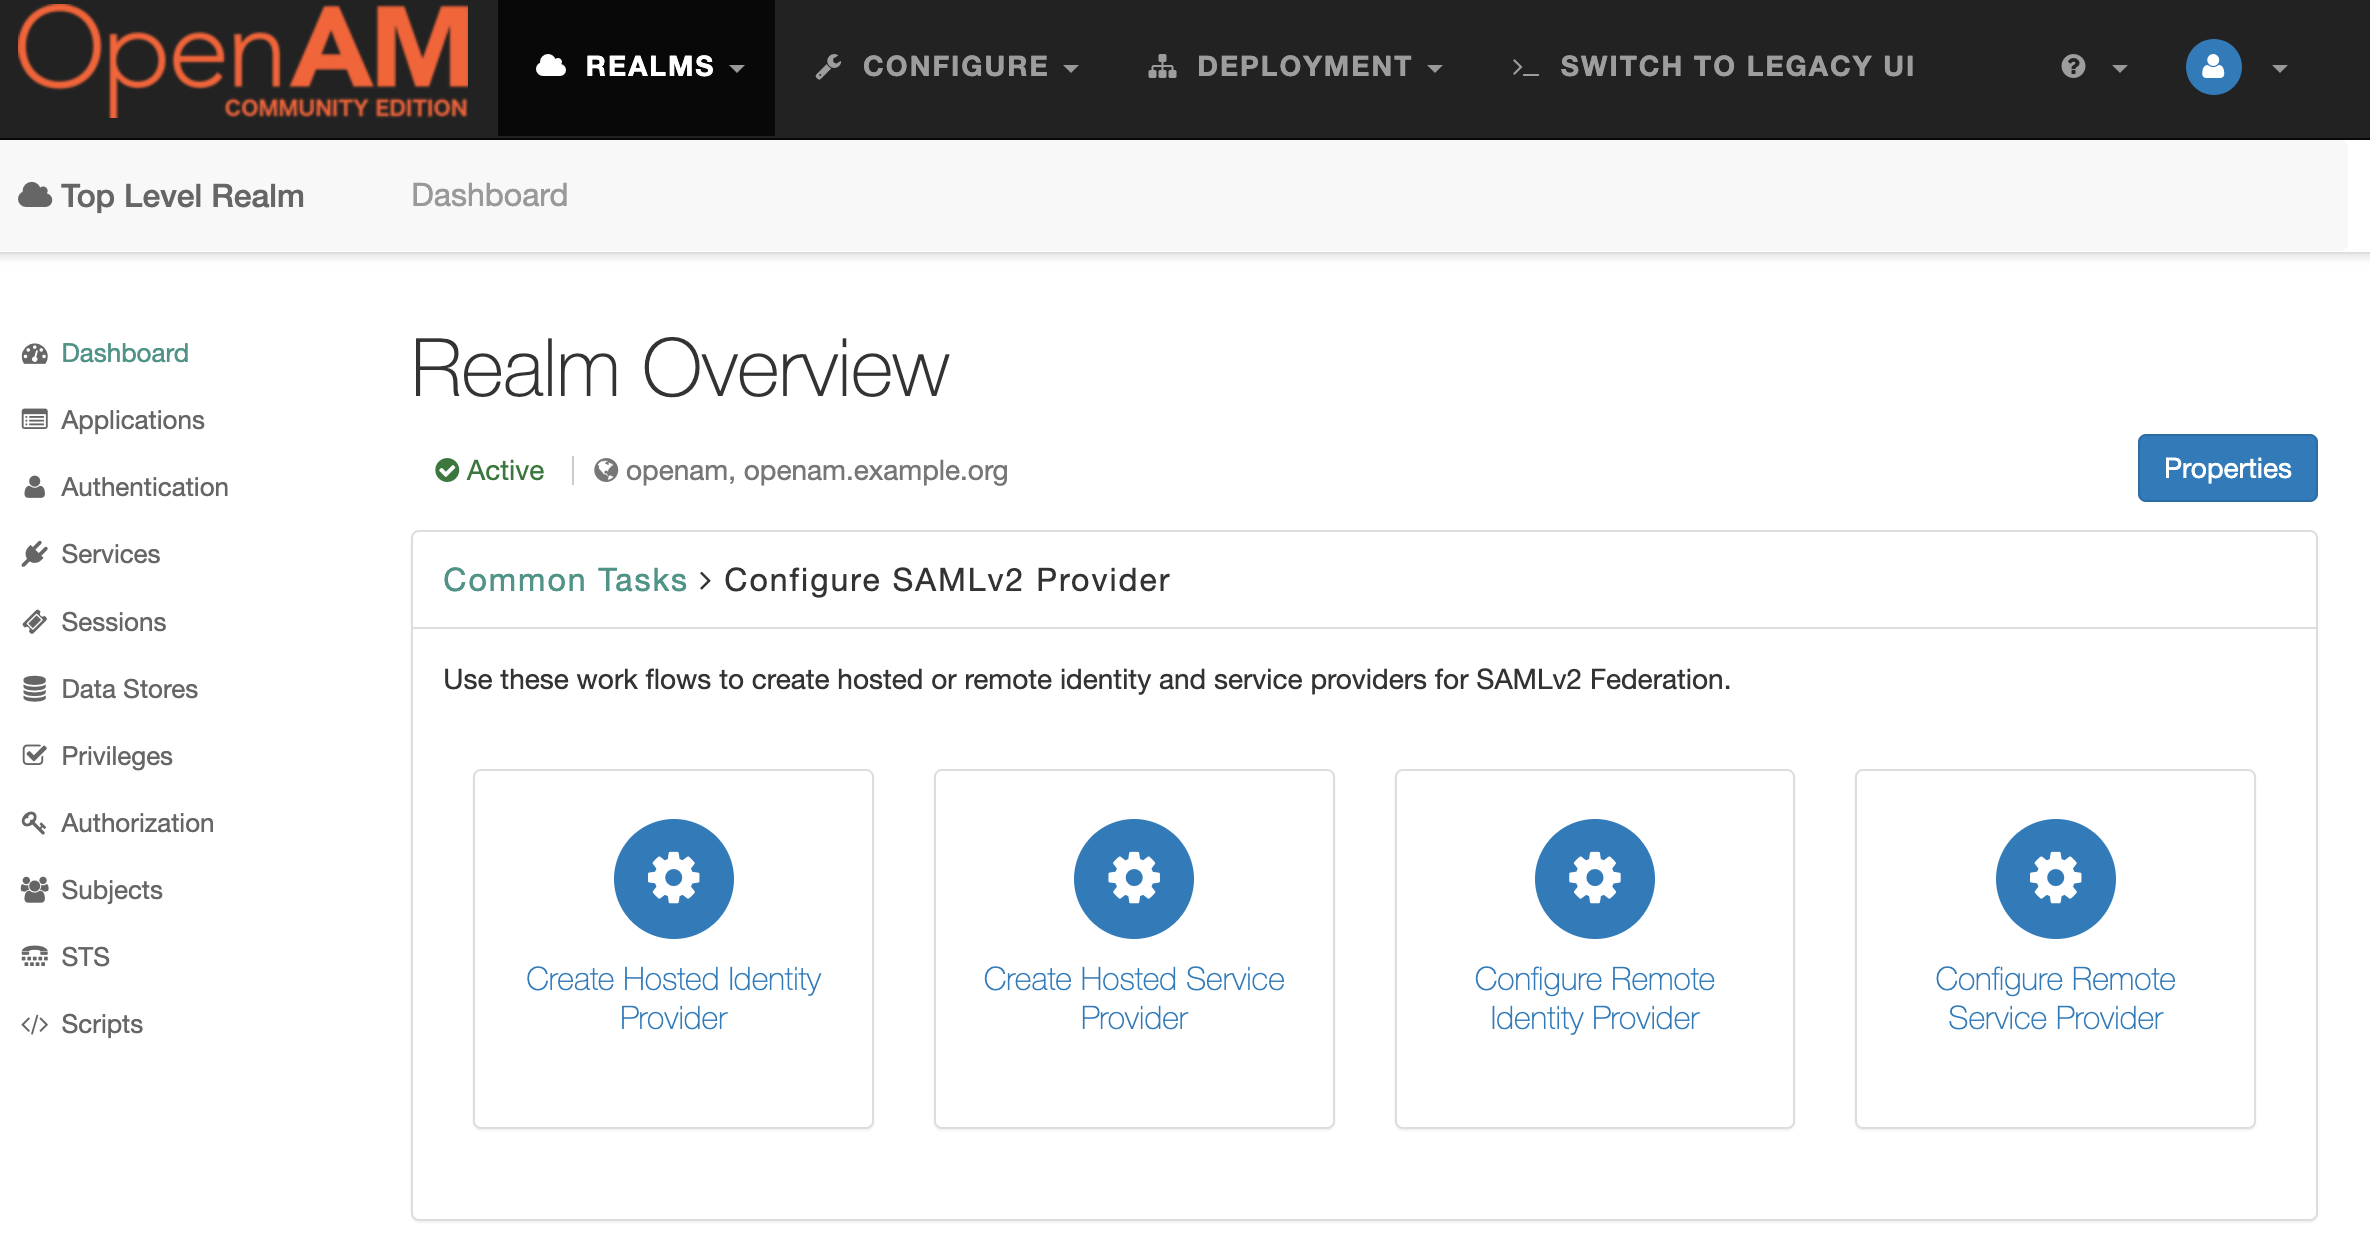
- Select Configure SAMLv2 Provider in the Common Tasks section

- Then Create Hosted Identity Provider
- Select a Signing Key (for demonstration purposes we will use test), enter the Circle of Trust name, and then map user's attributes to OpenAM. For demonstration users will be mapped by email.
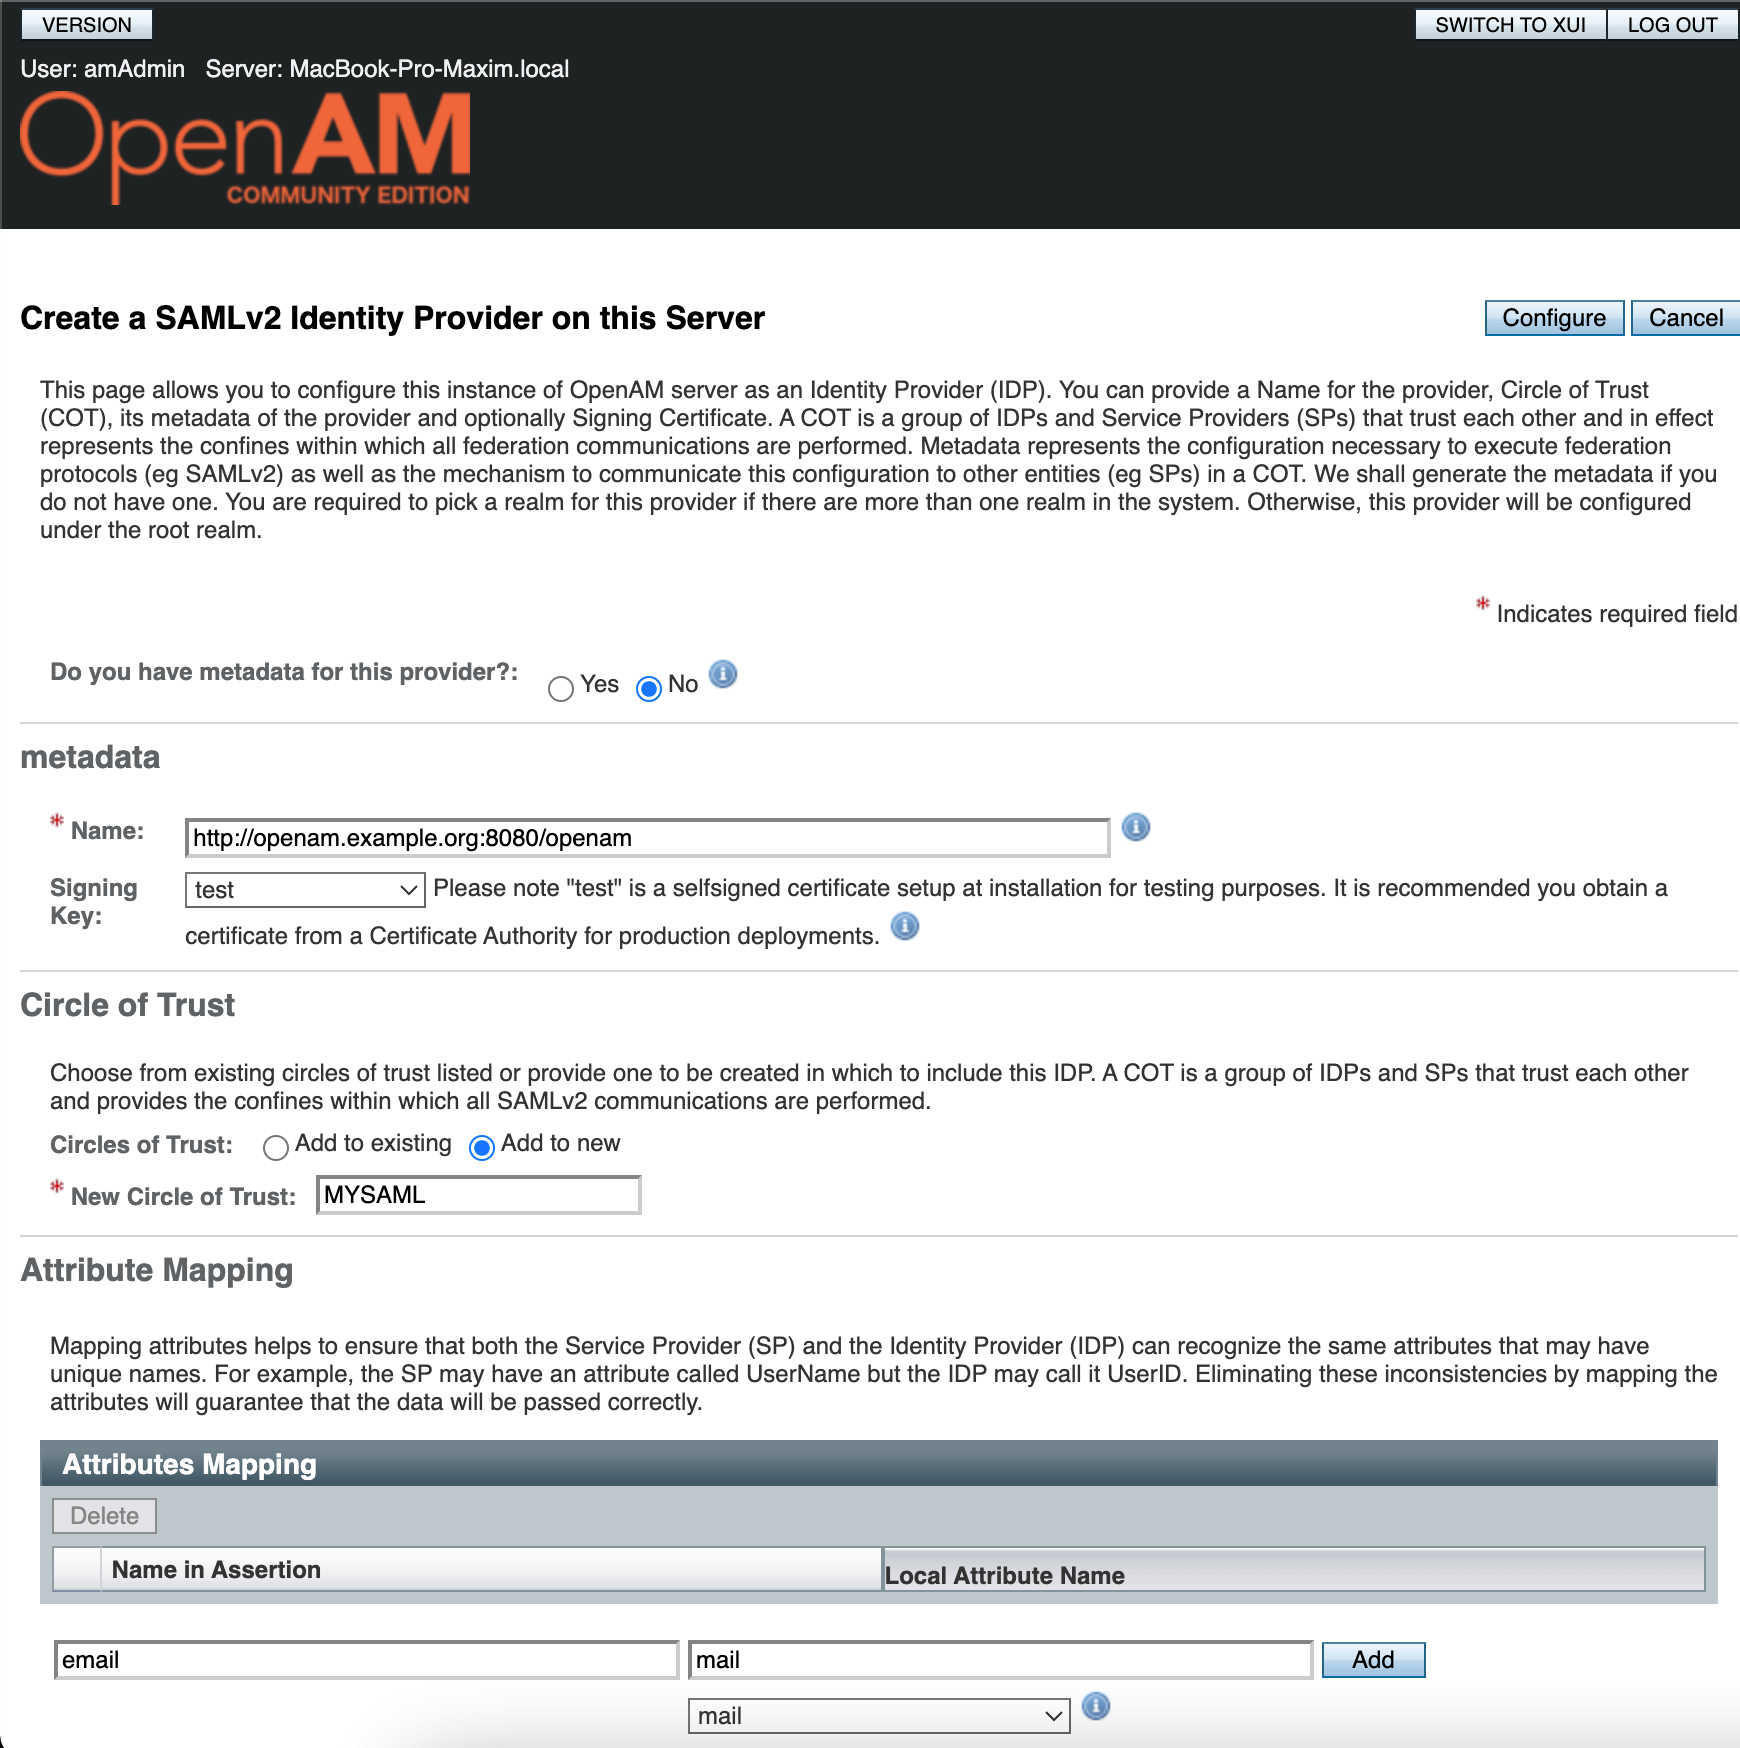
- Press the Configure button.
- Open the administration console
- Goto desired realm
- From the menu on the left, select the Applications section and navigate to SAML 2.0
- In the Entity Providers list select
http://openam.example.org:8080/openam - On the Assertion Content tab, under NameID Format in the NameID Value Map list, add the element
urn:oasis:names:tc:SAML:1.1:nameid-format:unspecified=mail - Press the Save button
- Open the administration console
- Goto desired realm
- Create a new user and fill the Email Address attribute
- Gotot Yandex Cloud Organization.
- On the left panel choose Federations .
- Click the Create Federation button.
- Give your federation a name. It must be unique within the folder.
- You can also add a description, if required.
- In the Cookie lifetime field, specify the time before the browser asks the user to re-authenticate.
- In the IdP Issuer field, enter a link to the OpenAM:
http://openam.example.org:8080/openam - In the Link to the IdP login page field, enter a link:
http://openam.example.org:8080/openam/SSORedirect/metaAlias/idp - Click the Create federation button.
While authenticating, the Cloud Organization service should be able to verify the IdP server certificate. To enable this, add the certificate to the federation:
- Open the OpenAM link
http://openam.example.org:8080/openam/saml2/jsp/exportmetadata.jspand copy theds:X509Certificatetag value - Save the certificate in a text file with a
.cerextension in the following format:
----BEGIN CERTIFICATE-----
<value ds:X509Certificate>
----END CERTIFICATE------ In the left panel, select Federations.
- Click the the federation for which you want to add the certificate.
- At the bottom of the page, click Adding a certificate.
- Enter the certificate name and description.
- Click Choose a file and specify the path to the certificate file.
- Click the Add button.
- Create a
metadata.xmlfile with the following contents where federation_ID - is a federation identifier in Yandex Cloud Organization, Federations section
<?xml version="1.0" encoding="UTF-8"?><md:EntityDescriptor xmlns:md="urn:oasis:names:tc:SAML:2.0:metadata" entityID="https://console.cloud.yandex.ru/federations/<federation_ID>">
    <md:SPSSODescriptor protocolSupportEnumeration="urn:oasis:names:tc:SAML:2.0:protocol">
        <md:AssertionConsumerService Binding="urn:oasis:names:tc:SAML:2.0:bindings:HTTP-Redirect" Location="https://console.cloud.yandex.ru/federations/<federation_ID>" index="1"/>
    </md:SPSSODescriptor>
</md:EntityDescriptor>- Open the administration console
- Goto desired realm
- Choose Configure SAMLv2 Provider in the Common Tasks section
- Then click Configure Remote Service Provider
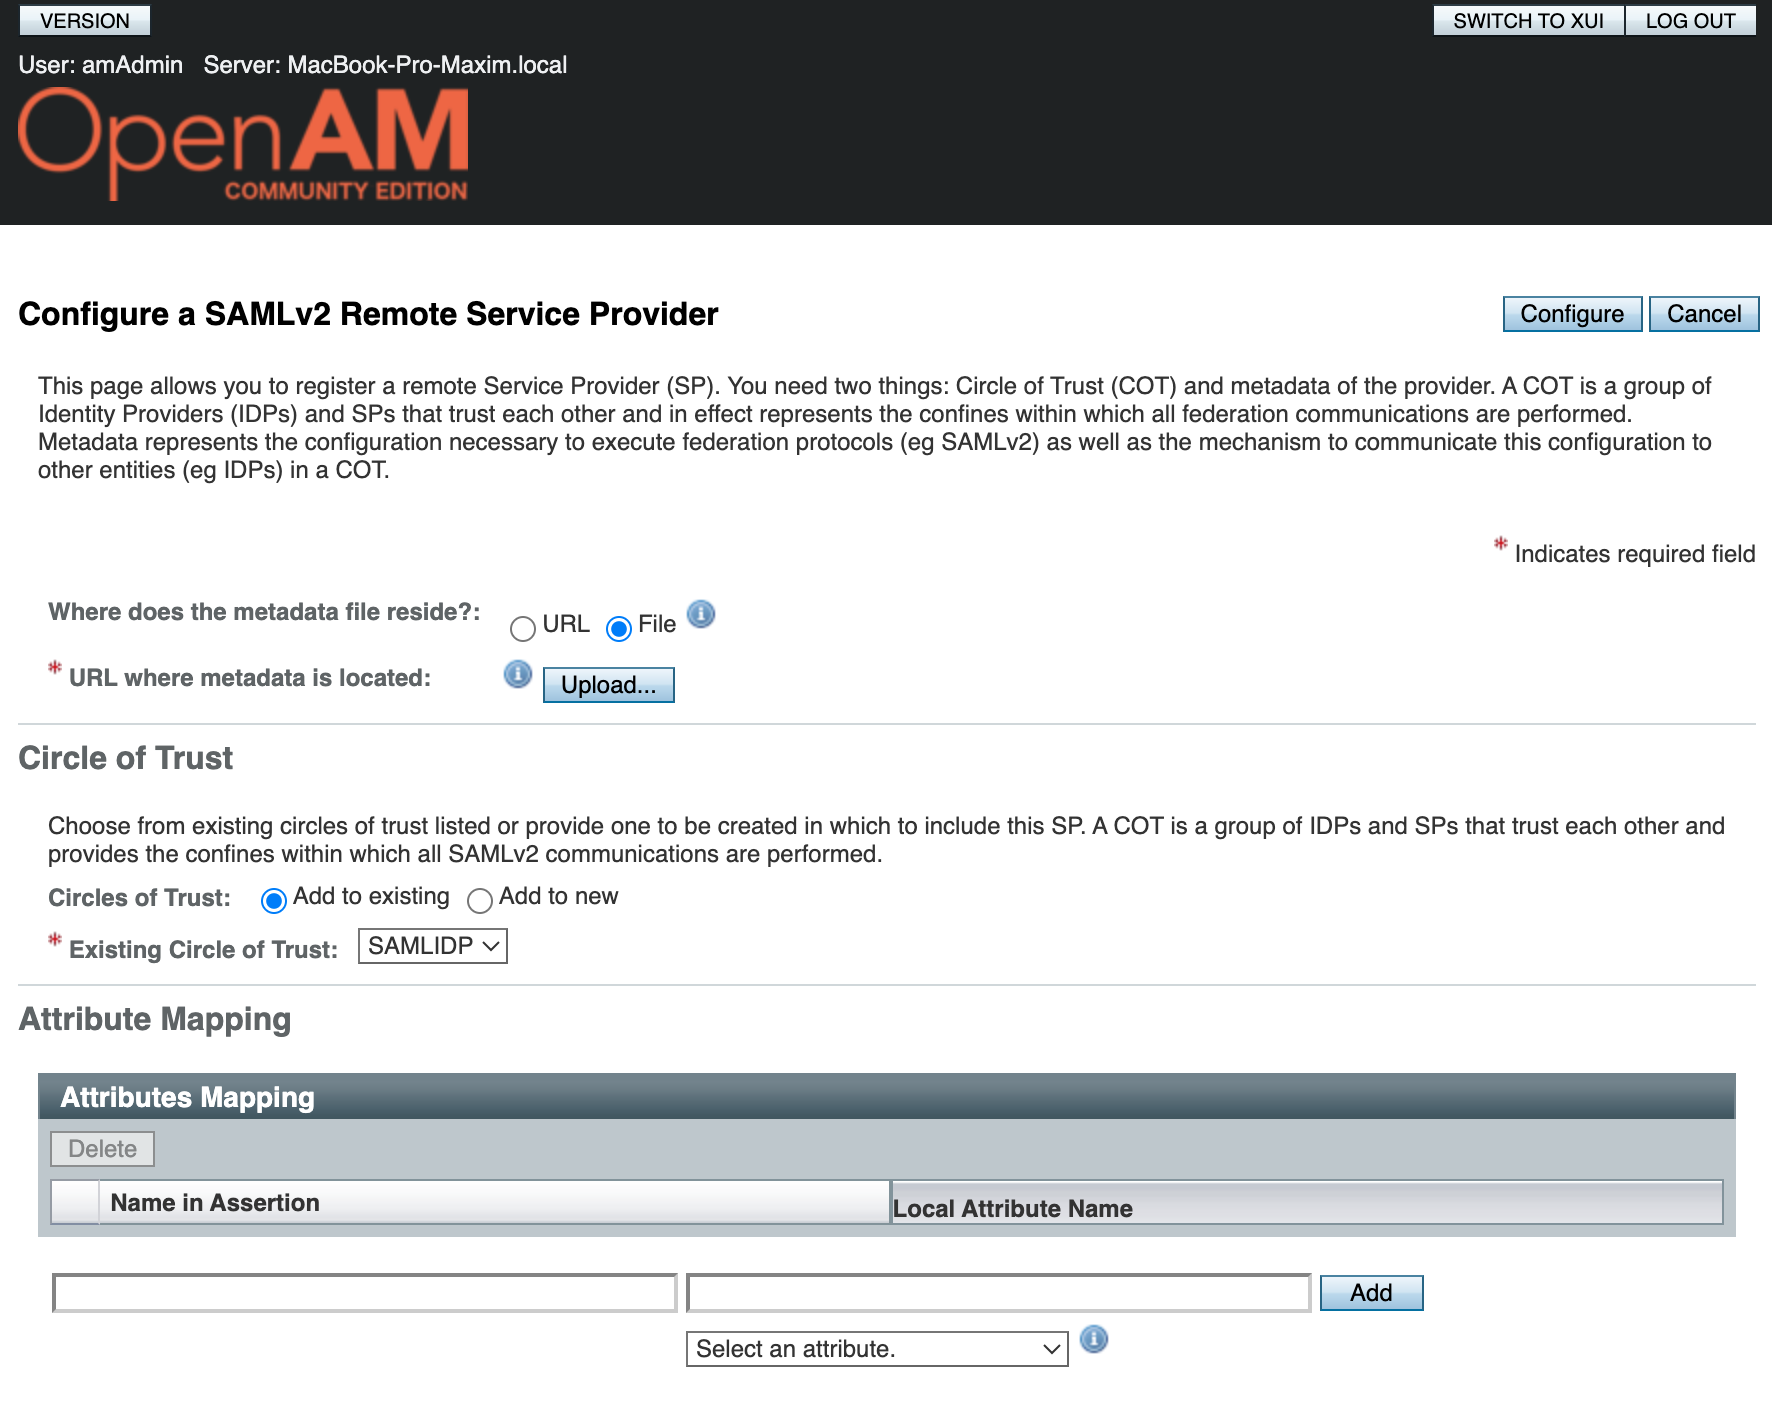
- Load the
metadata.xmlfile created in the previous step as metadata. - Select the existing Circle Of Trust, created on the Create and Configure Identity Provider in OpenAM stage
- Нажмите Configure
If the Automatically create users option is enabled, a federation will only add users logging in to a cloud for the first time. You can only add a federated user again manually after deleting them from a federation.
- Login to account that belongs to an organization administrator or owner.
- Goto Yandex Cloud Organization service.
- In the left panel, select Users.
- In the top-right corner, click Add federated users.
- Select the identity federation to add users from.
- Enter emails of the OpenAM users
- Click the Add button. This will give the OpenAM users access to the organization.
When you finish setting up SSO, test that everything works properly:
-
Open your browser in guest or private browsing mode.
-
Follow the URL to log in to the management console:
https://console.cloud.yandex.ru/federations/<federation_ID> -
Enter OpenAM user credentials and click Login.
On successful authentication, the IdP server will redirect you to URL https://console.cloud.yandex.ru/federations/<federation_ID>, which you have set in the metadata.xml file for the Service Provider in the OpenAM settings and then to the management console home page. In the top-right corner, you will be able to see you are logged in to the console as a federated user.


