Watson Services
Go to cloud.ibm.com/registration
Enter Email address and Password and click Next.
Check the email that you used for the 7-digit verification code and enter it in the Verification code box and click Next.
Enter your First name, Last name, and Country or region and click Next.
Read and click I accept the product Terms and Conditions of this registration form and click Continue.
Review the account privacy notice and click I acknowledge that I understand how IBM is using my Basic Personal Data... and click Continue.
Select Personal for Account type and click Next.
Enter Billing information, probably just Address and Phone number and click Next.
Enter Credit card information and click Next. While we are going to use Lite services which are generally free, we still must provide a valid credit card.
Click on Create account.
Wait for the registration to complete. It can take a few minutes.
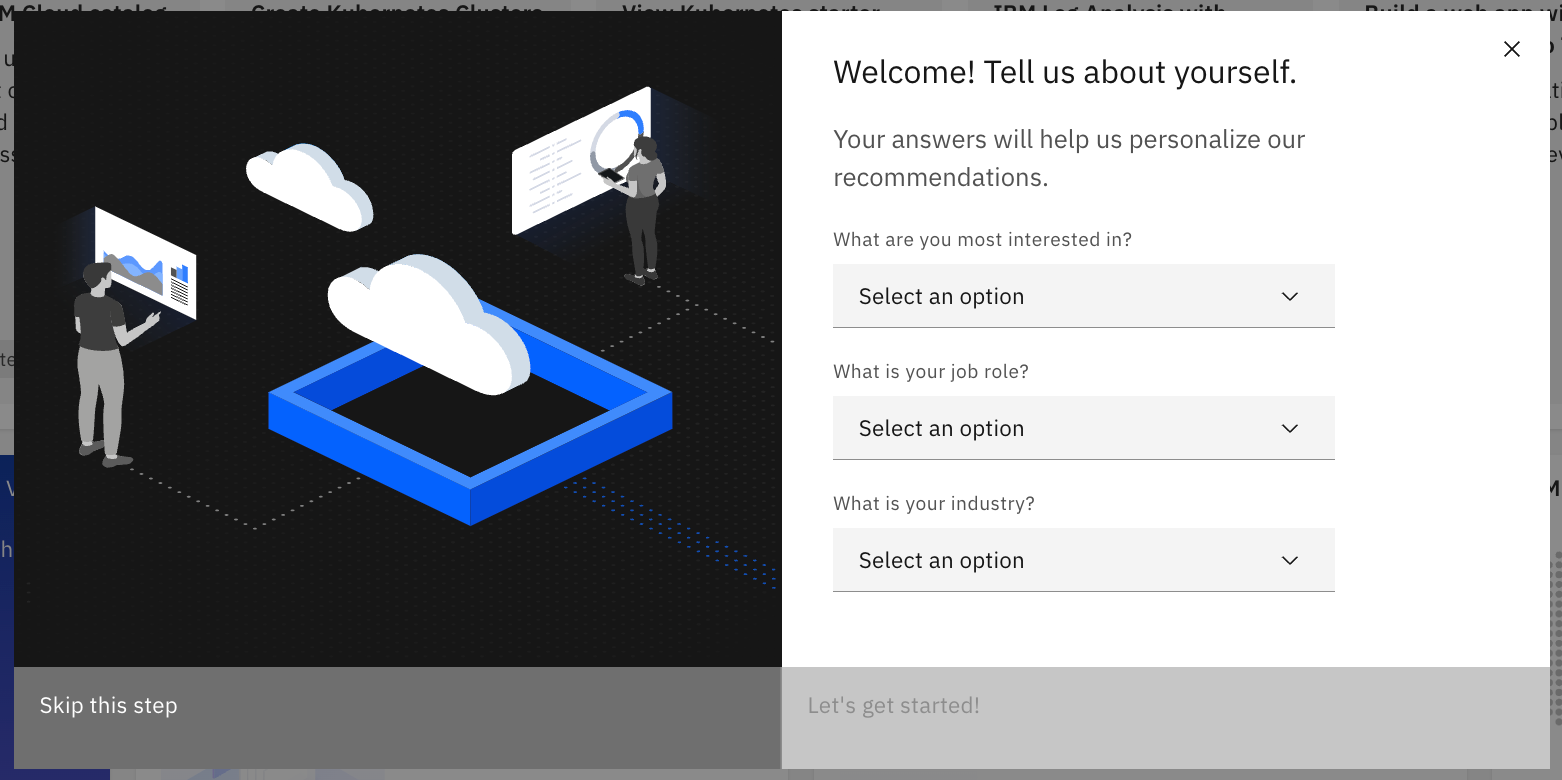
This dialog box will appear. You can fill it out if you wish or just click Skip this step to continue.
You will be taken to the IBM Cloud Dashboard.
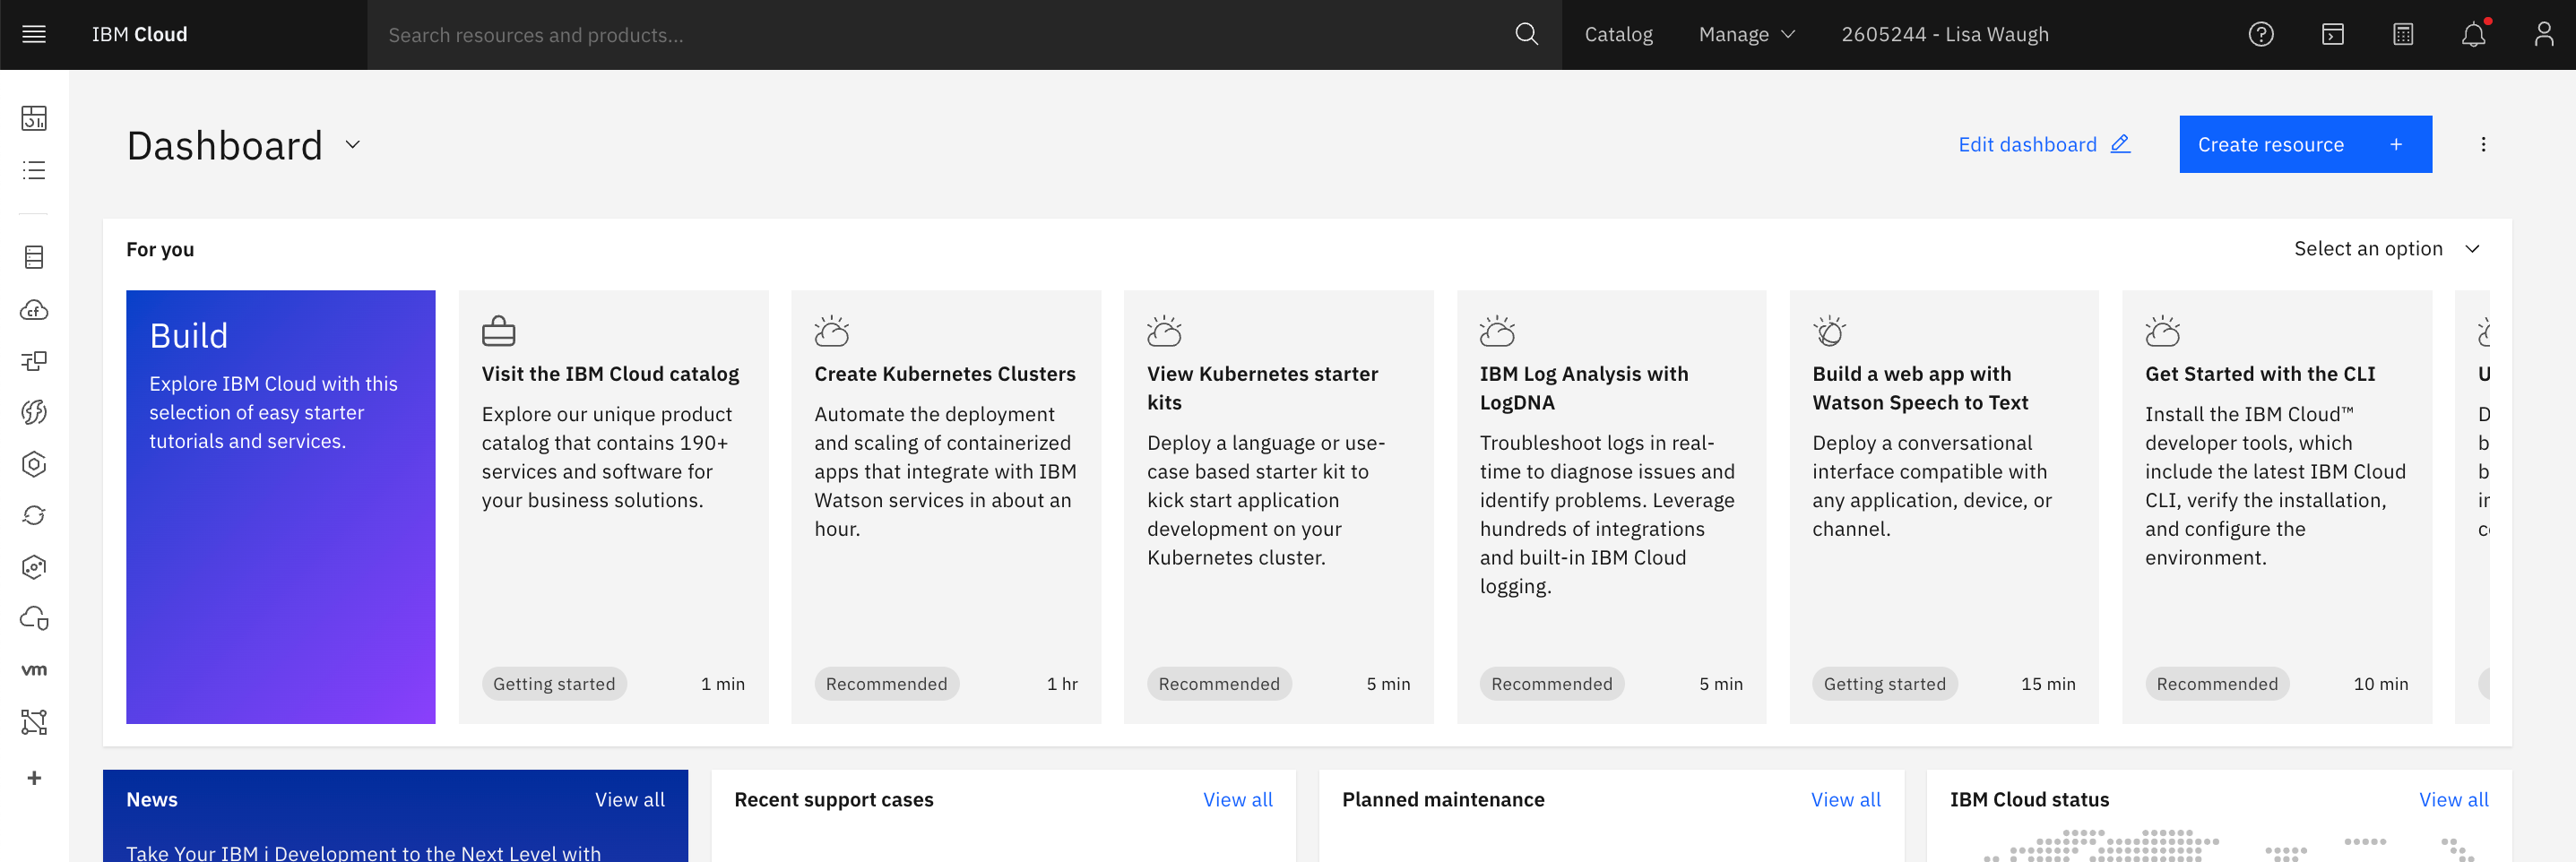
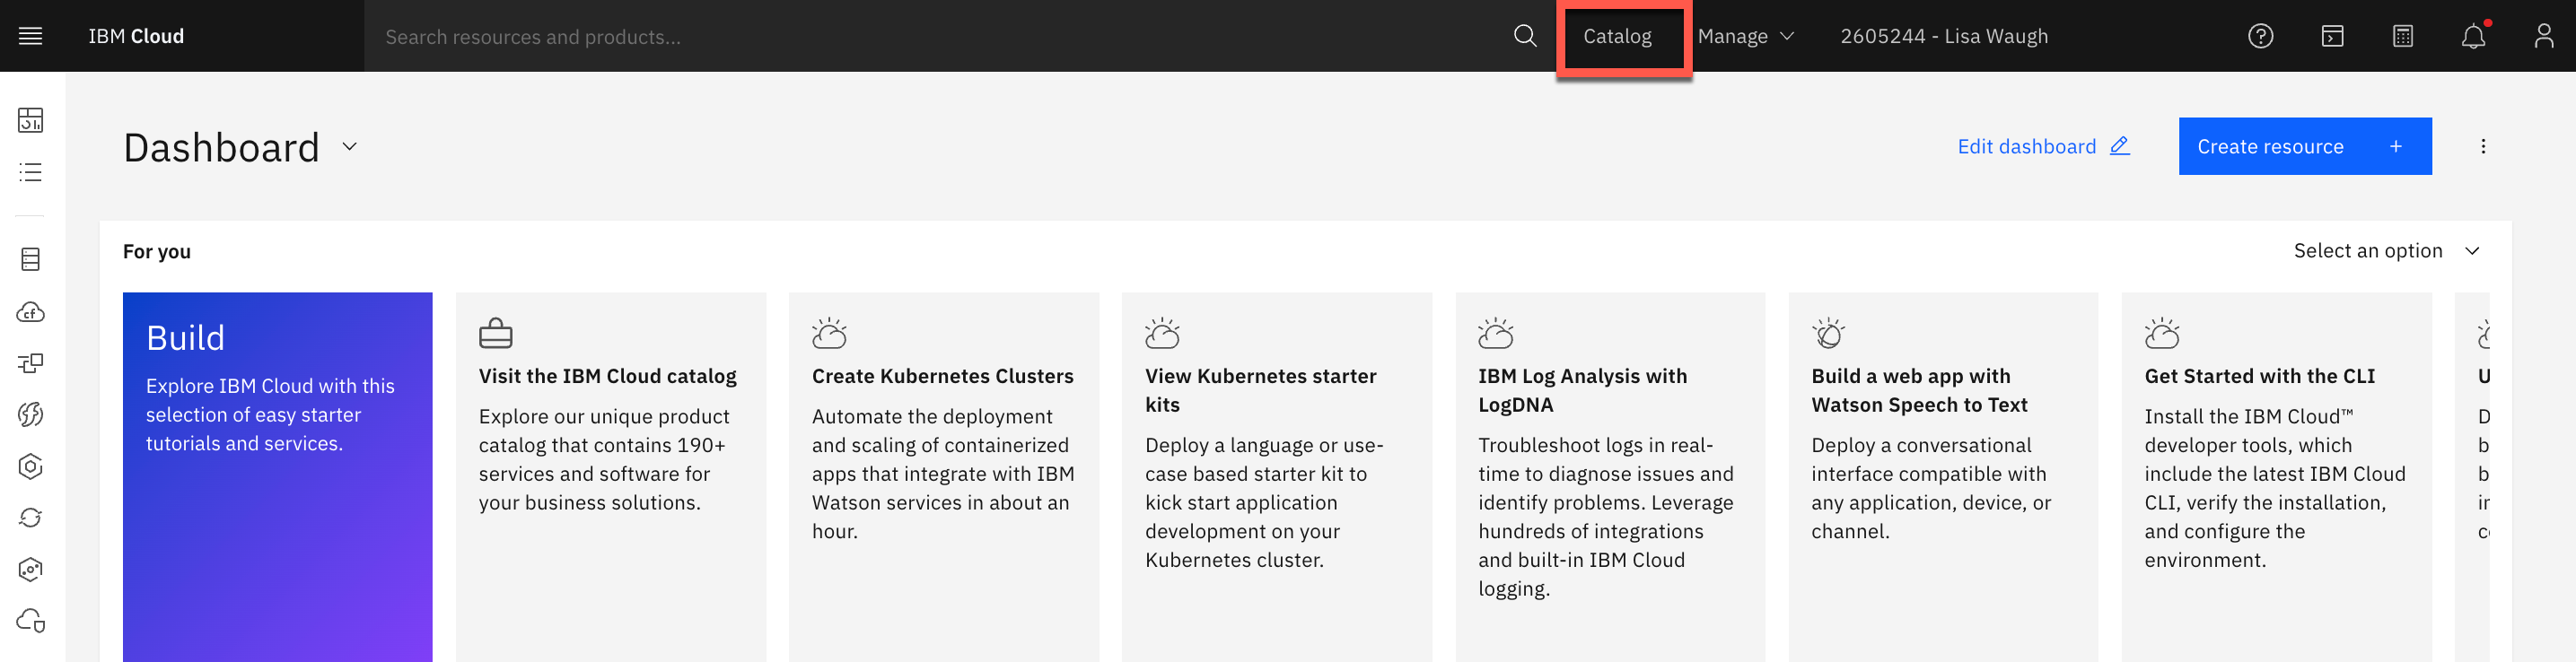
Click on Catalog in the top of the screen.
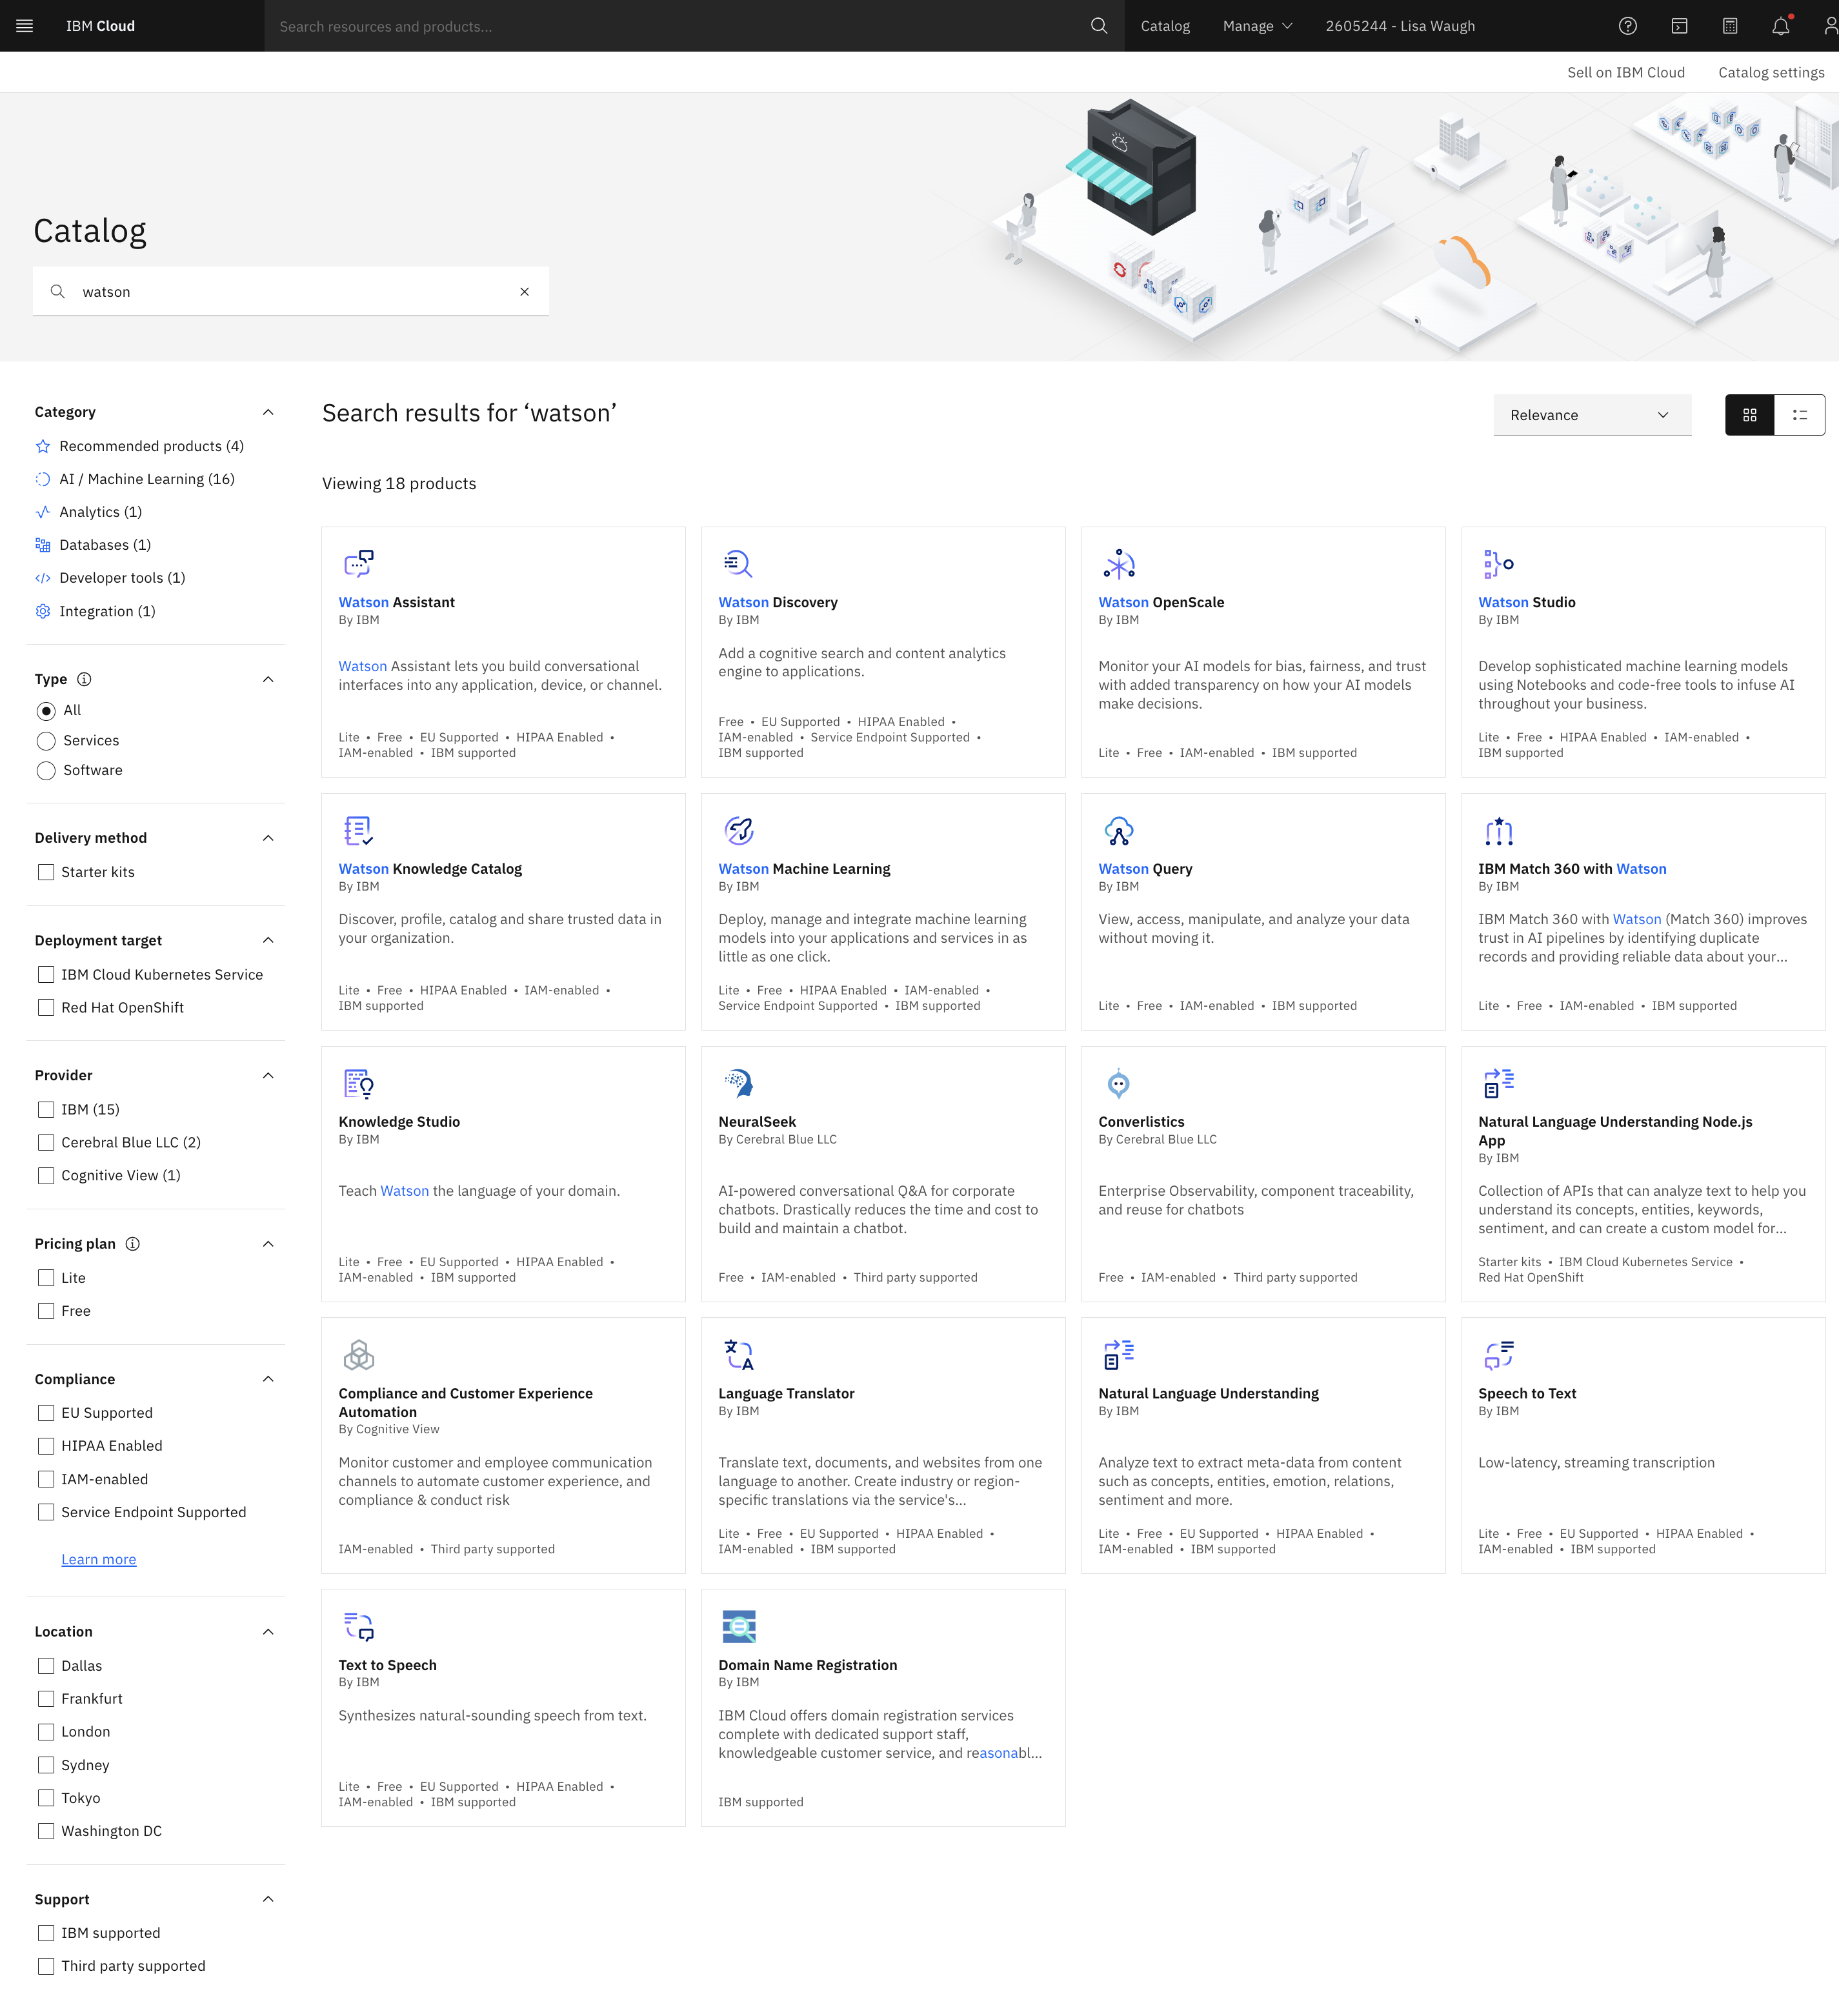
This will take you to the Catalog, type in watson in the search field.
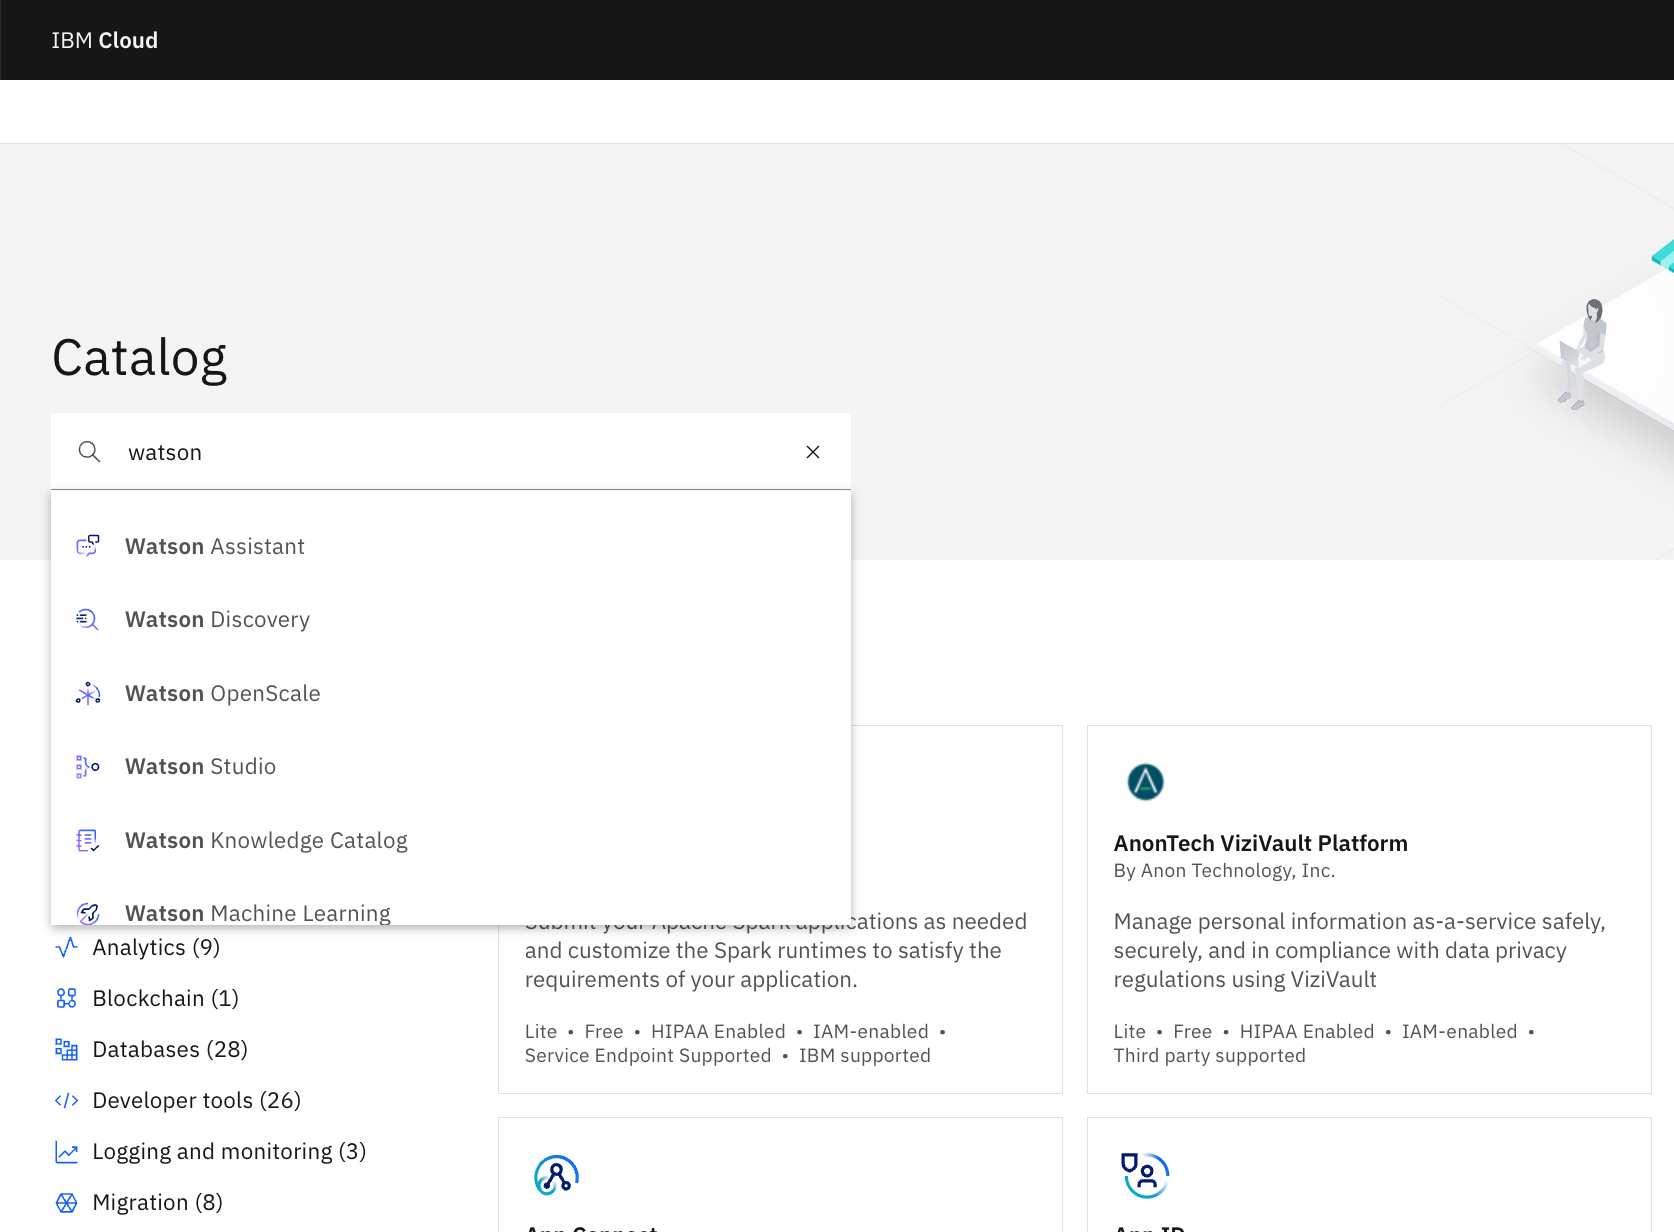
Hit enter to see all the Watson services.
We will be using Watson Assistant, Speech to Text, Text to Speech, and Natural Language Understanding the first couple of weeks.
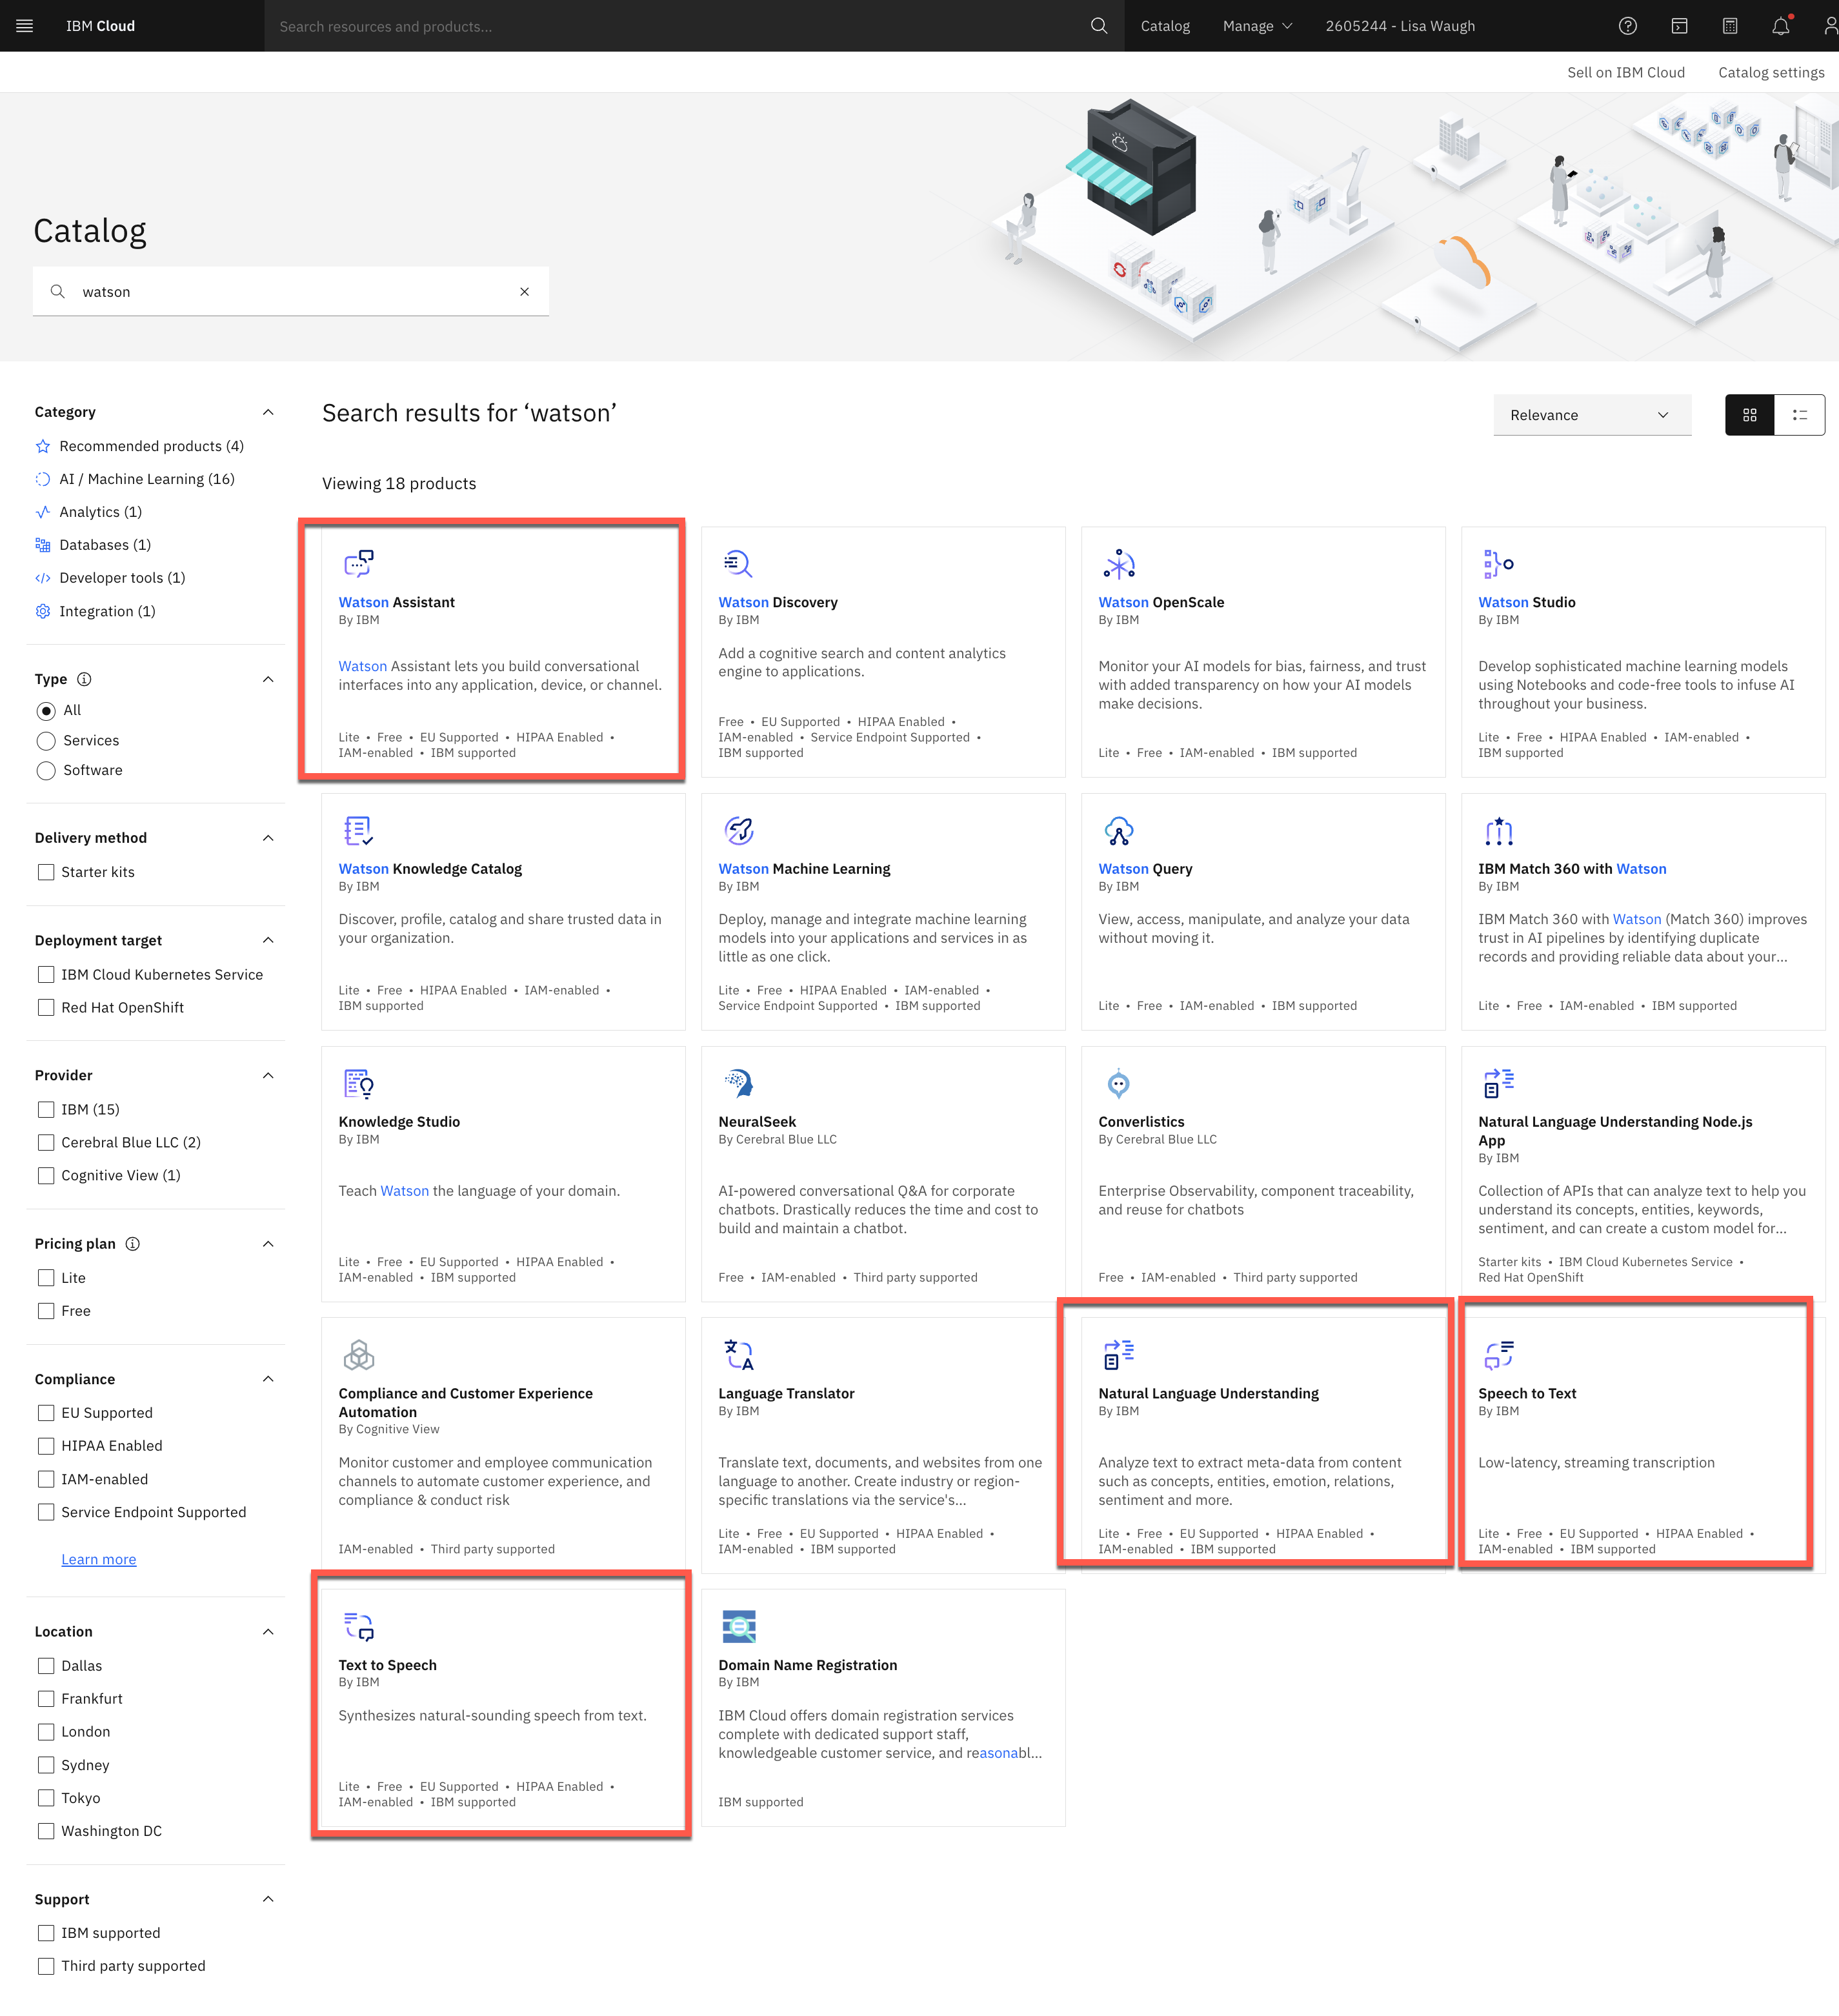
Natural Language Understanding is what we will use first. Click on Natural Language Understanding.
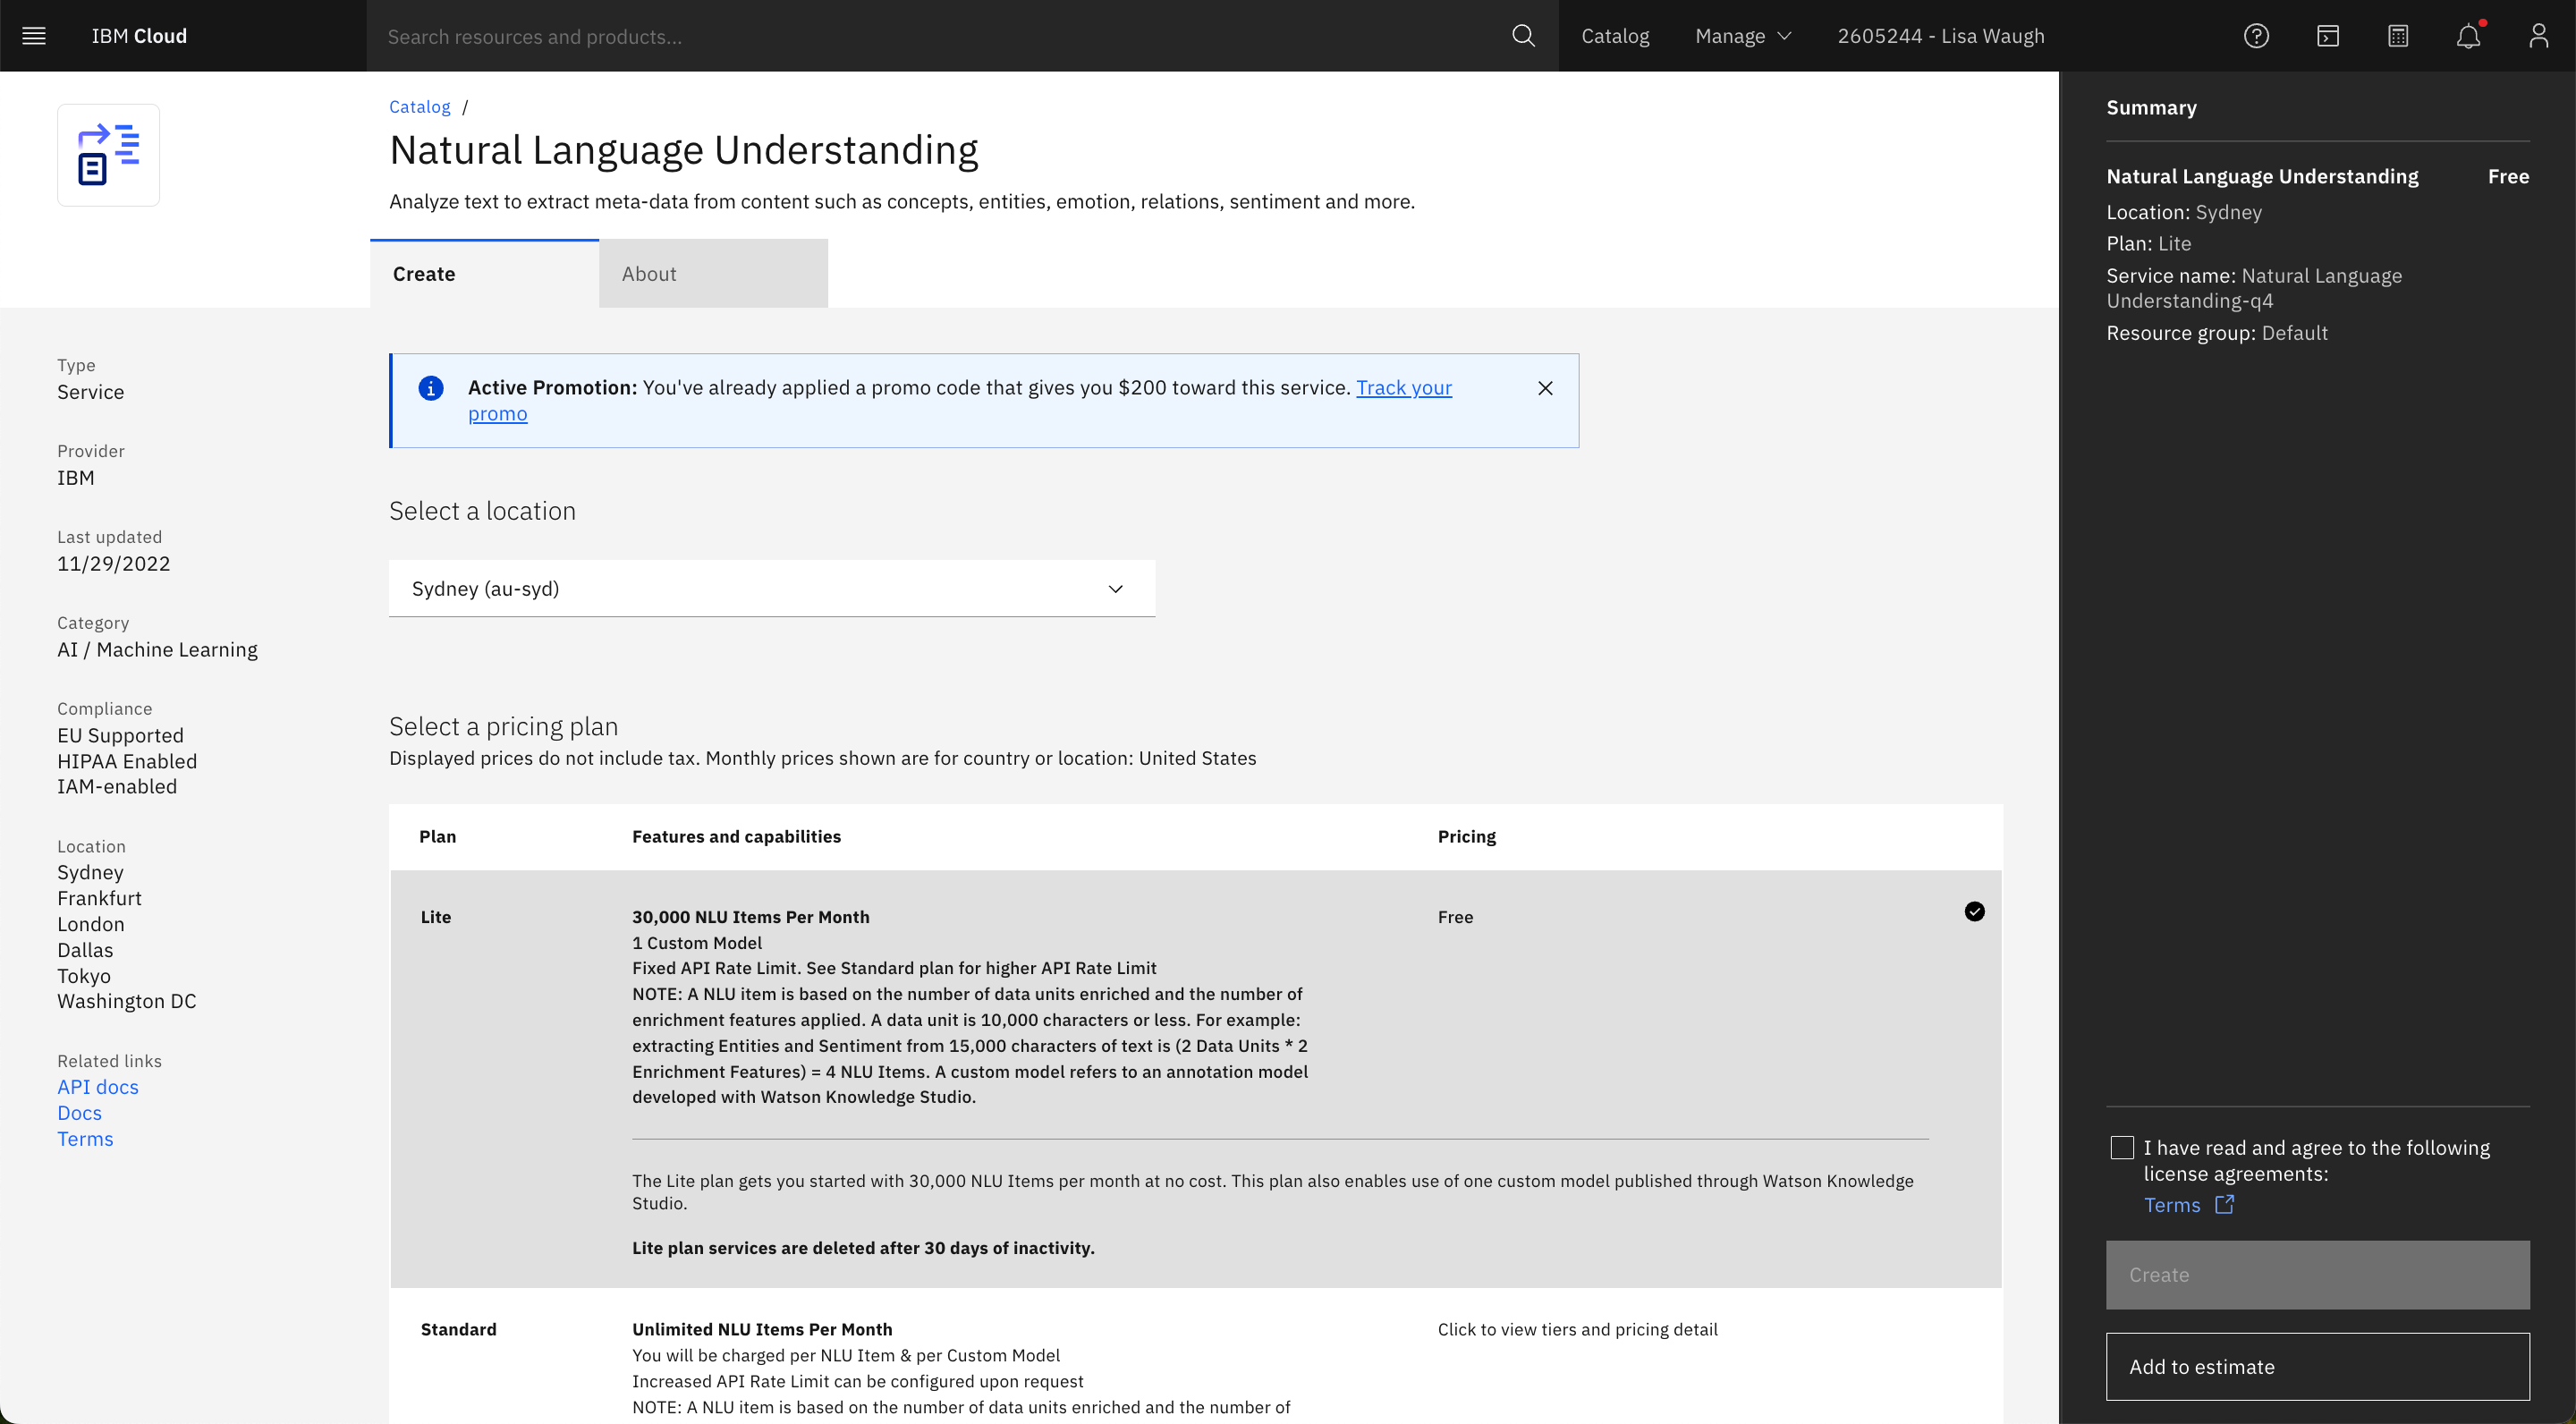
You need to pick which type of Pricing Plan you want. If you select Lite and you don't use your TJBot for more than 30 days, your service will be deleted. If you select Standard, you will be charged (after you've exceeded your promo credit). Select the type of account you would like to have, read and accept the license agreements, and click Create.
You will be taken to screen for the Tone Analyzer service you just created.
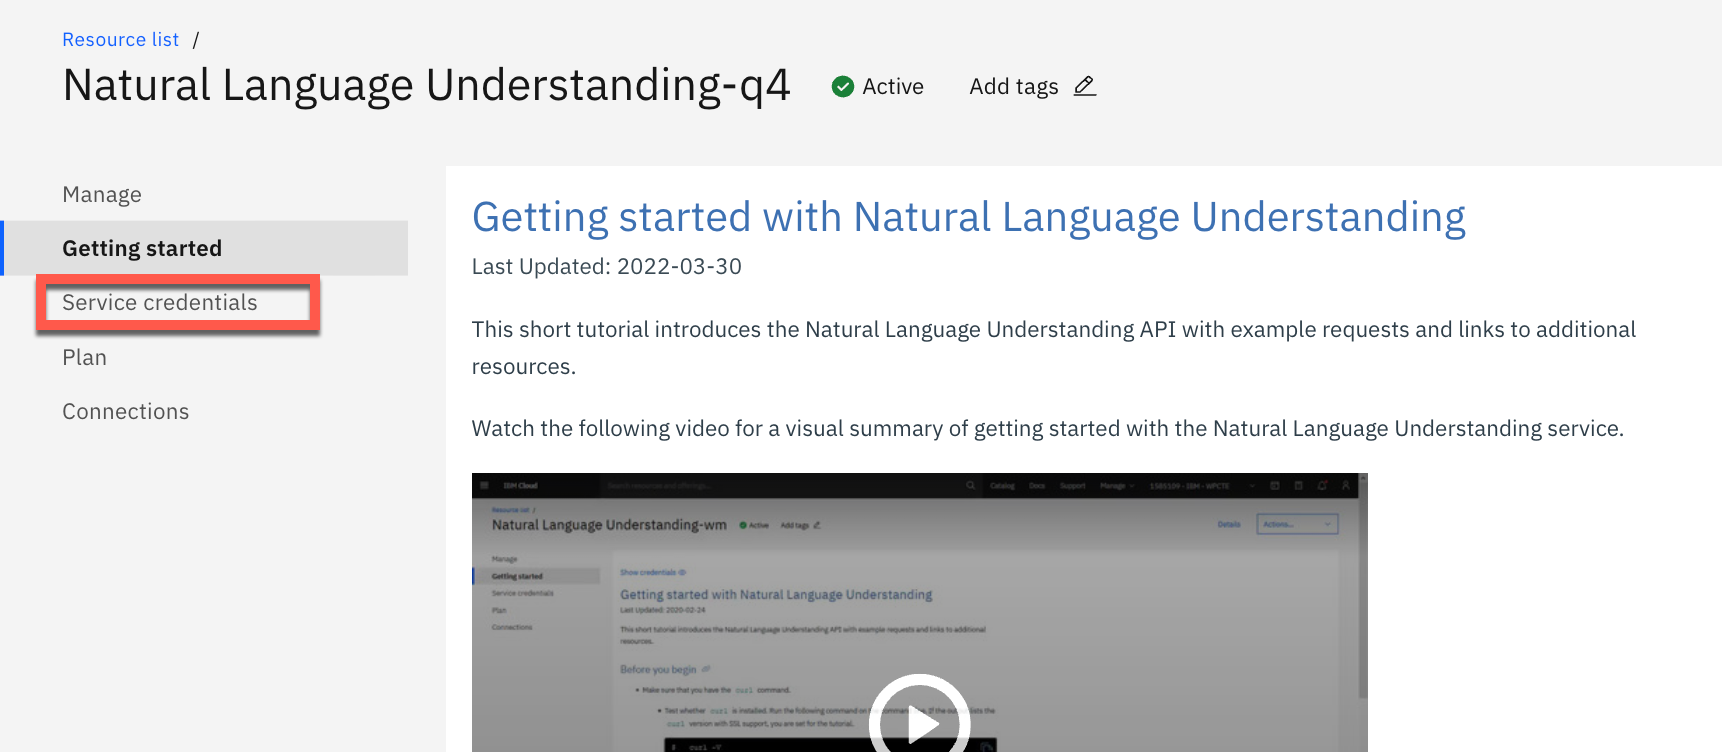
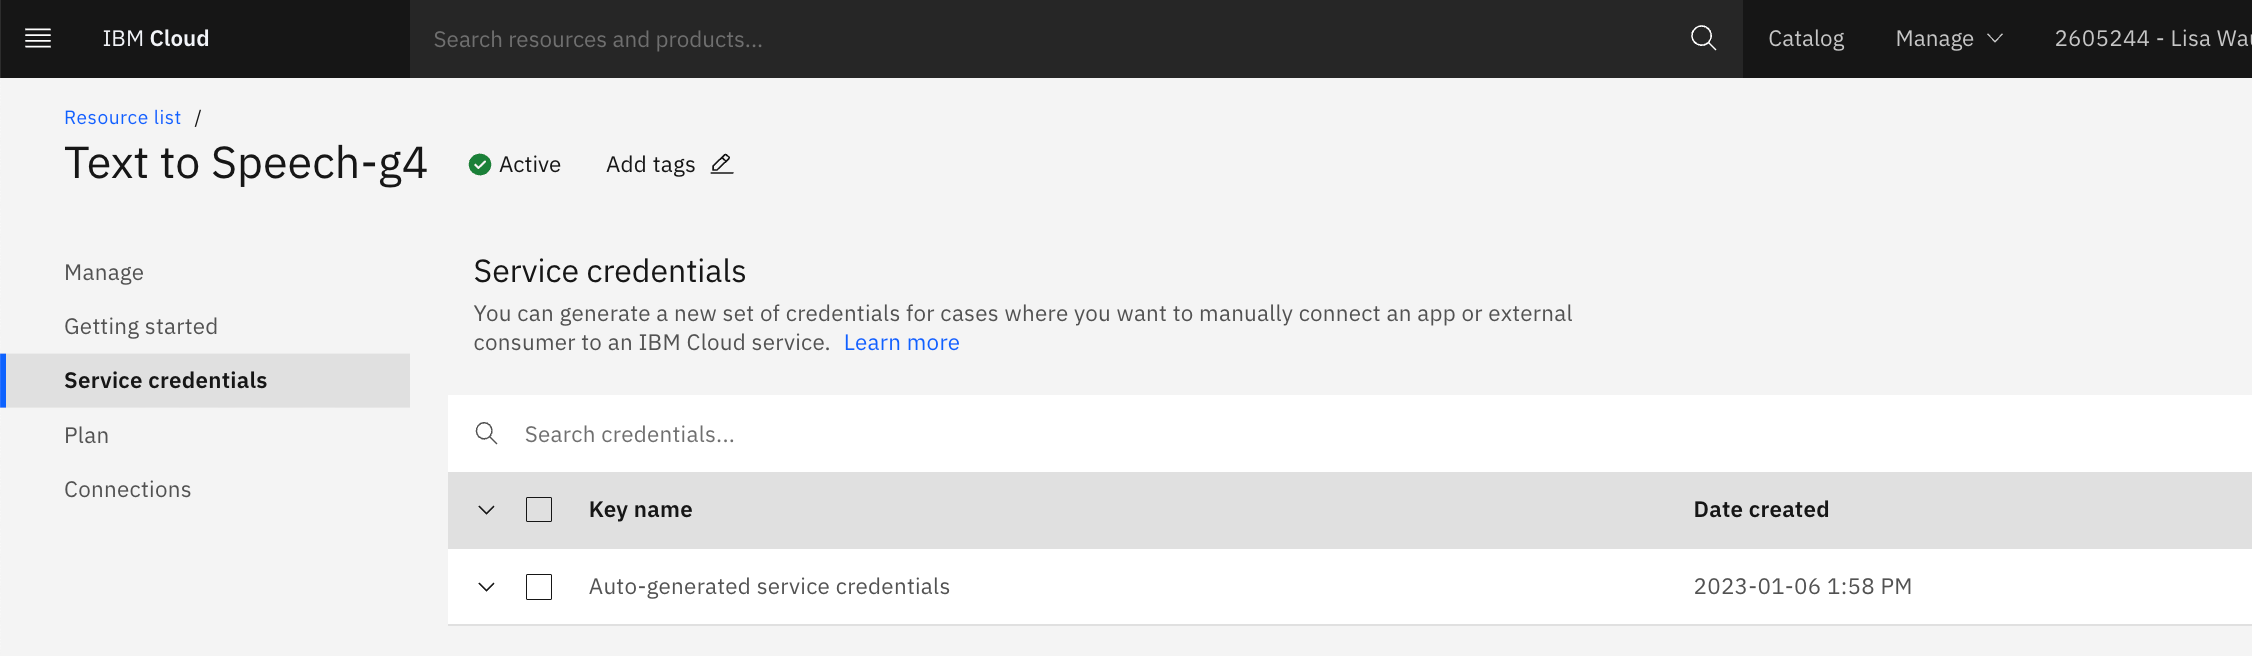
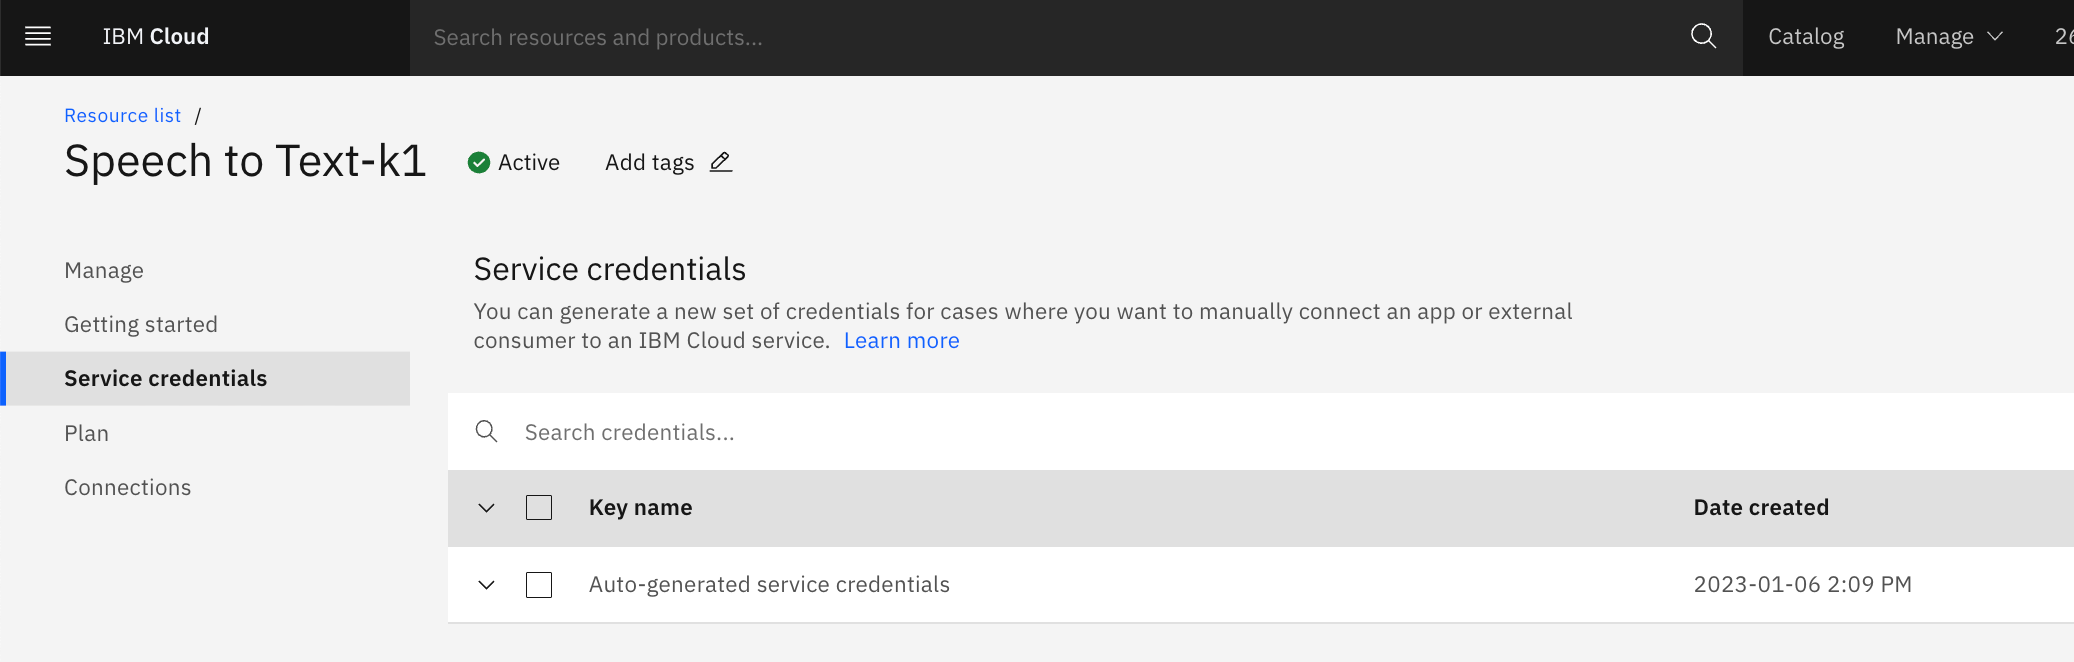
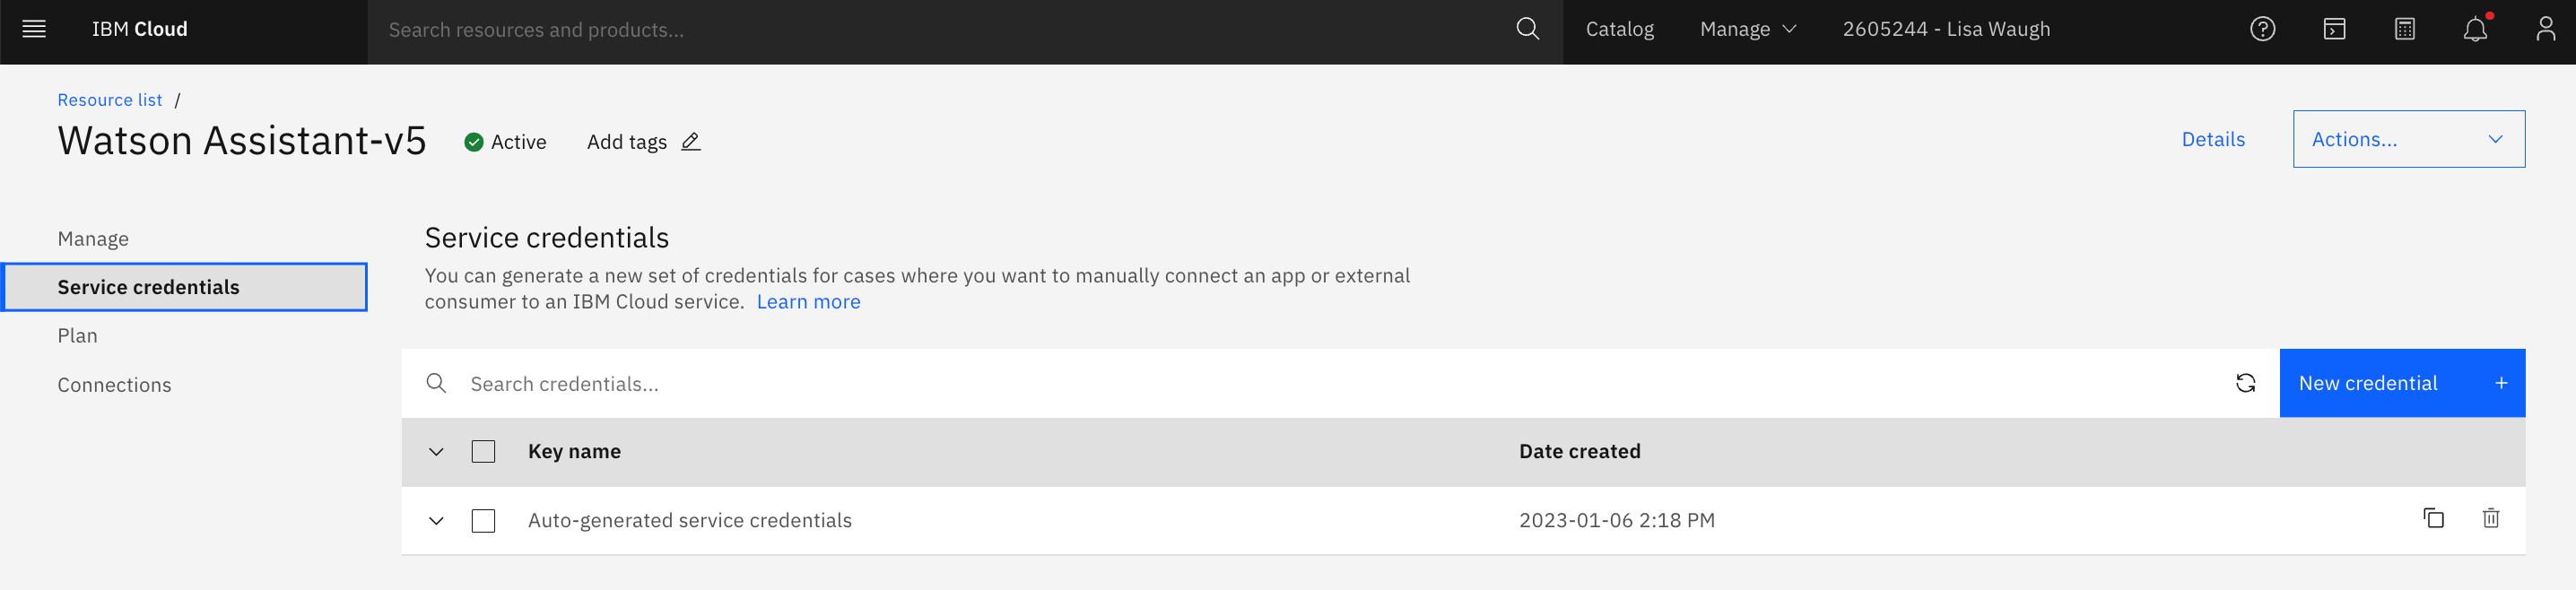
Click on Service credentials on the left side to get the credentials we need for TJBot configuration.
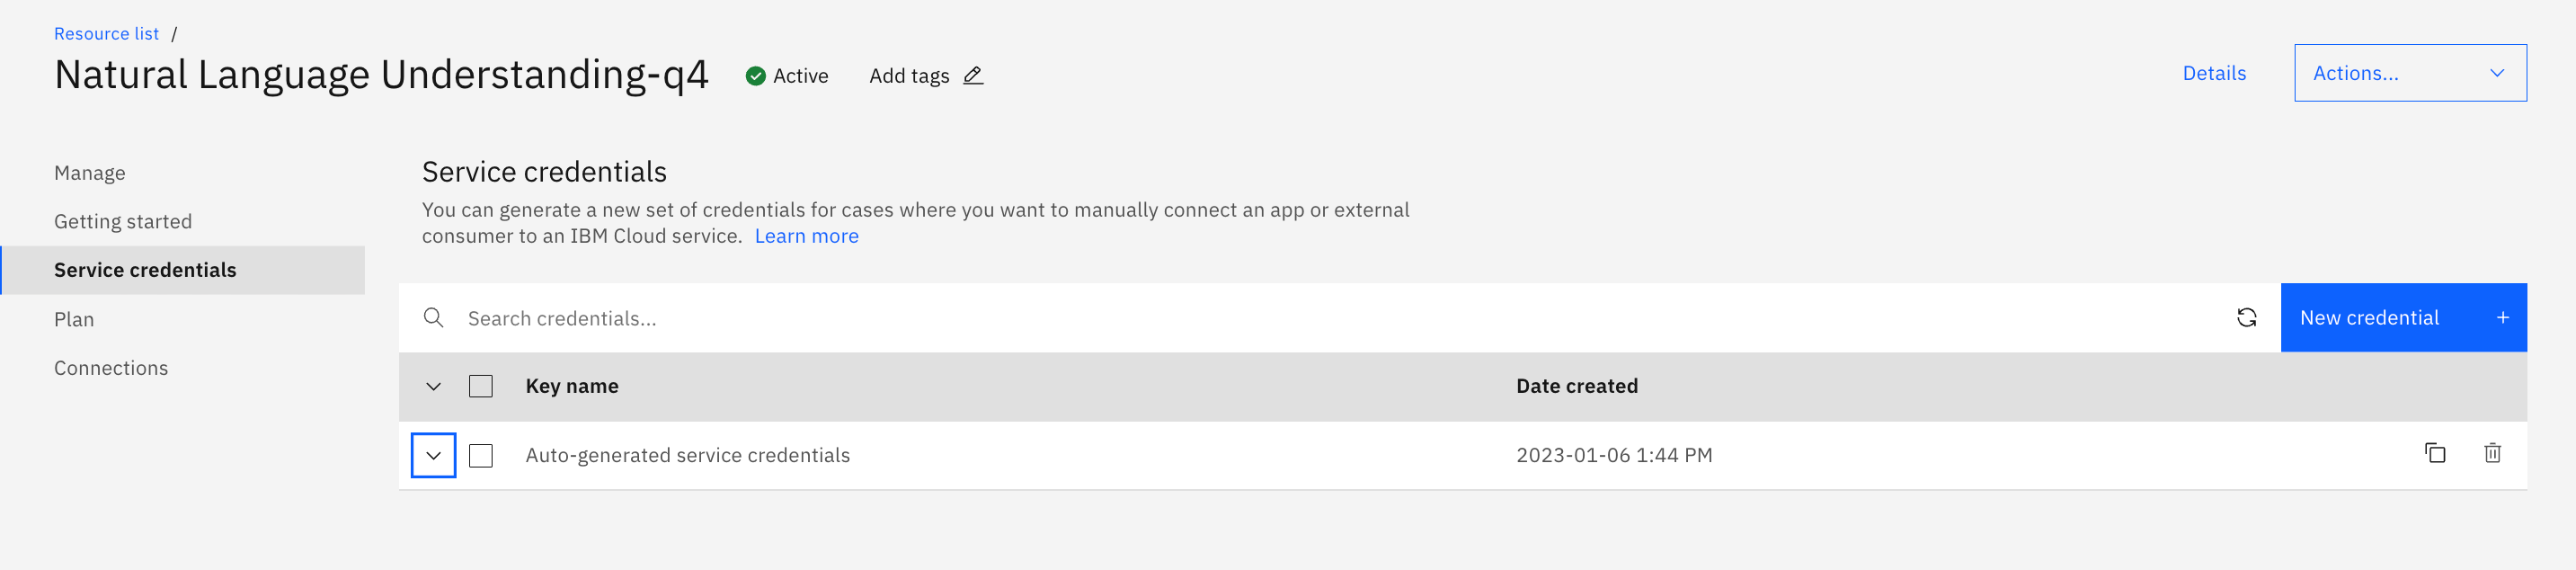
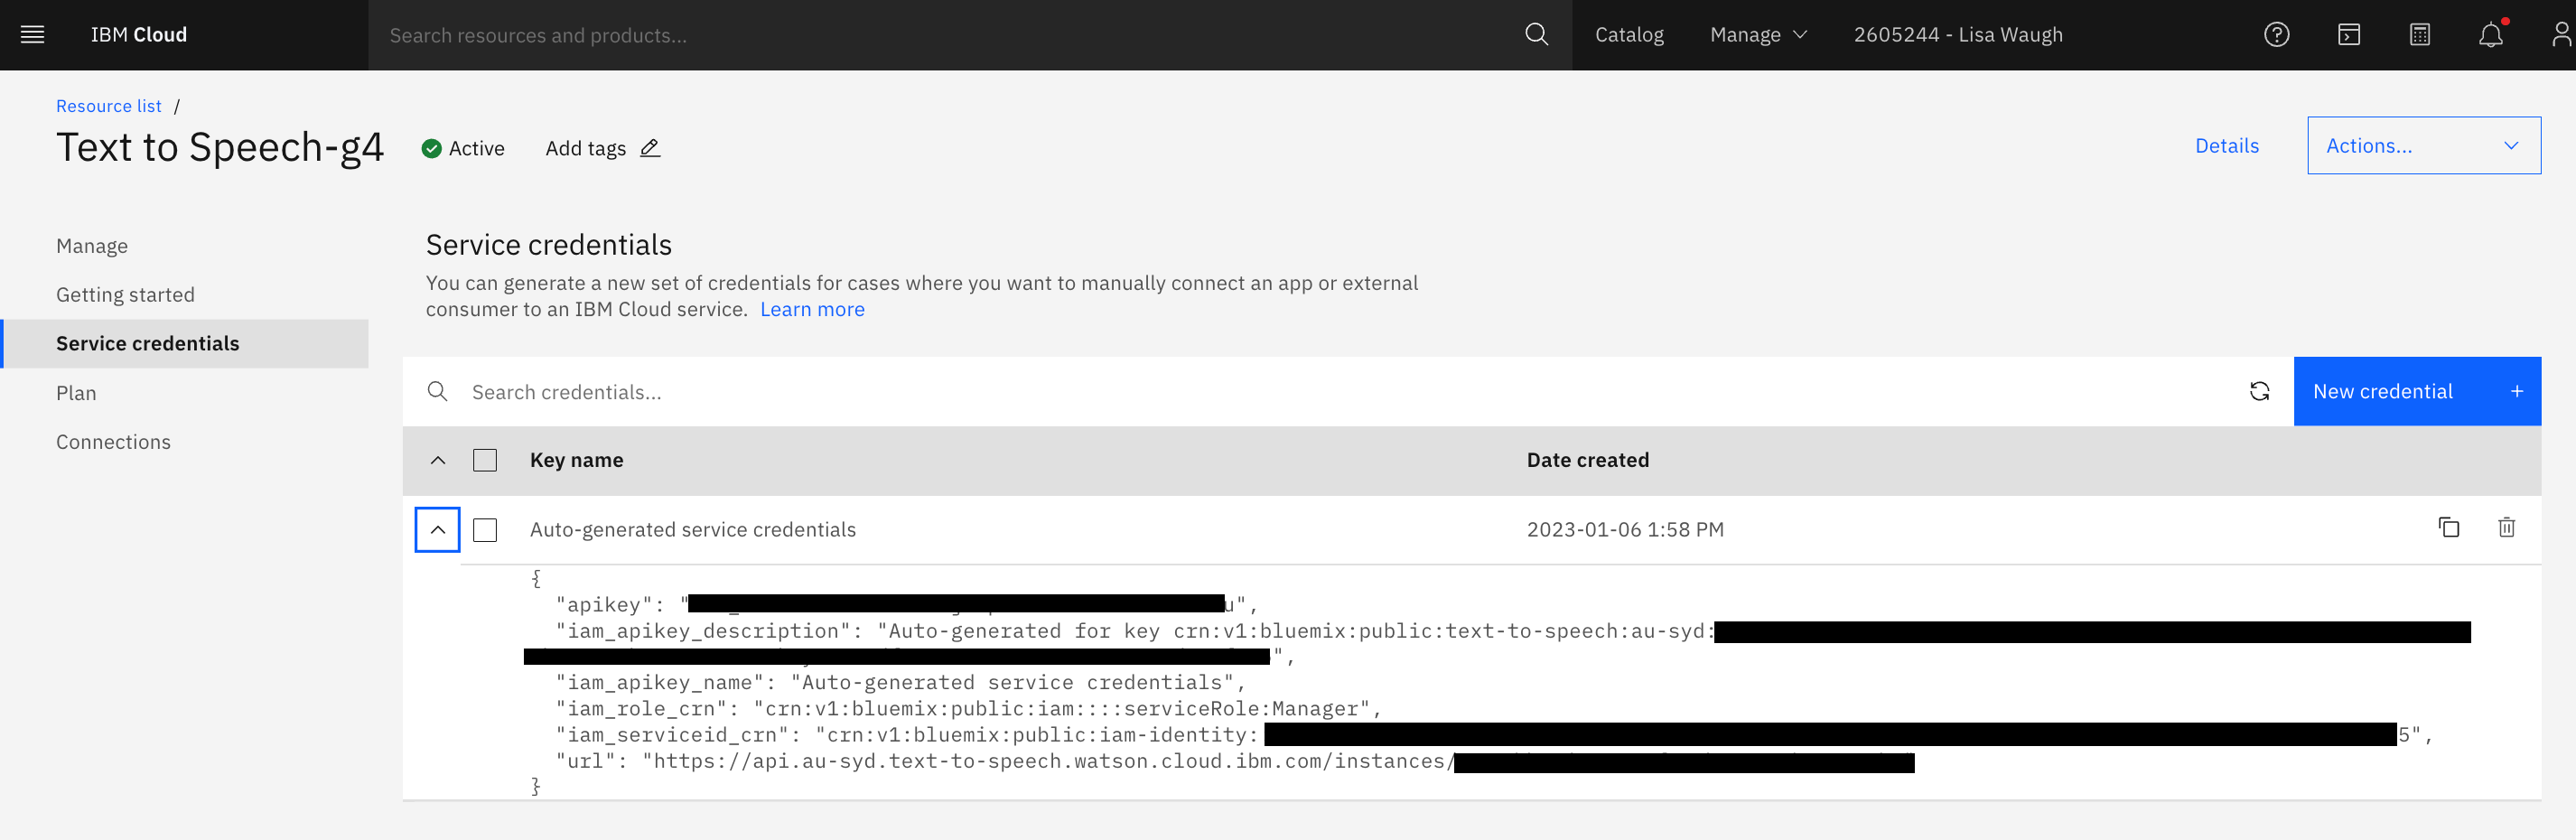
Expand the credentials by clicking on the v before Auto-generated service credentials.
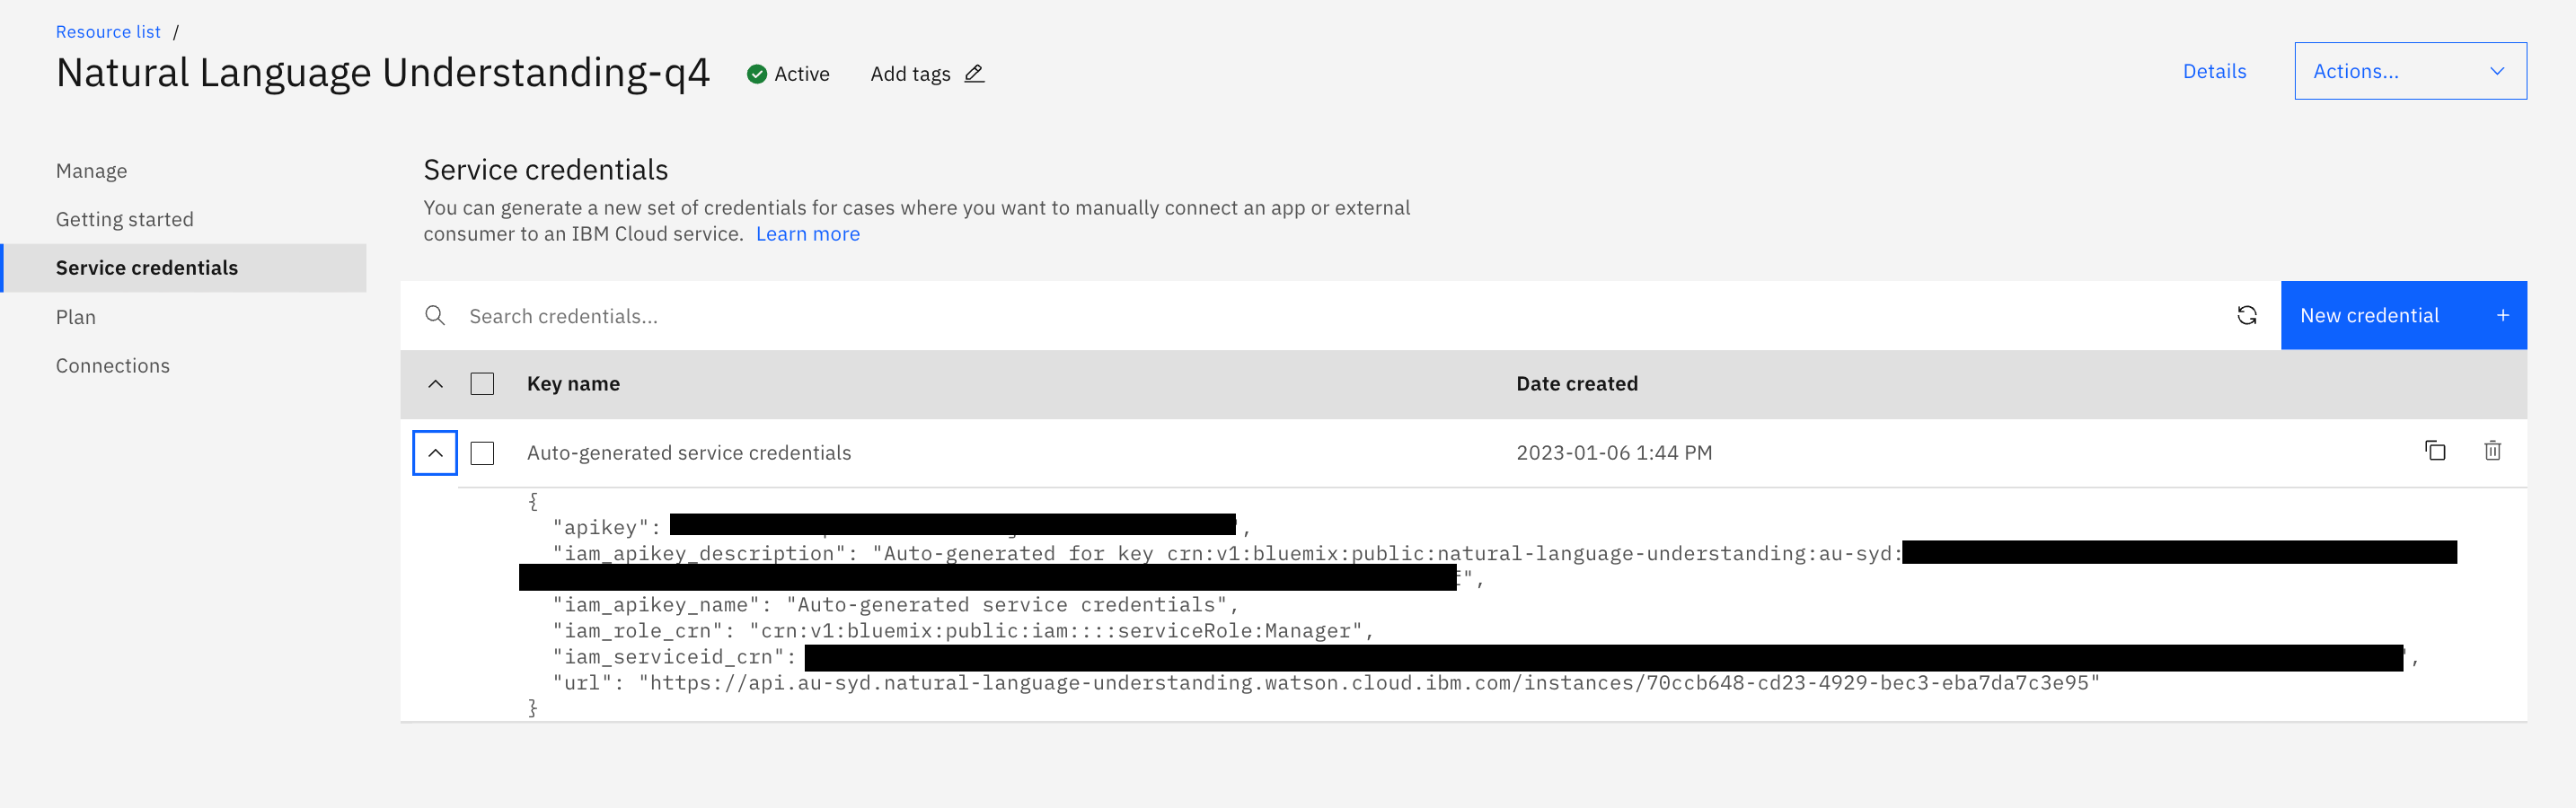
Copy this to a text file to use later.
In the top of the screen click on Catalog to go back to the Catalog of services.

On the left hand side enter watson in the search bar and hit enter to see the catalog of Watson services.
Scroll down and click on Text to Speech to create the TTS service.
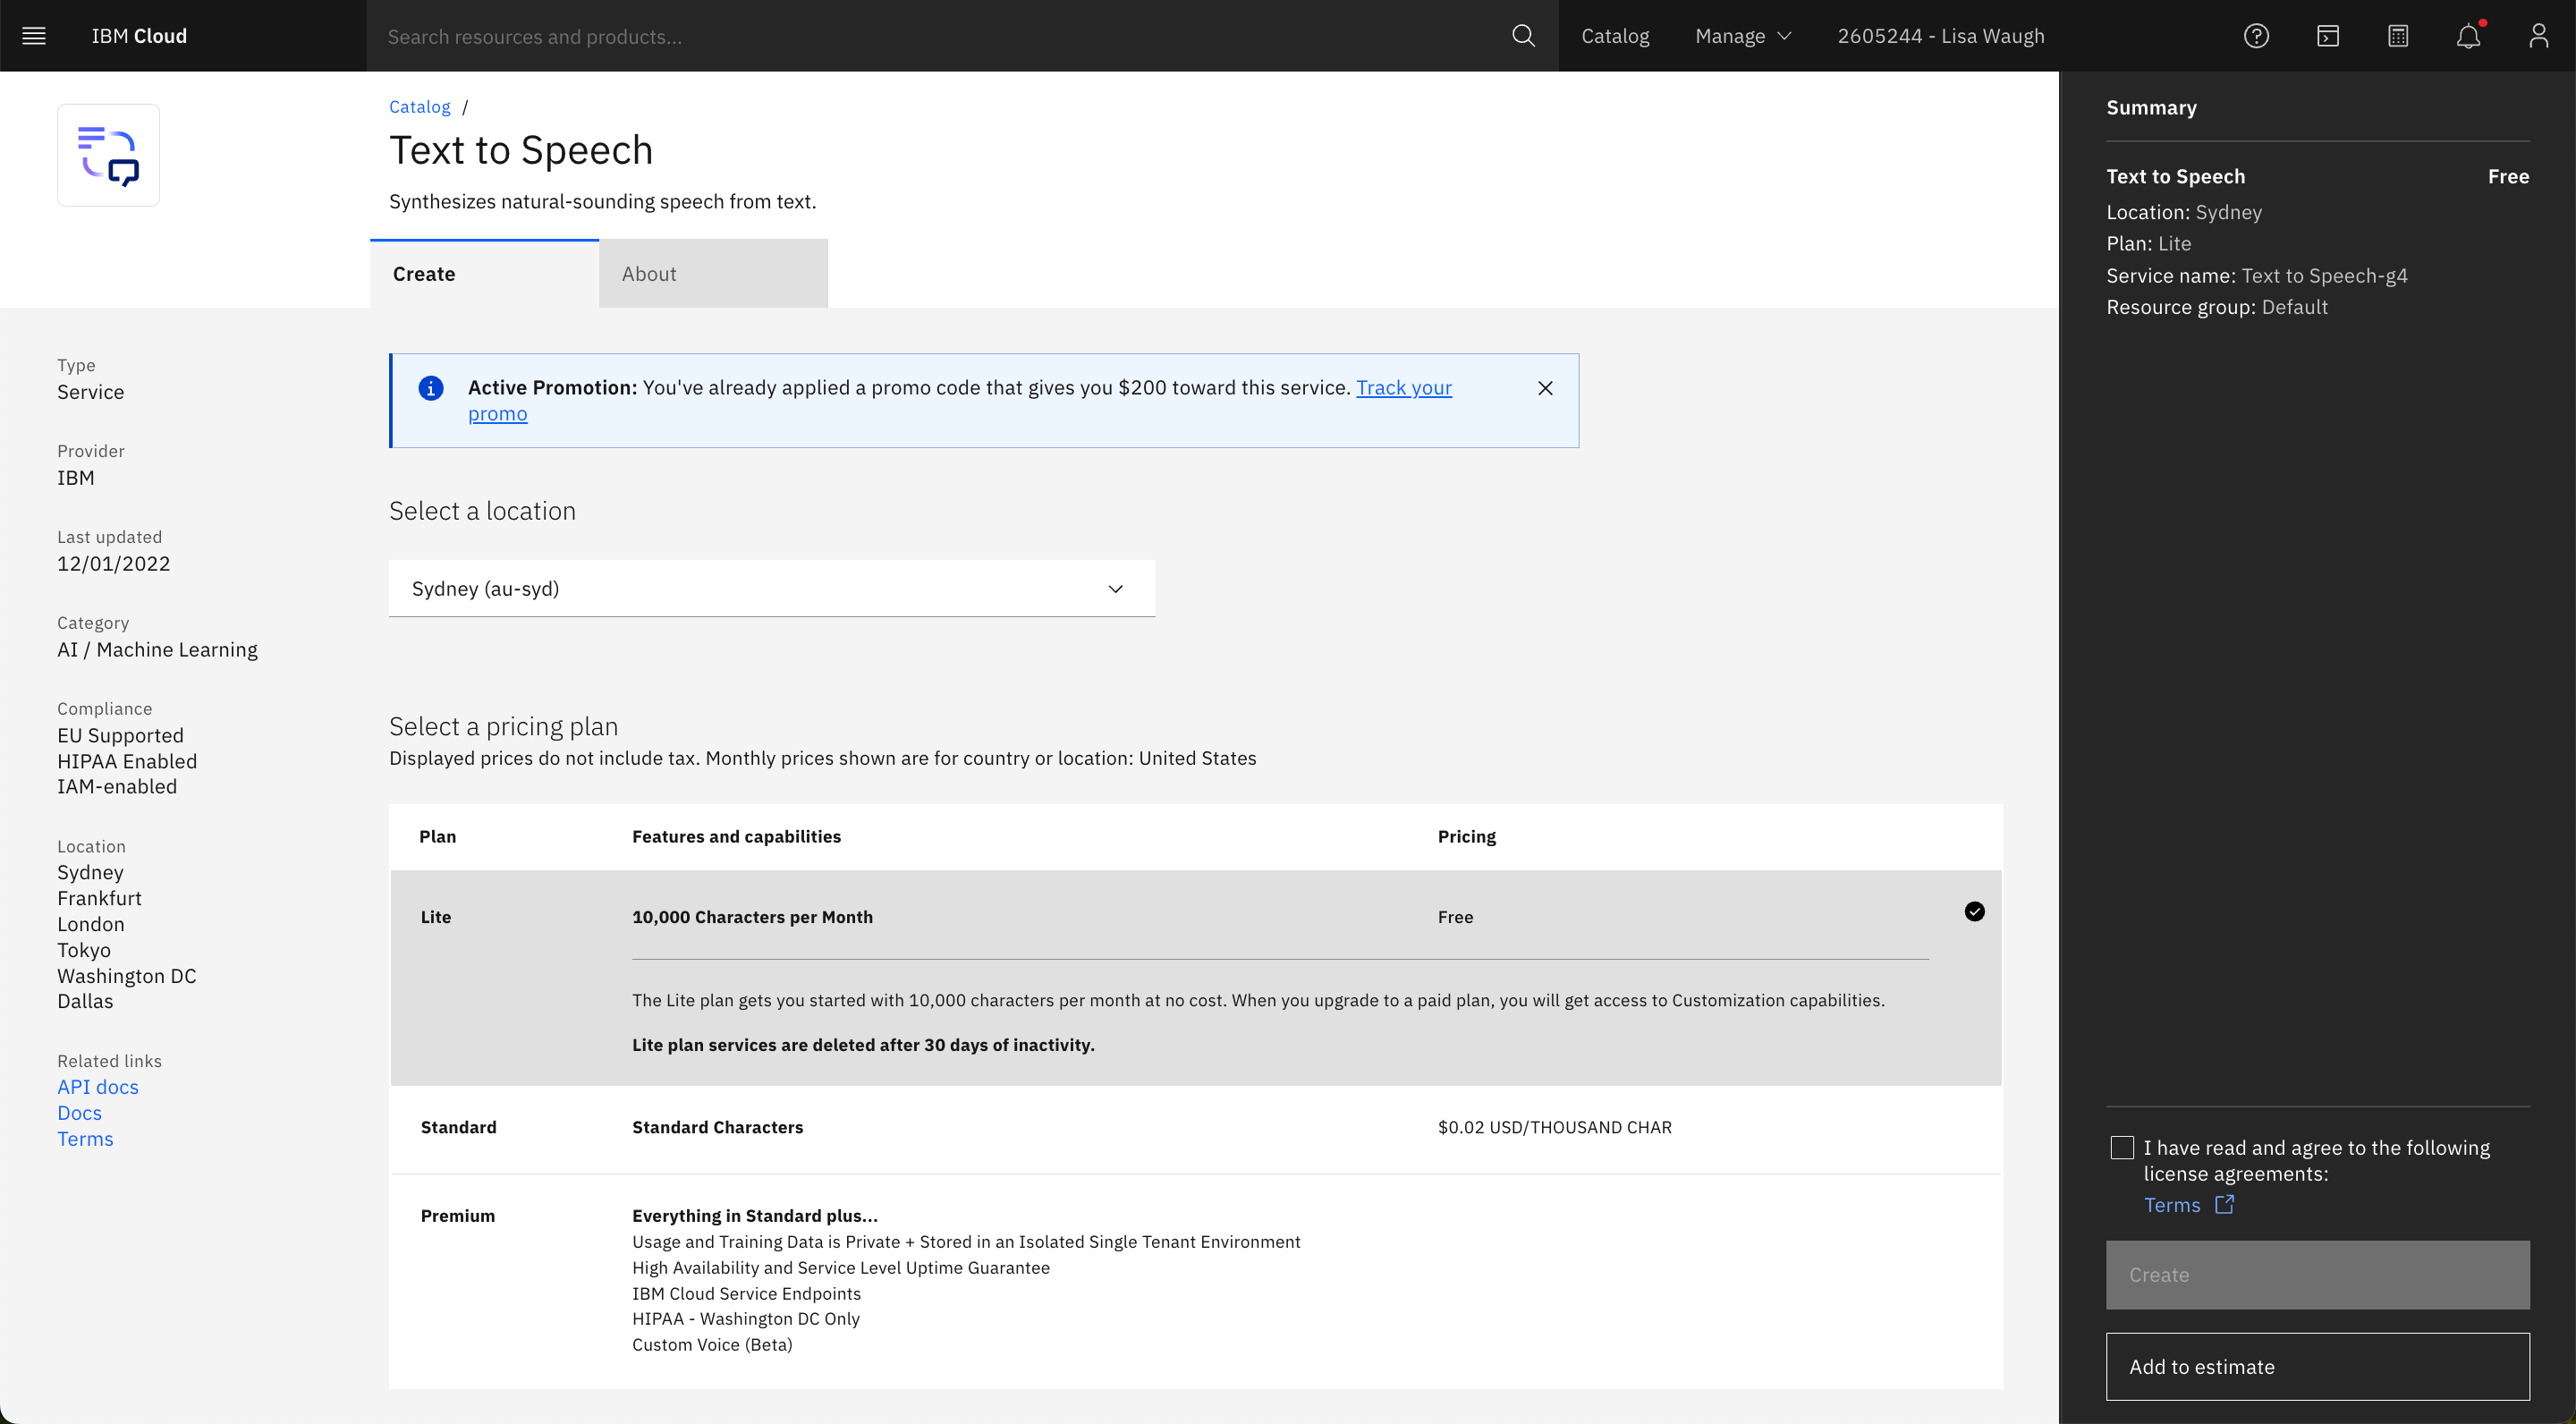
Make sure that the Lite Plan is selected. Read and select I have read and agree to the following license agreements and click on Create.
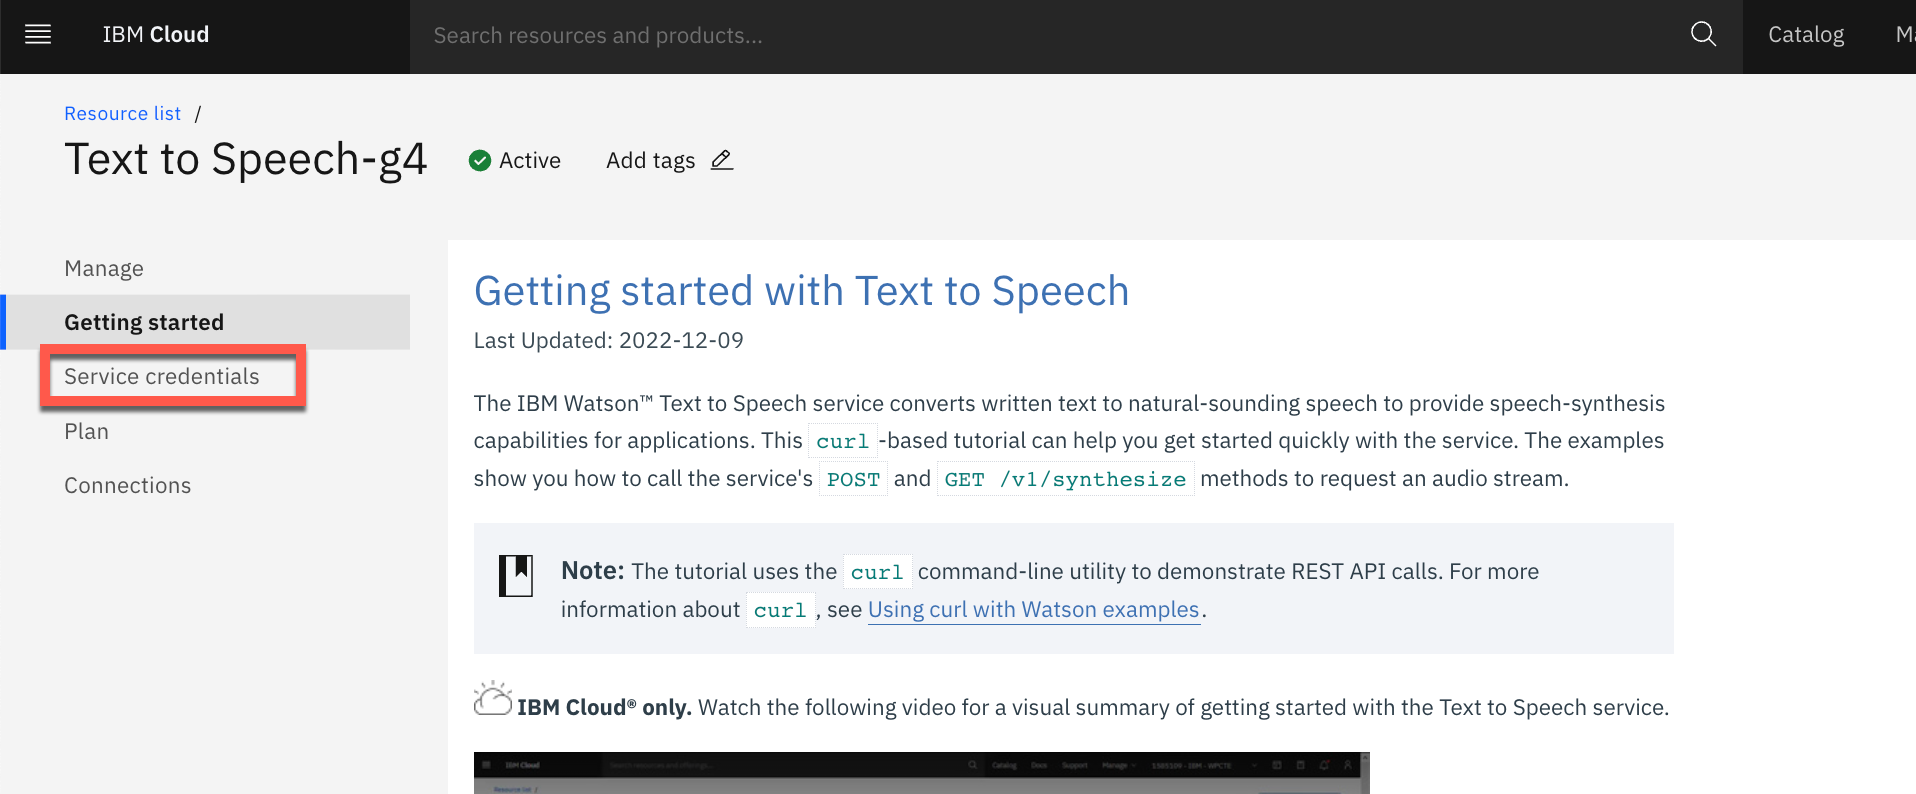
Click on Service credentials
Click on the v before Auto-generated service credentials to view the credentials.
Copy the credentials for use later.
In the top of the screen click on Catalog to go back to the Catalog of services.
On the left hand side enter watson in the search bar and hit enter to see the catalog of Watson services.
Scroll down and click on Speech to Text.
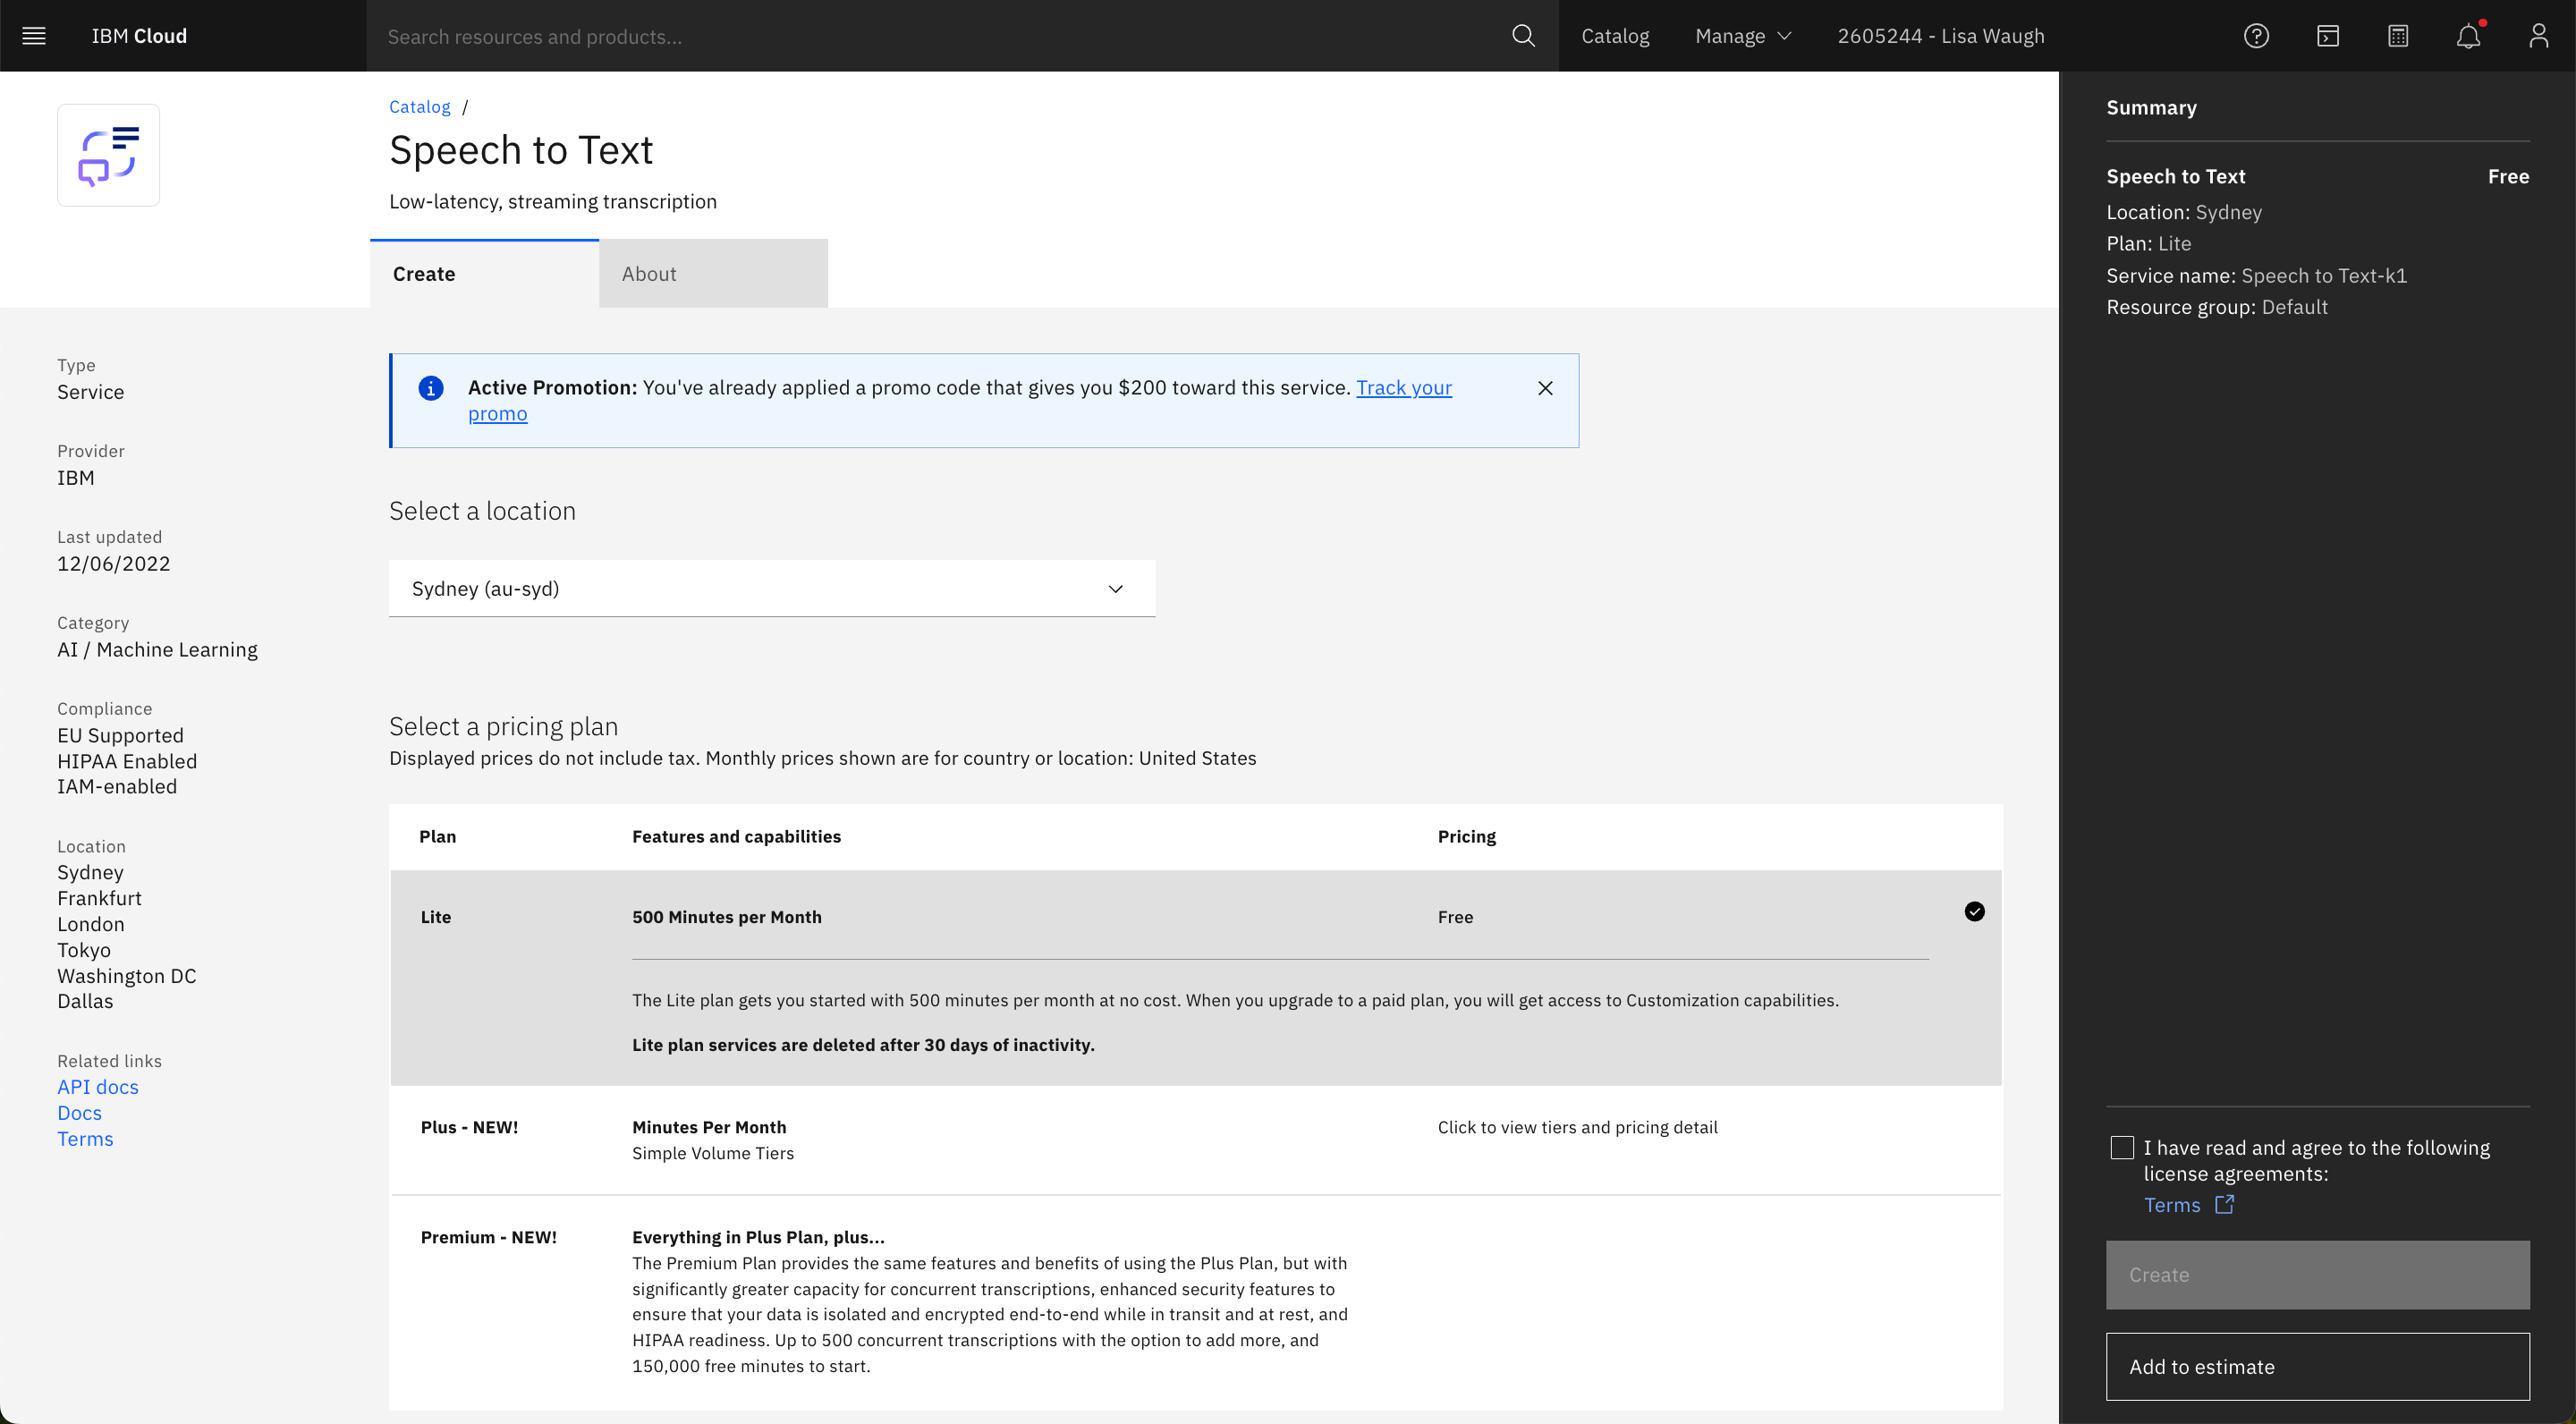
Make sure that the Lite Plan is selected. Read and select I have read and agree to the following license agreements and click on Create.
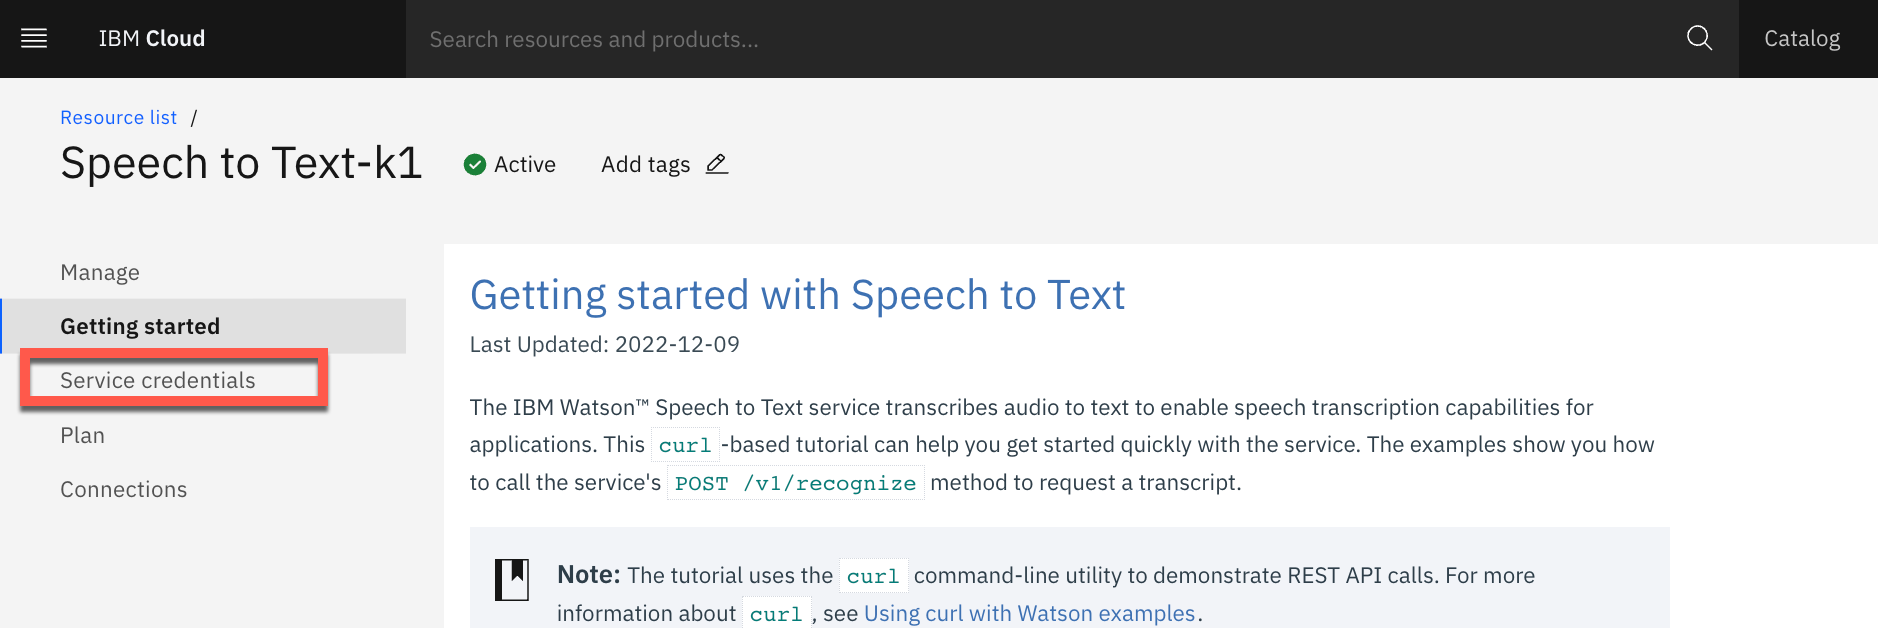
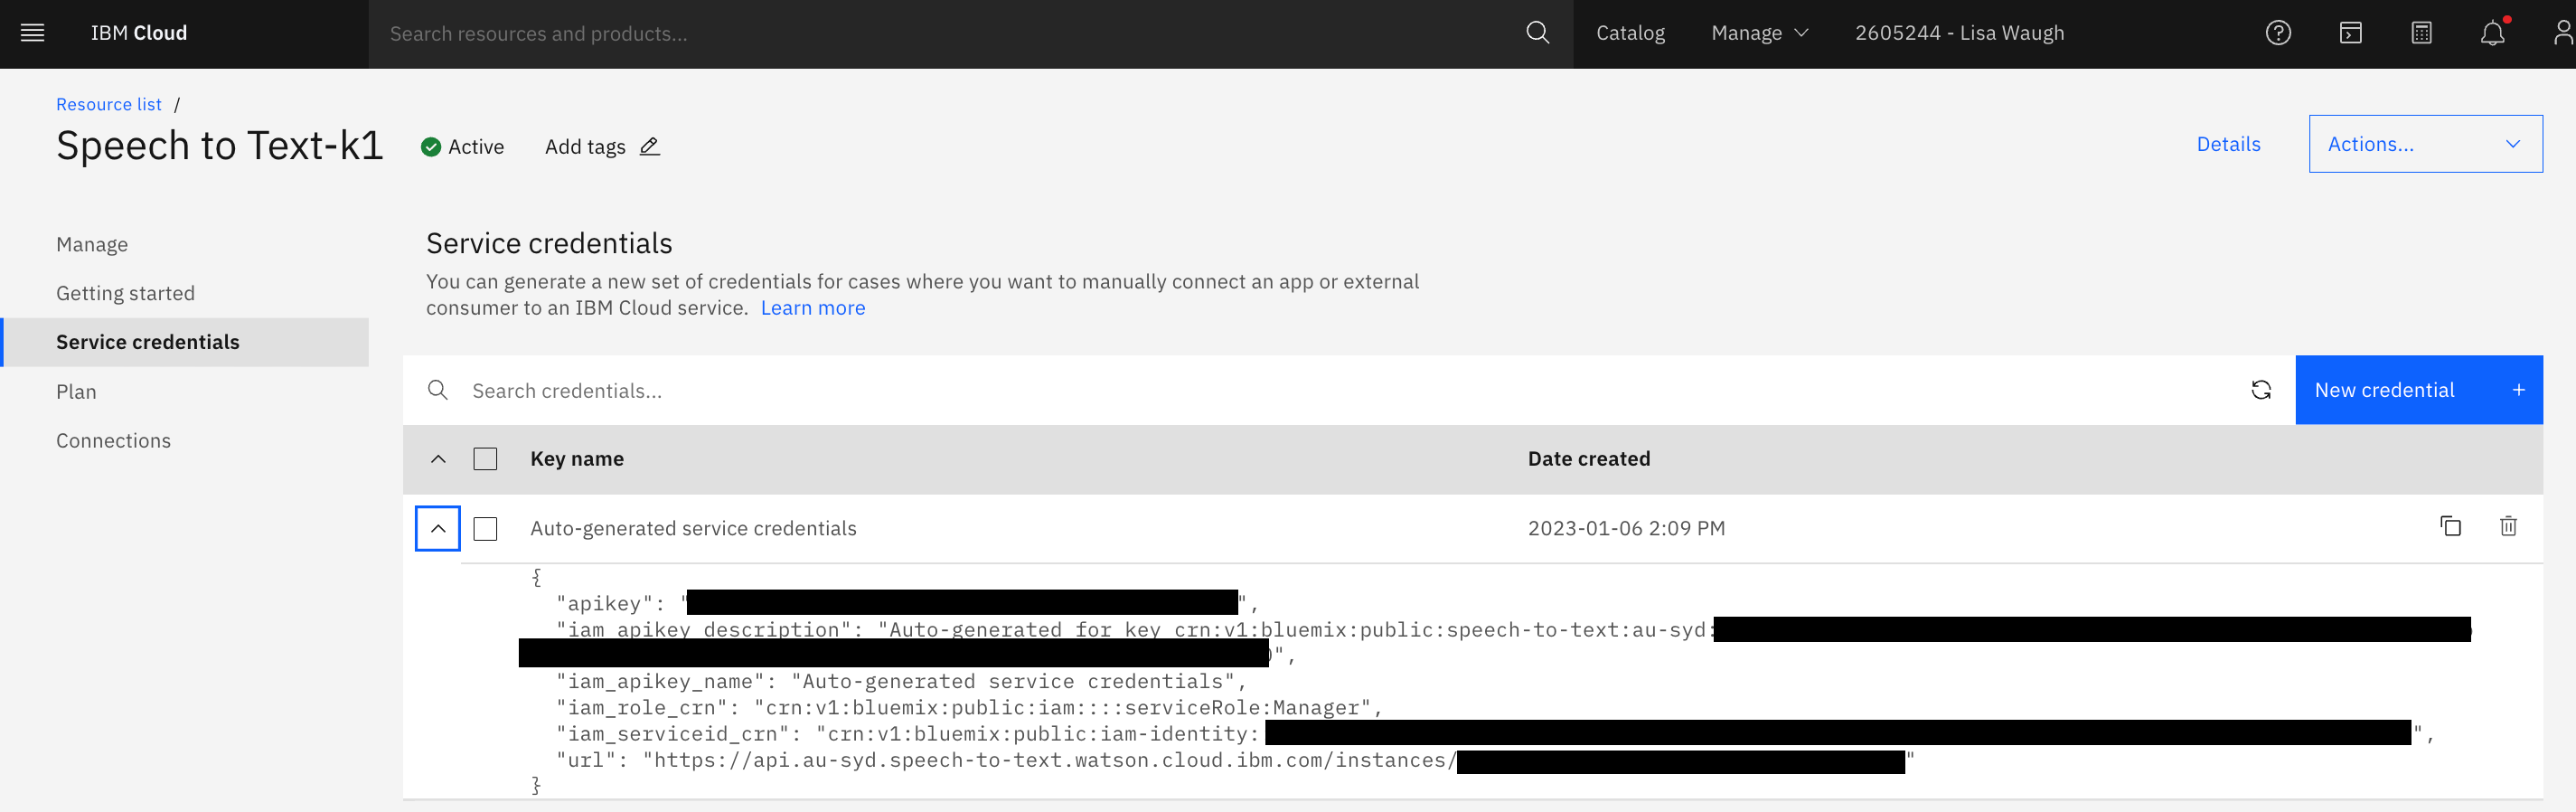
Then on the left hand side, click on Service credentials.
Click on the v before Auto-generated service credentials to view the credentials.
Copy the credentials to a text file.
In the top of the screen click on Catalog to go back to the Catalog of services.

On the left hand side enter watson in the search bar and hit enter to see the catalog of Watson services.
Click on Watson Assistant.
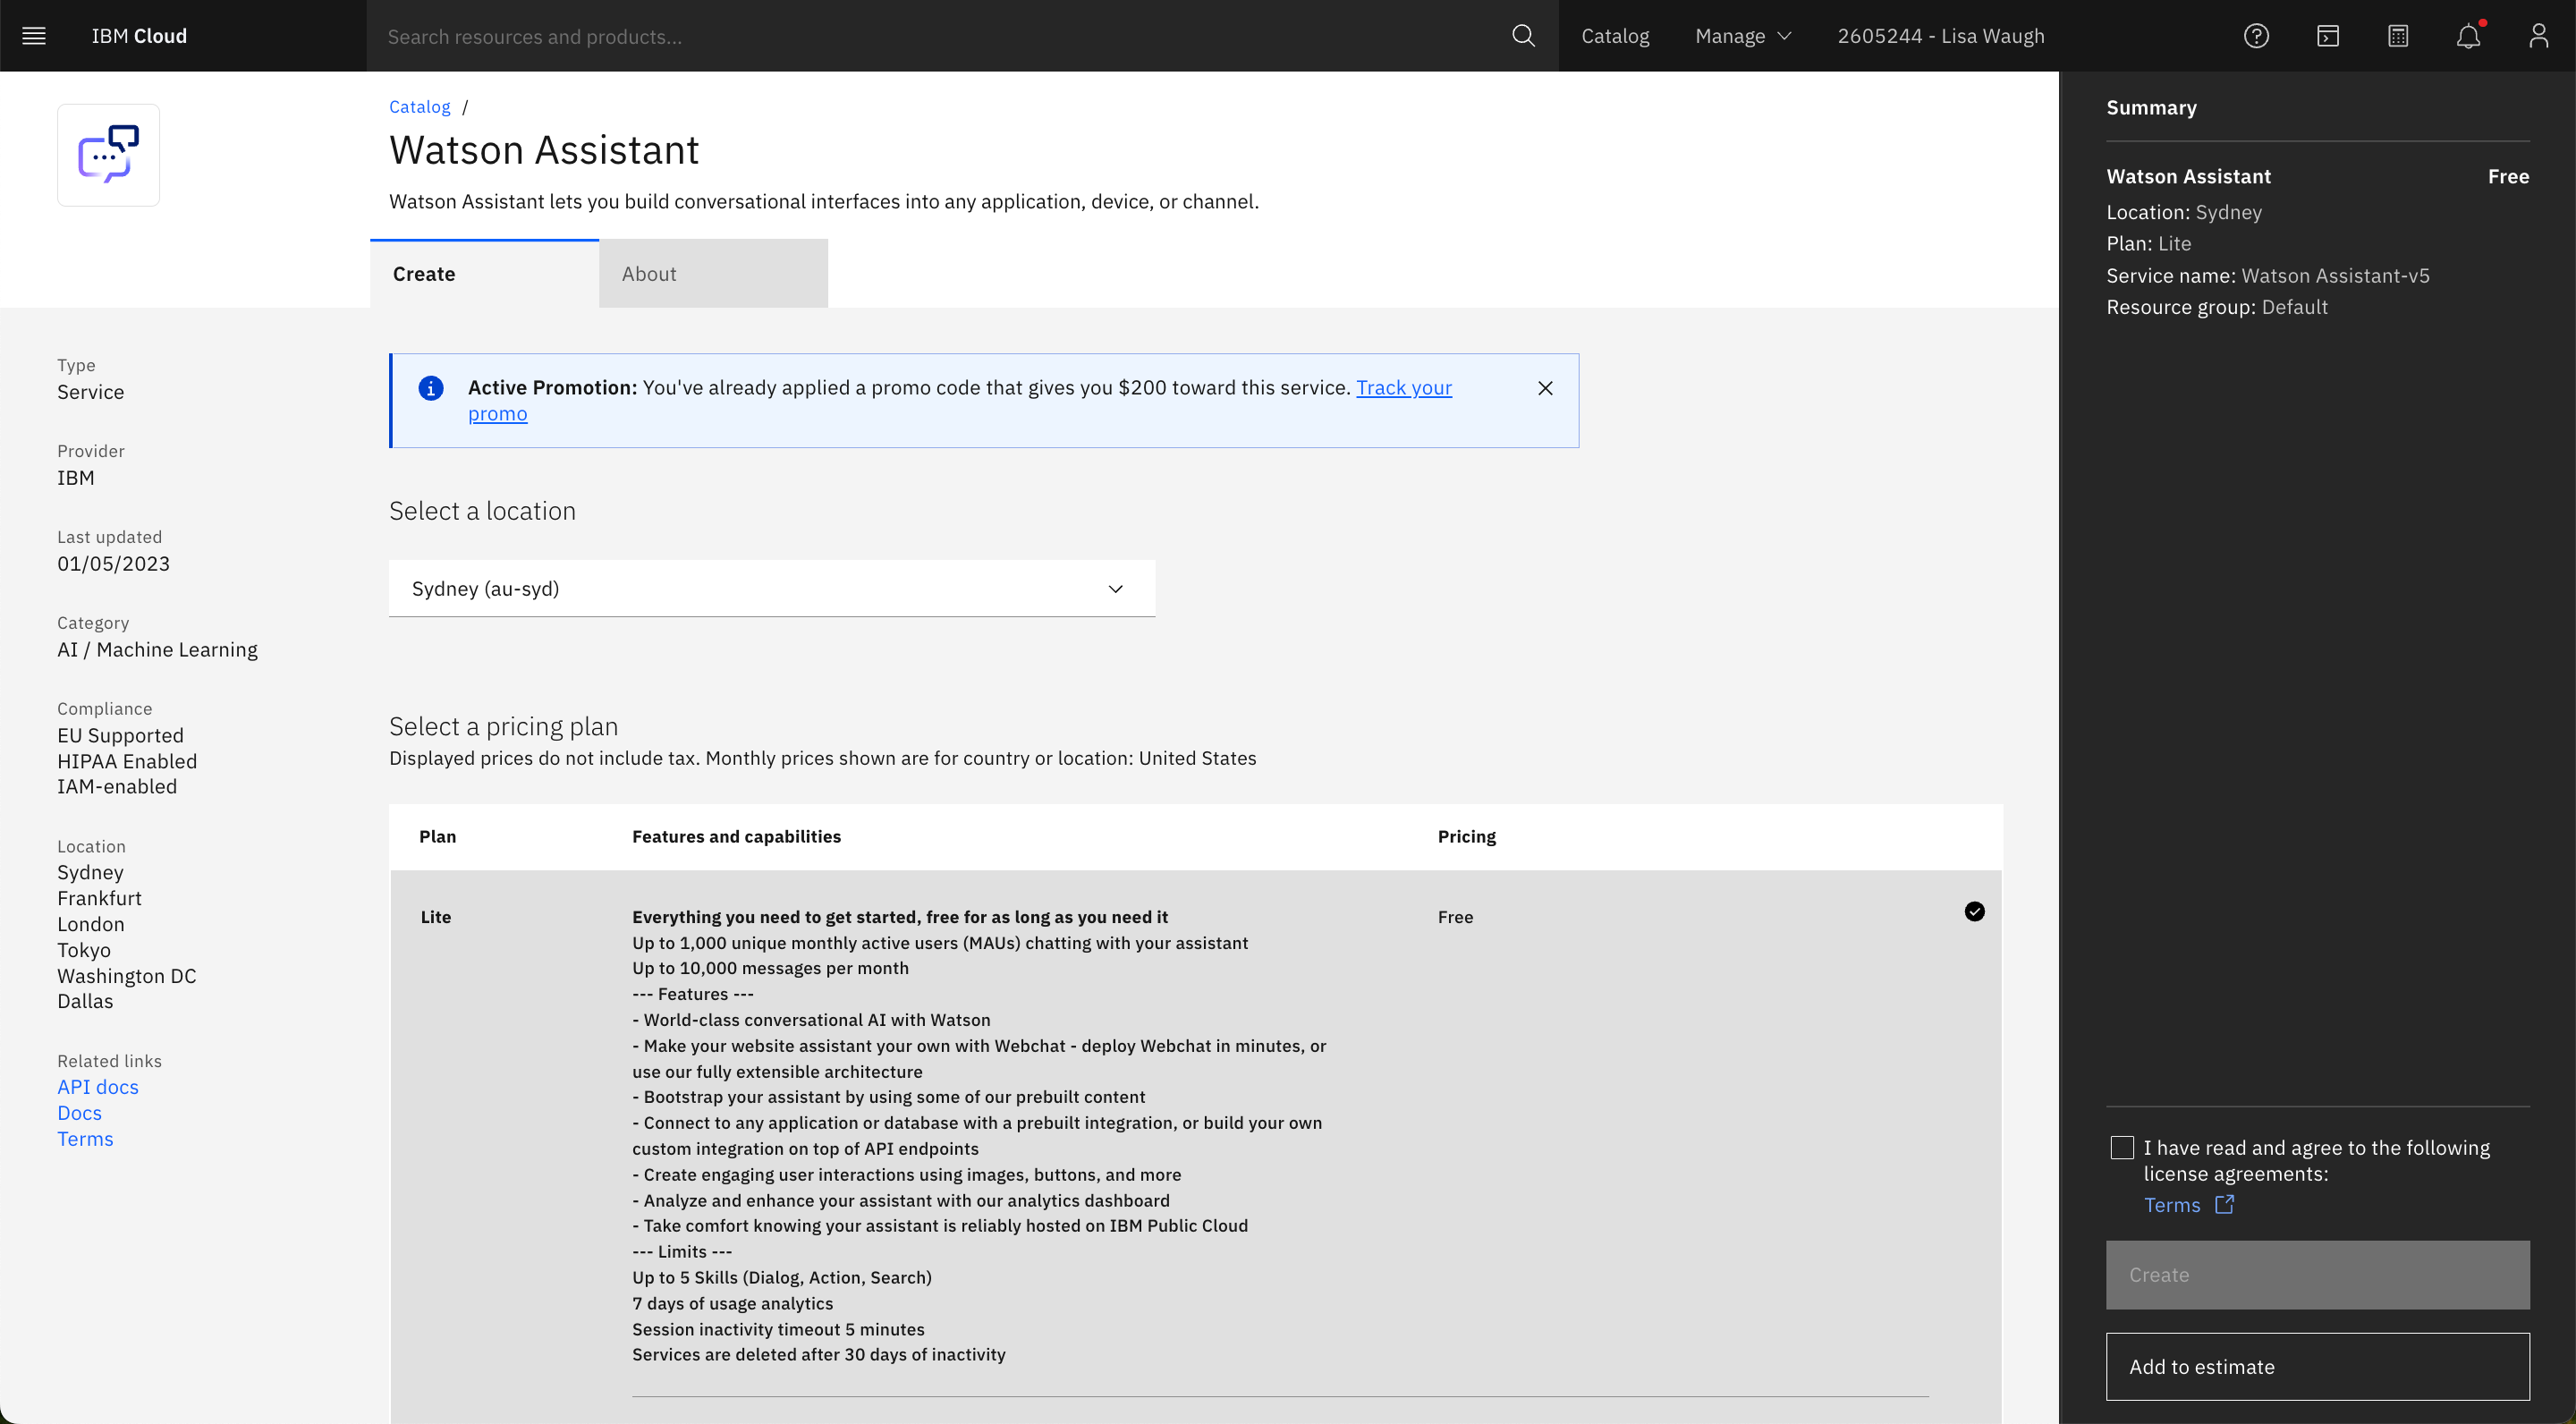
Make sure that the Lite Plan is selected. Read and select I have read and agree to the following license agreements and click on Create.
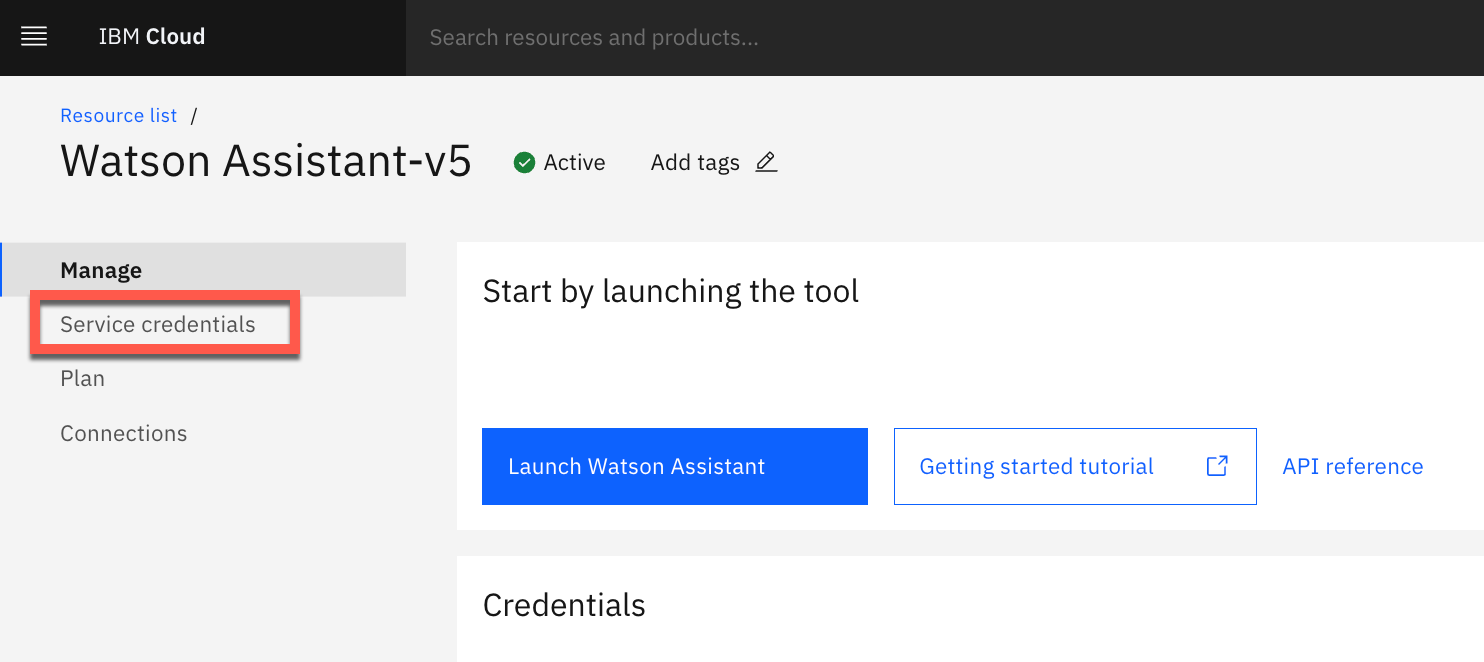
Then on the left hand side, click on Service credentials.
Click on the v before Auto-generated service credentials to view the credentials.
Copy the credentials to a text file for later use.

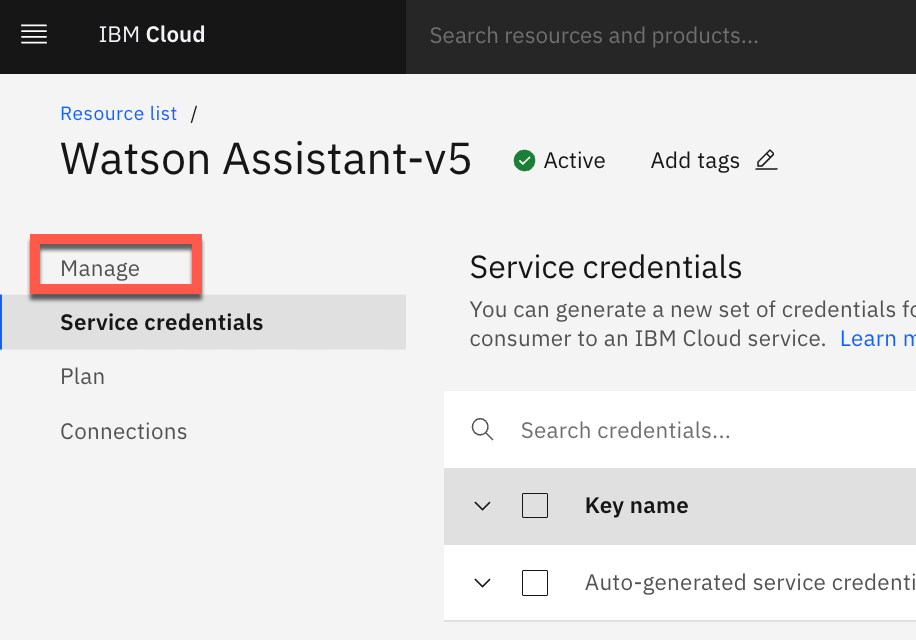
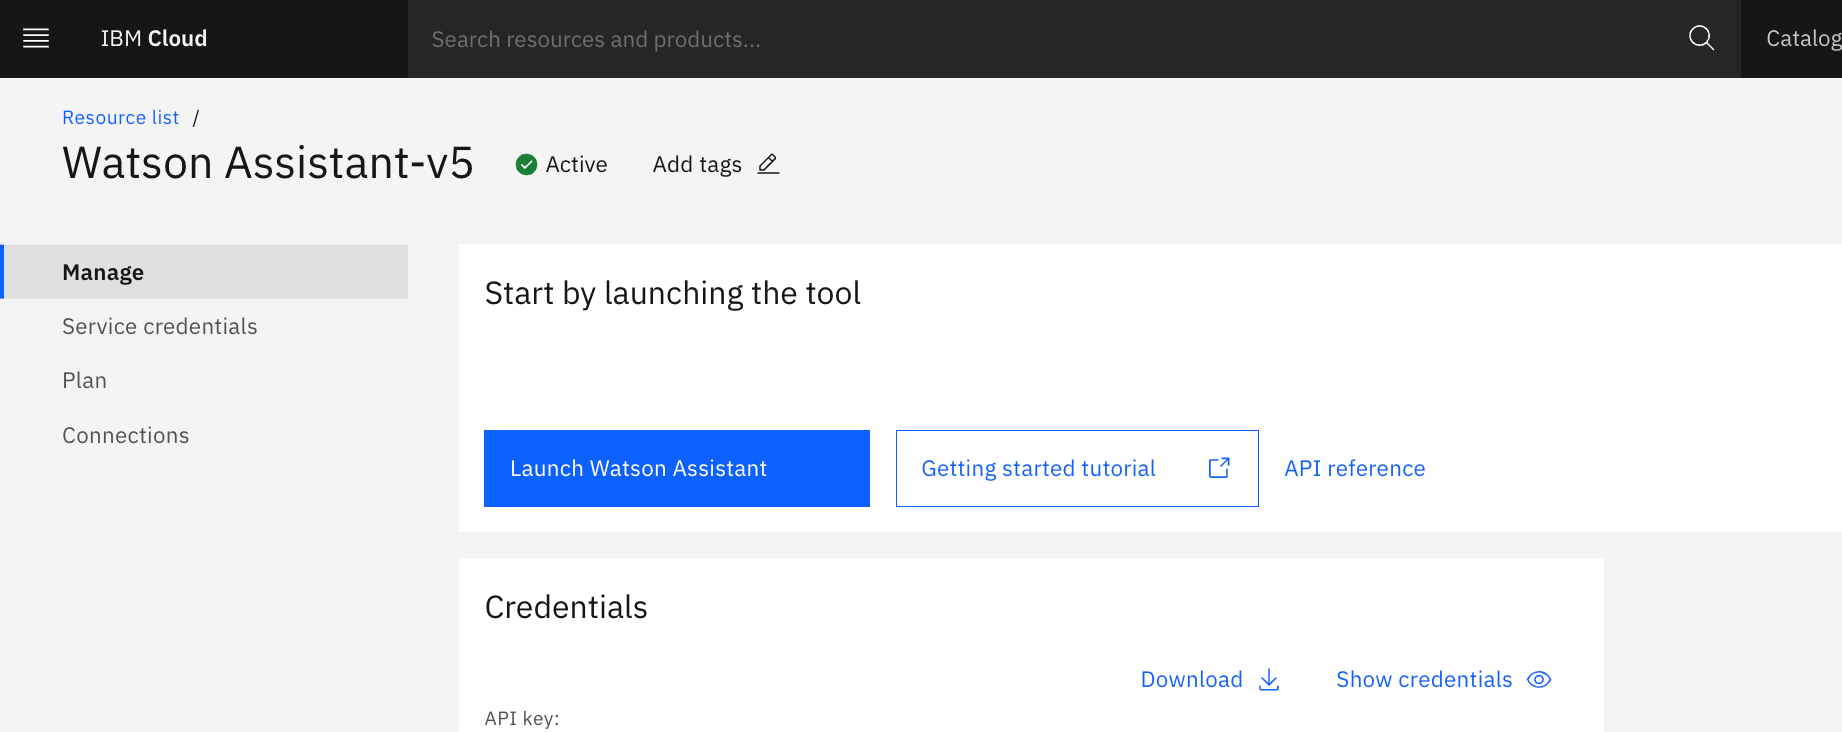
Click on Manage on the left hand side.
Then click on Launch Watson Assistant.
Click on Log in with IBM ID.

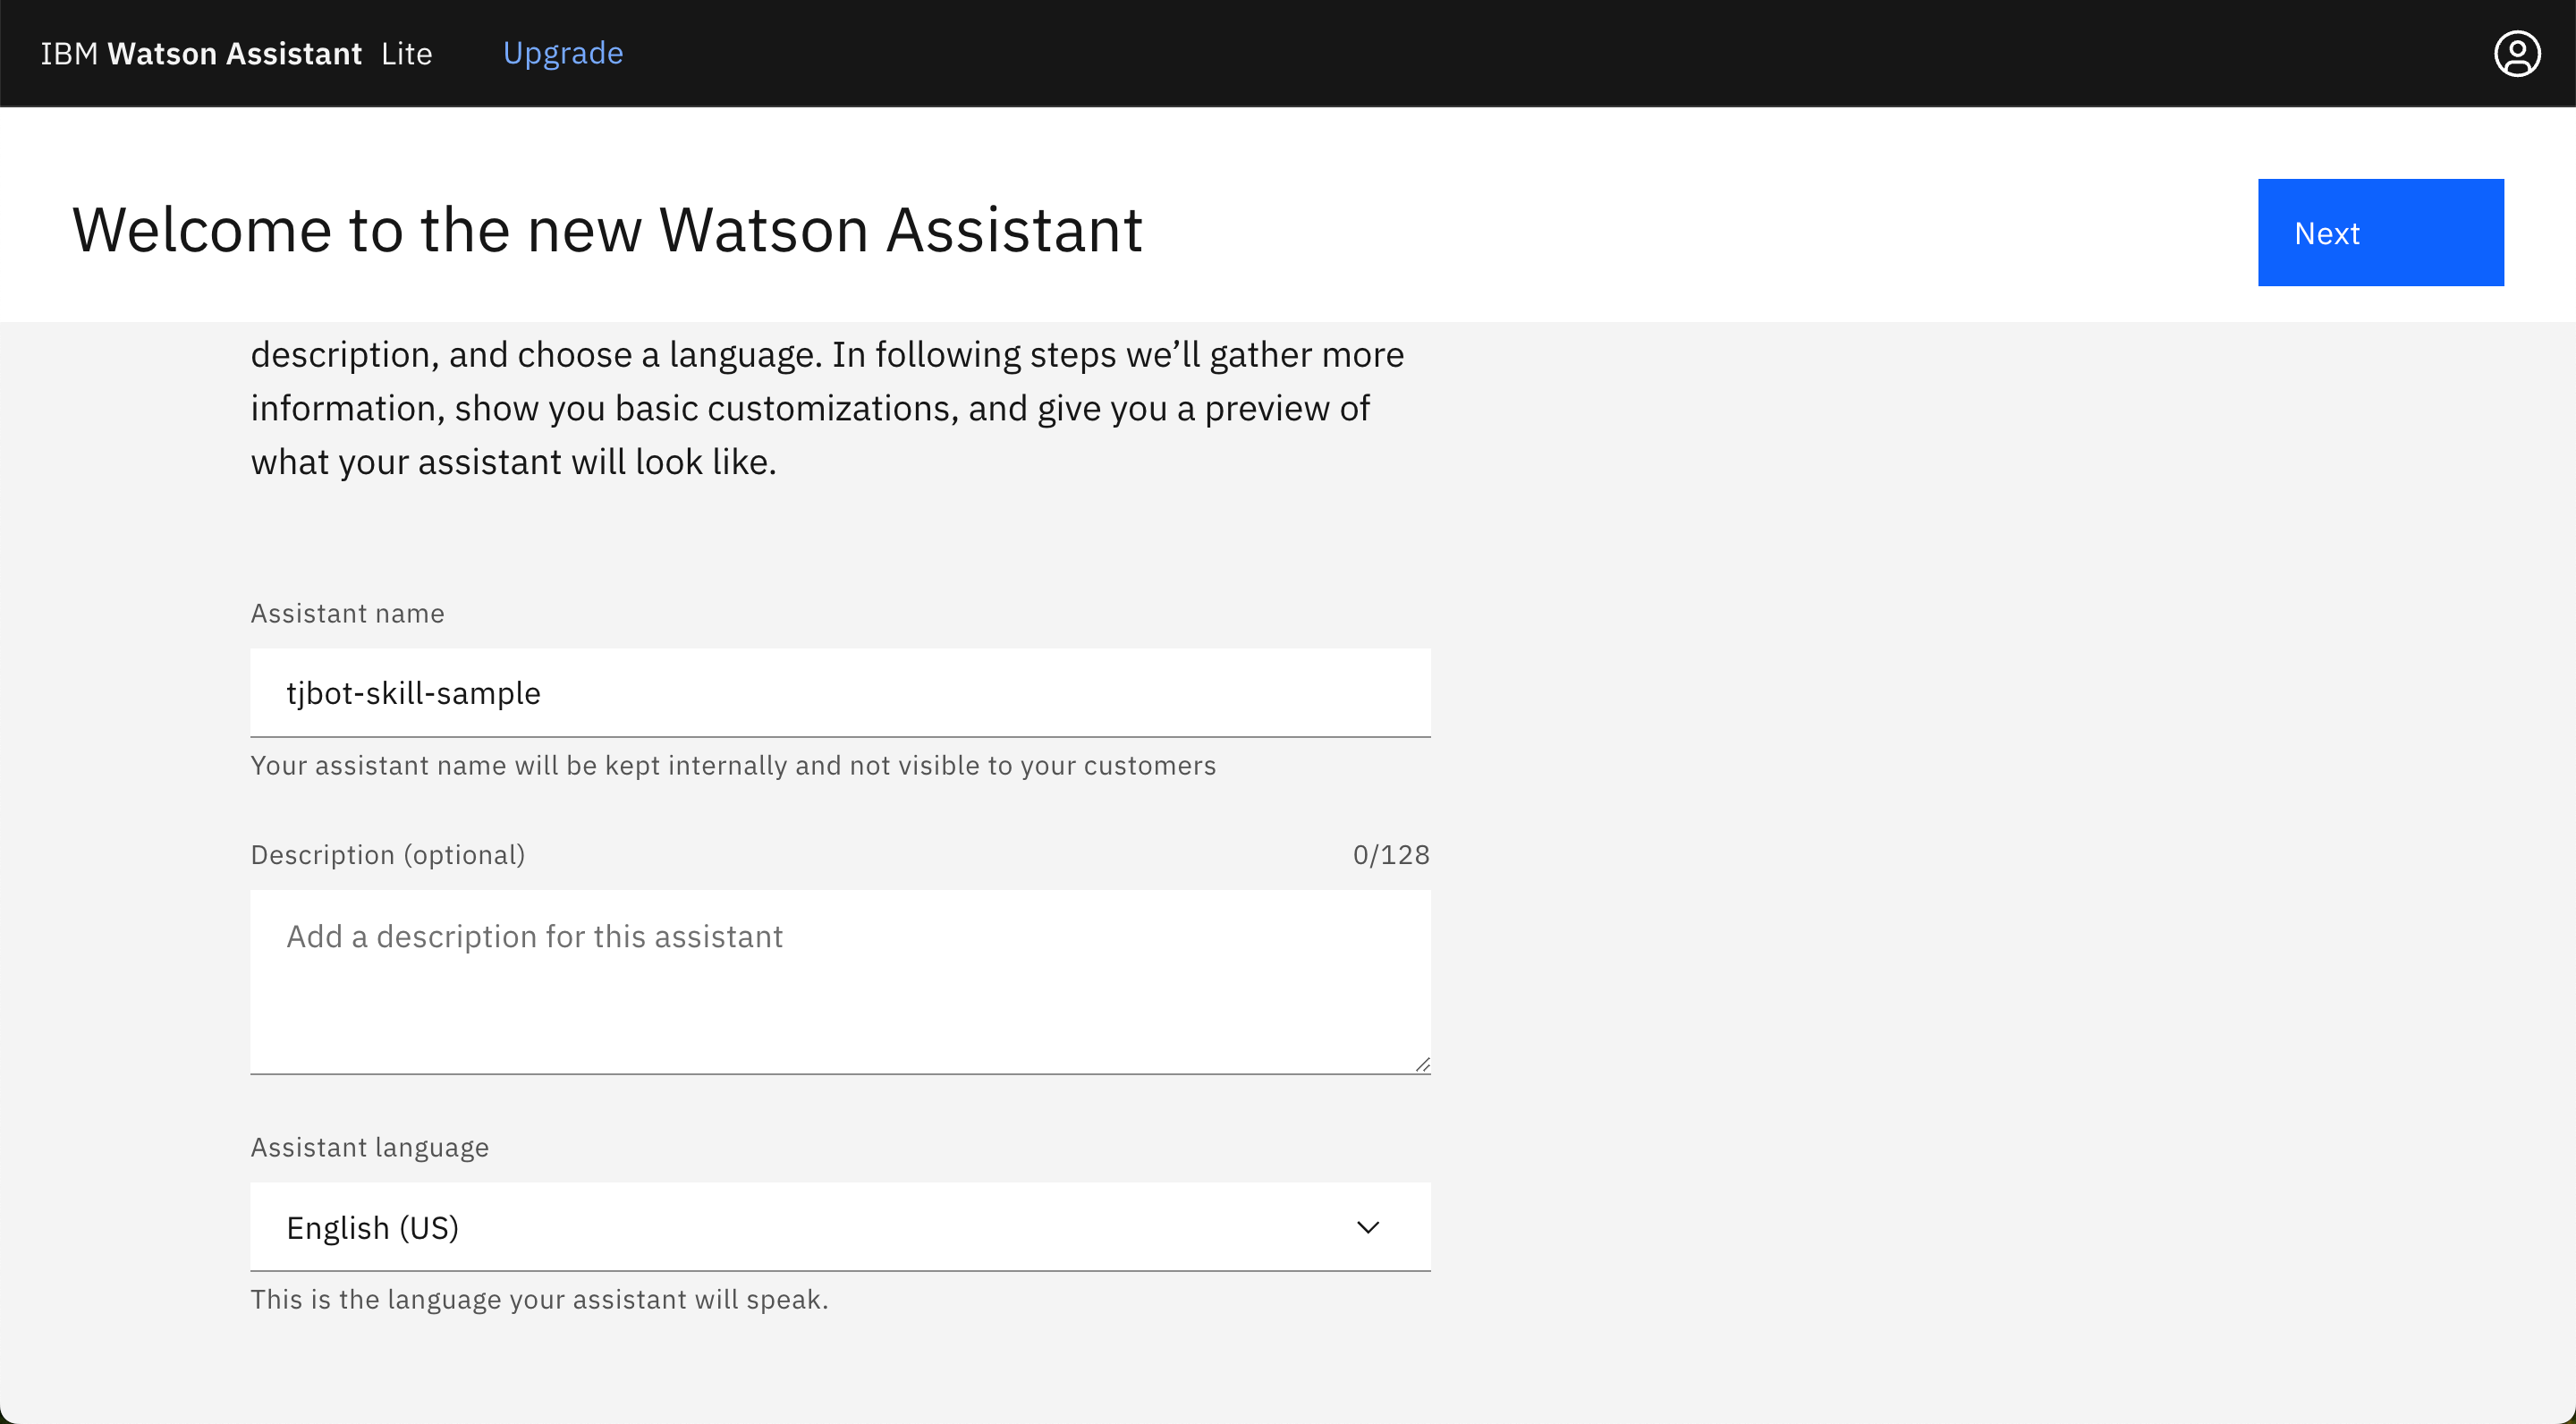
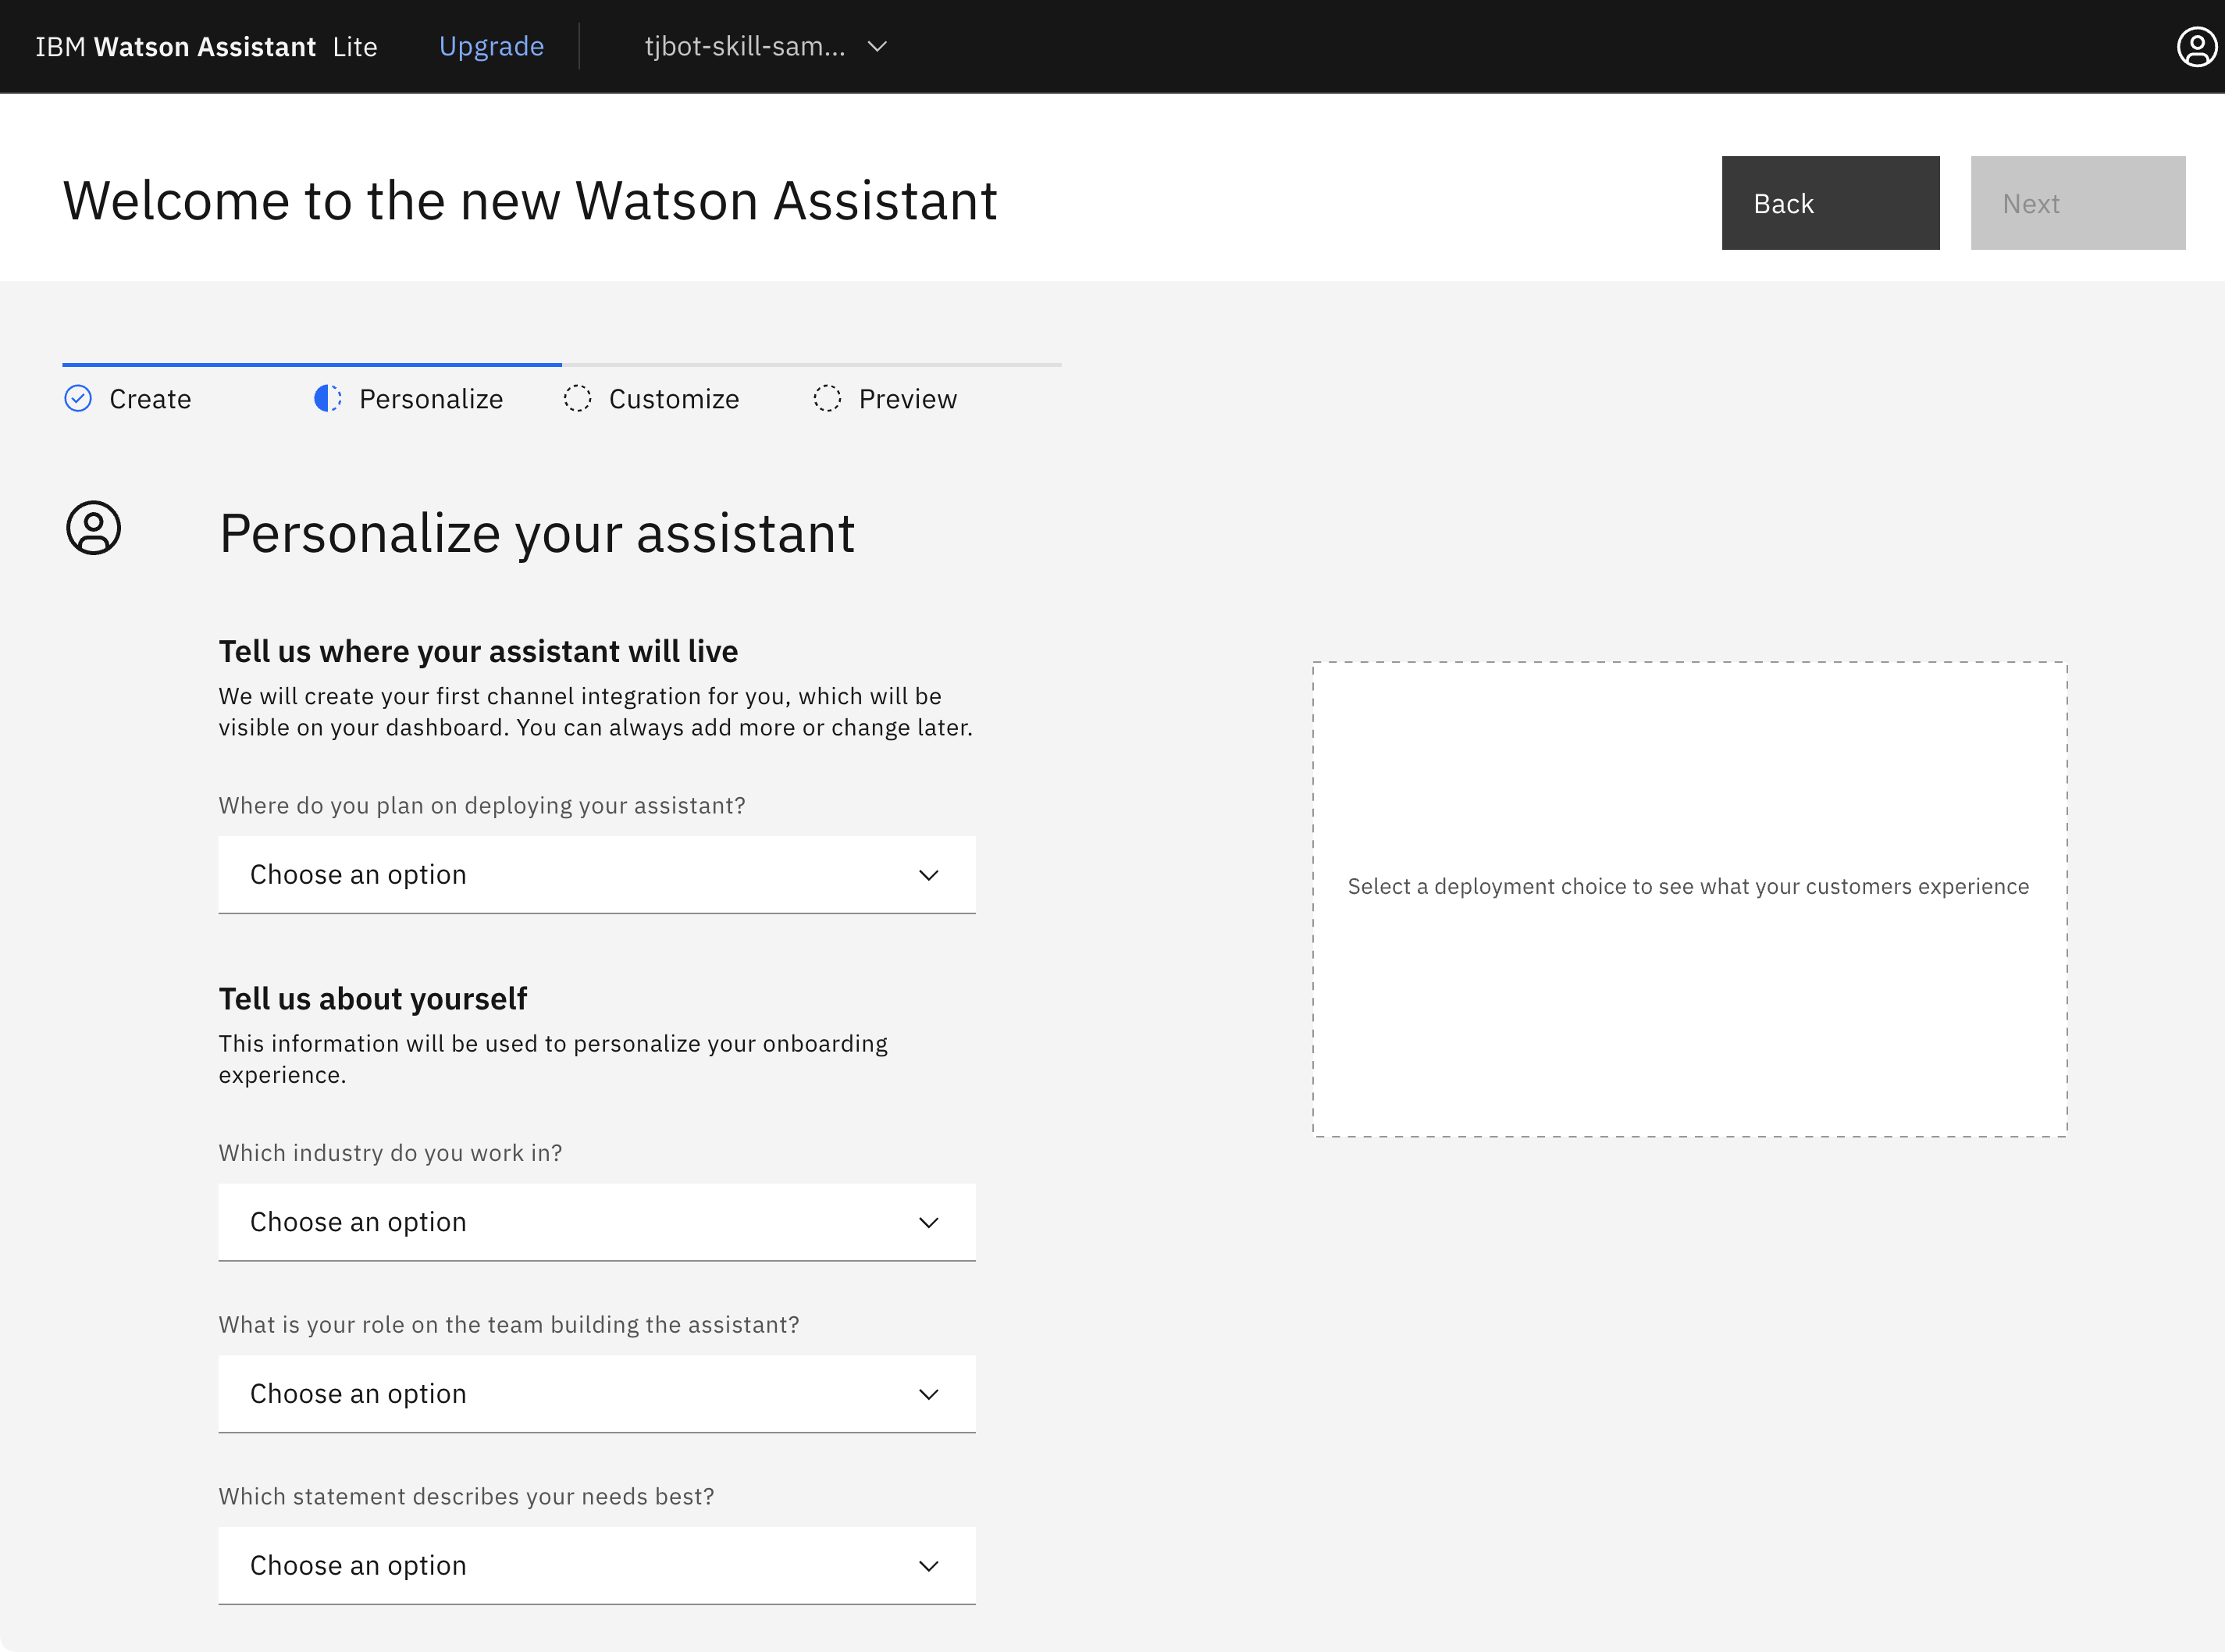
Enter Assistant name, tjbot-skill-sample, and click Next.
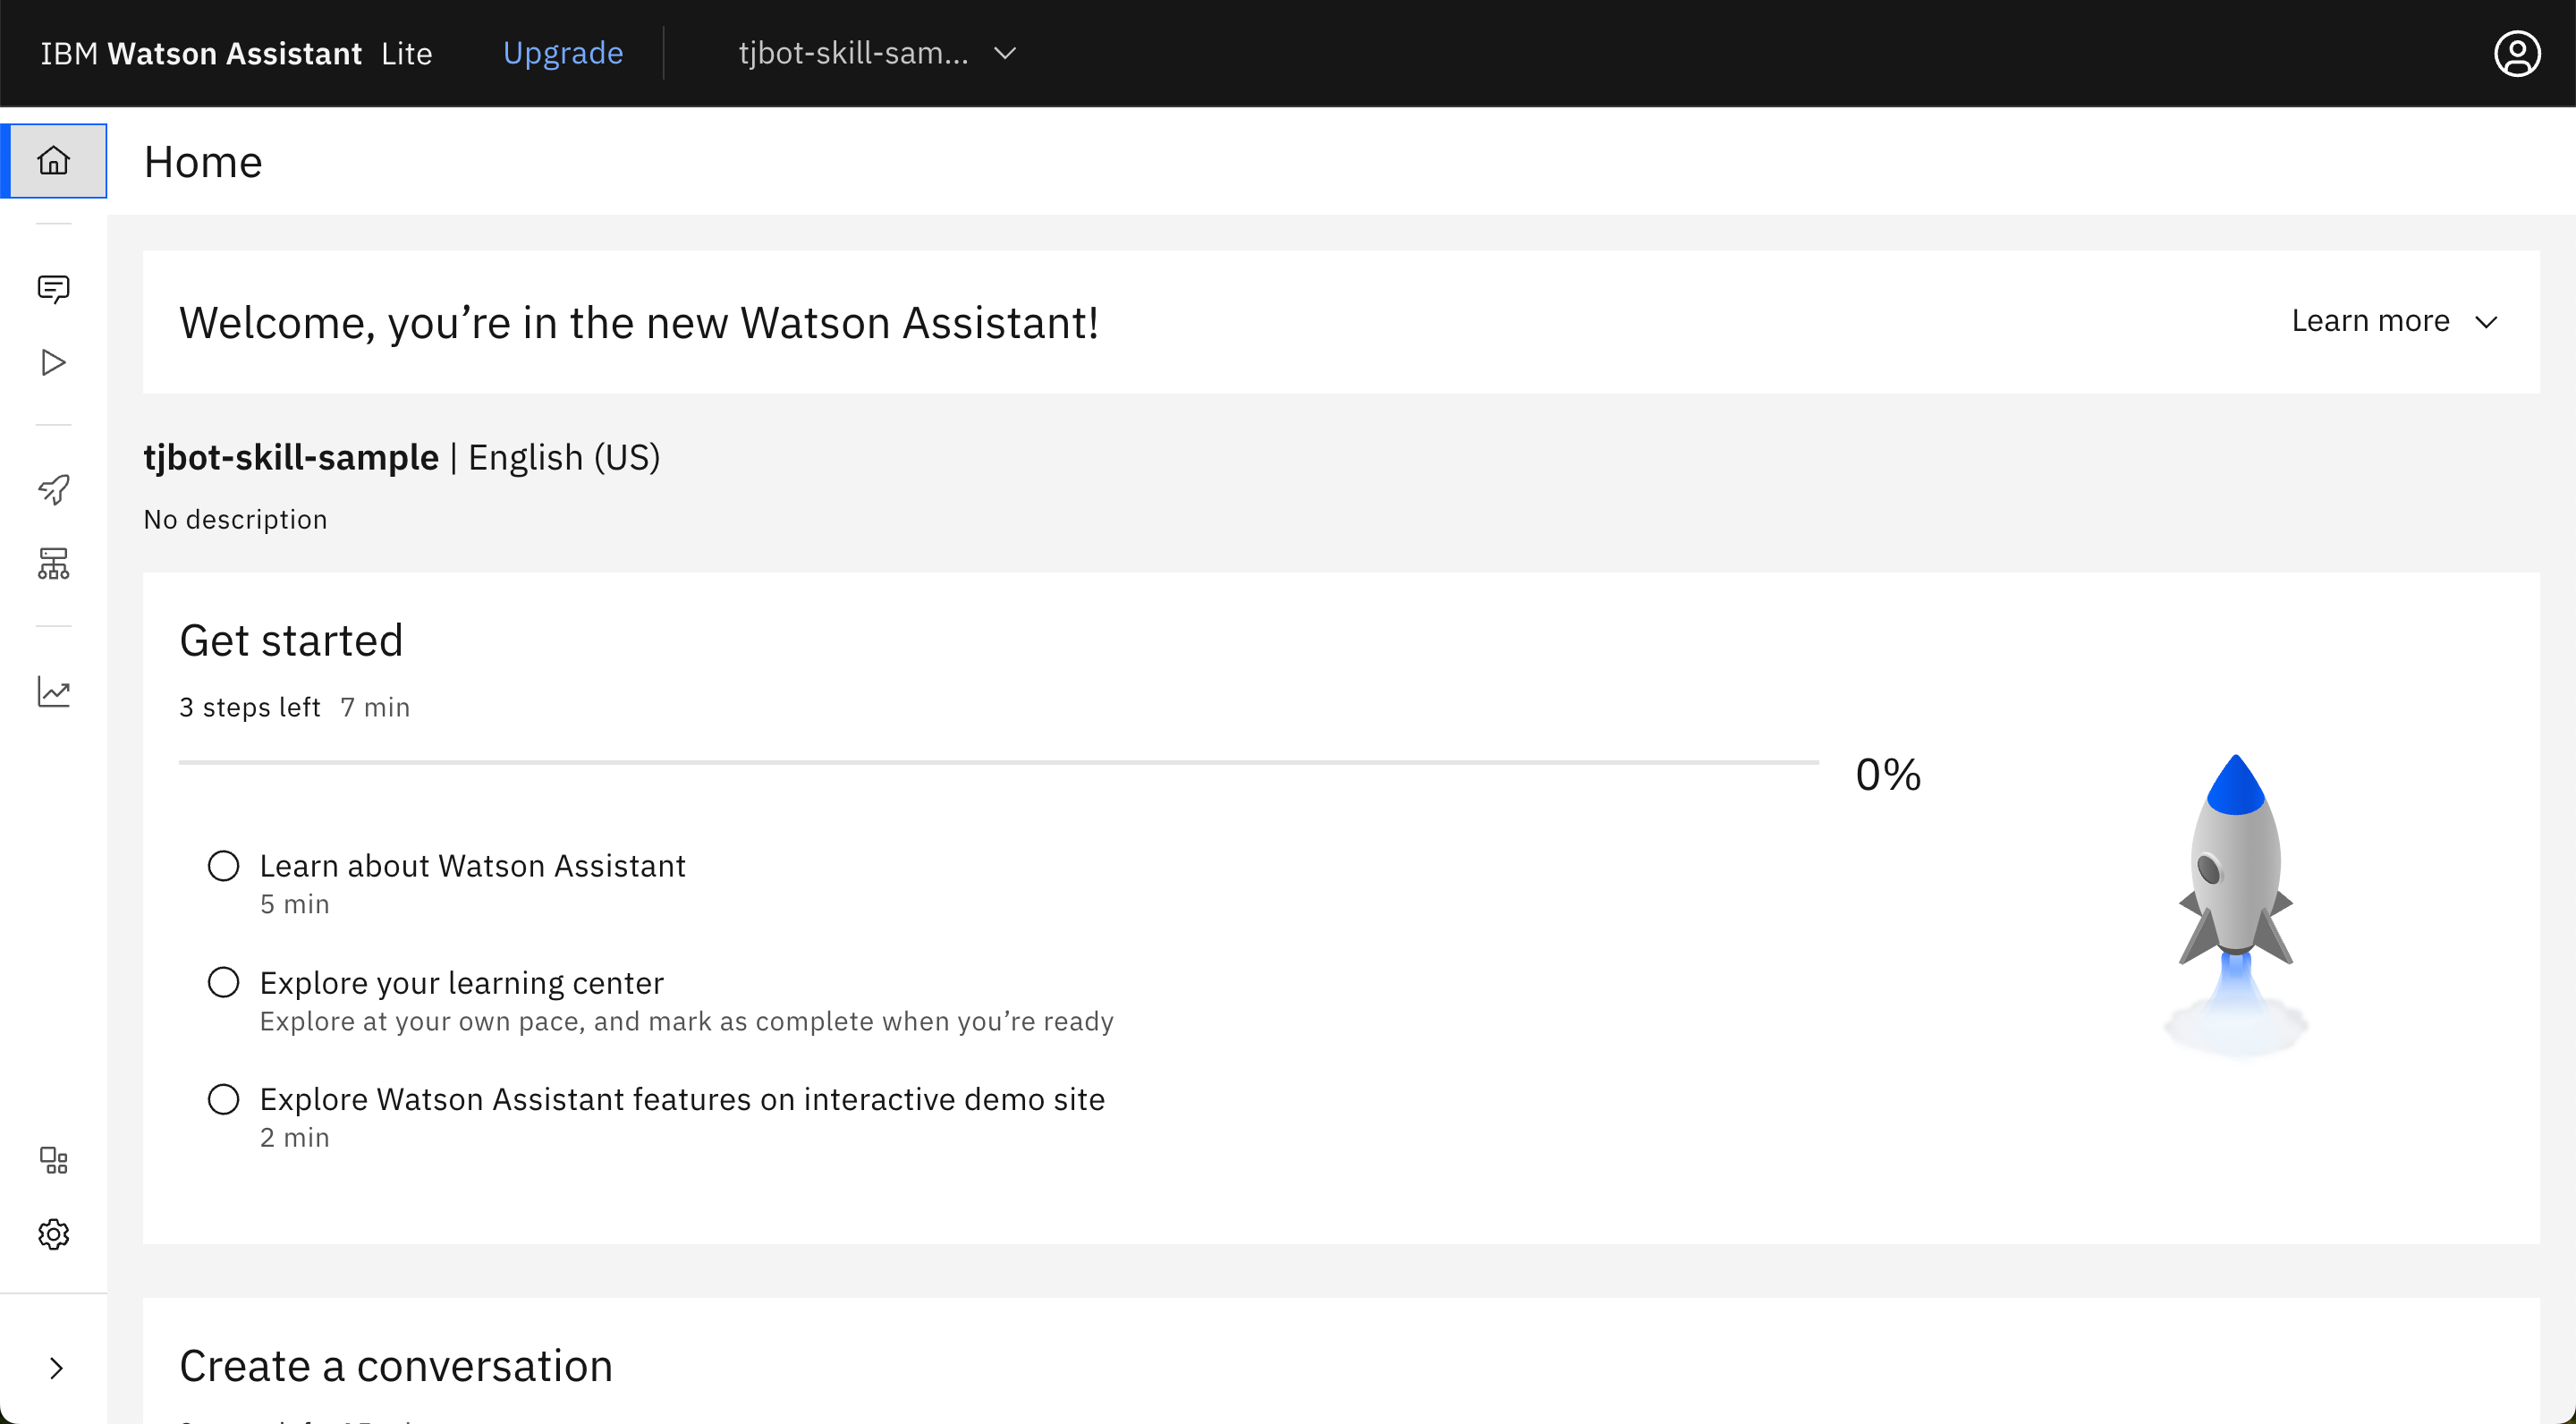
Hover over House icon and the left navigation bar will expand.
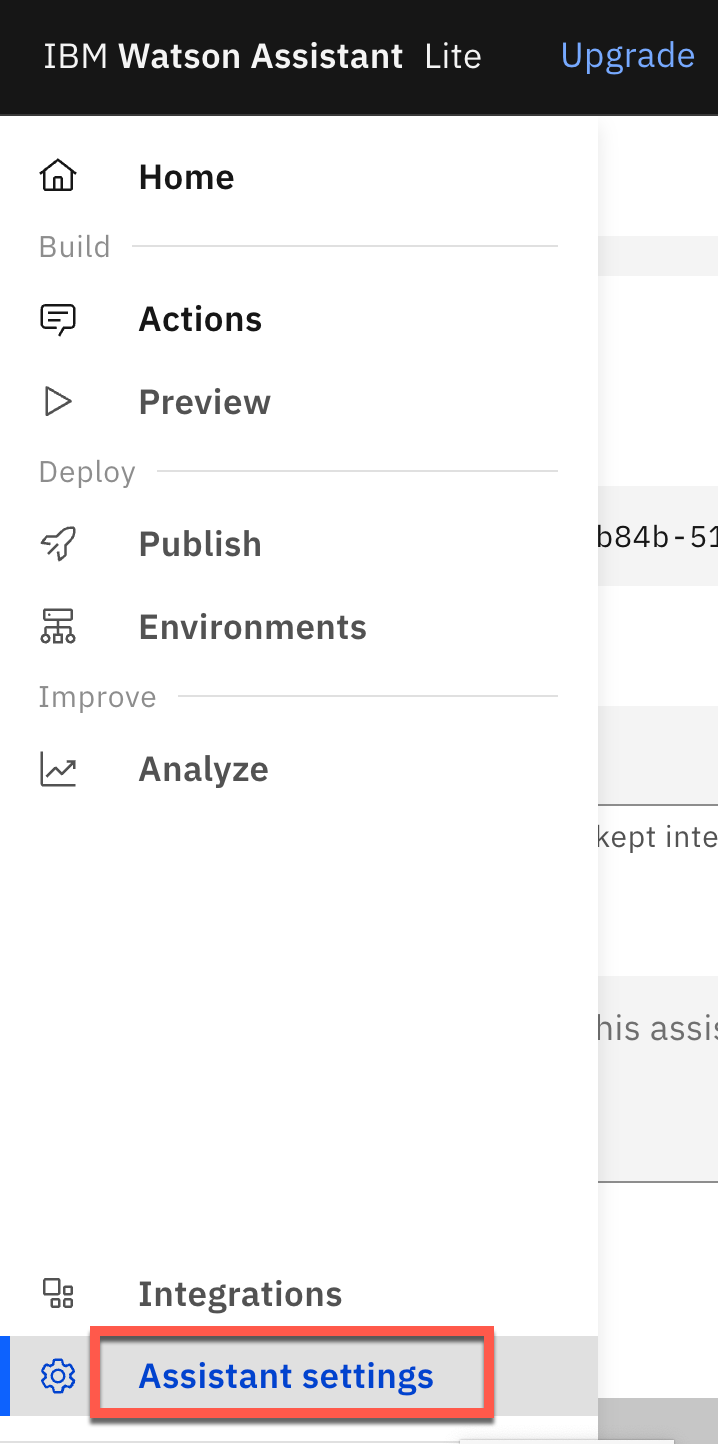
Click on Assistant settings
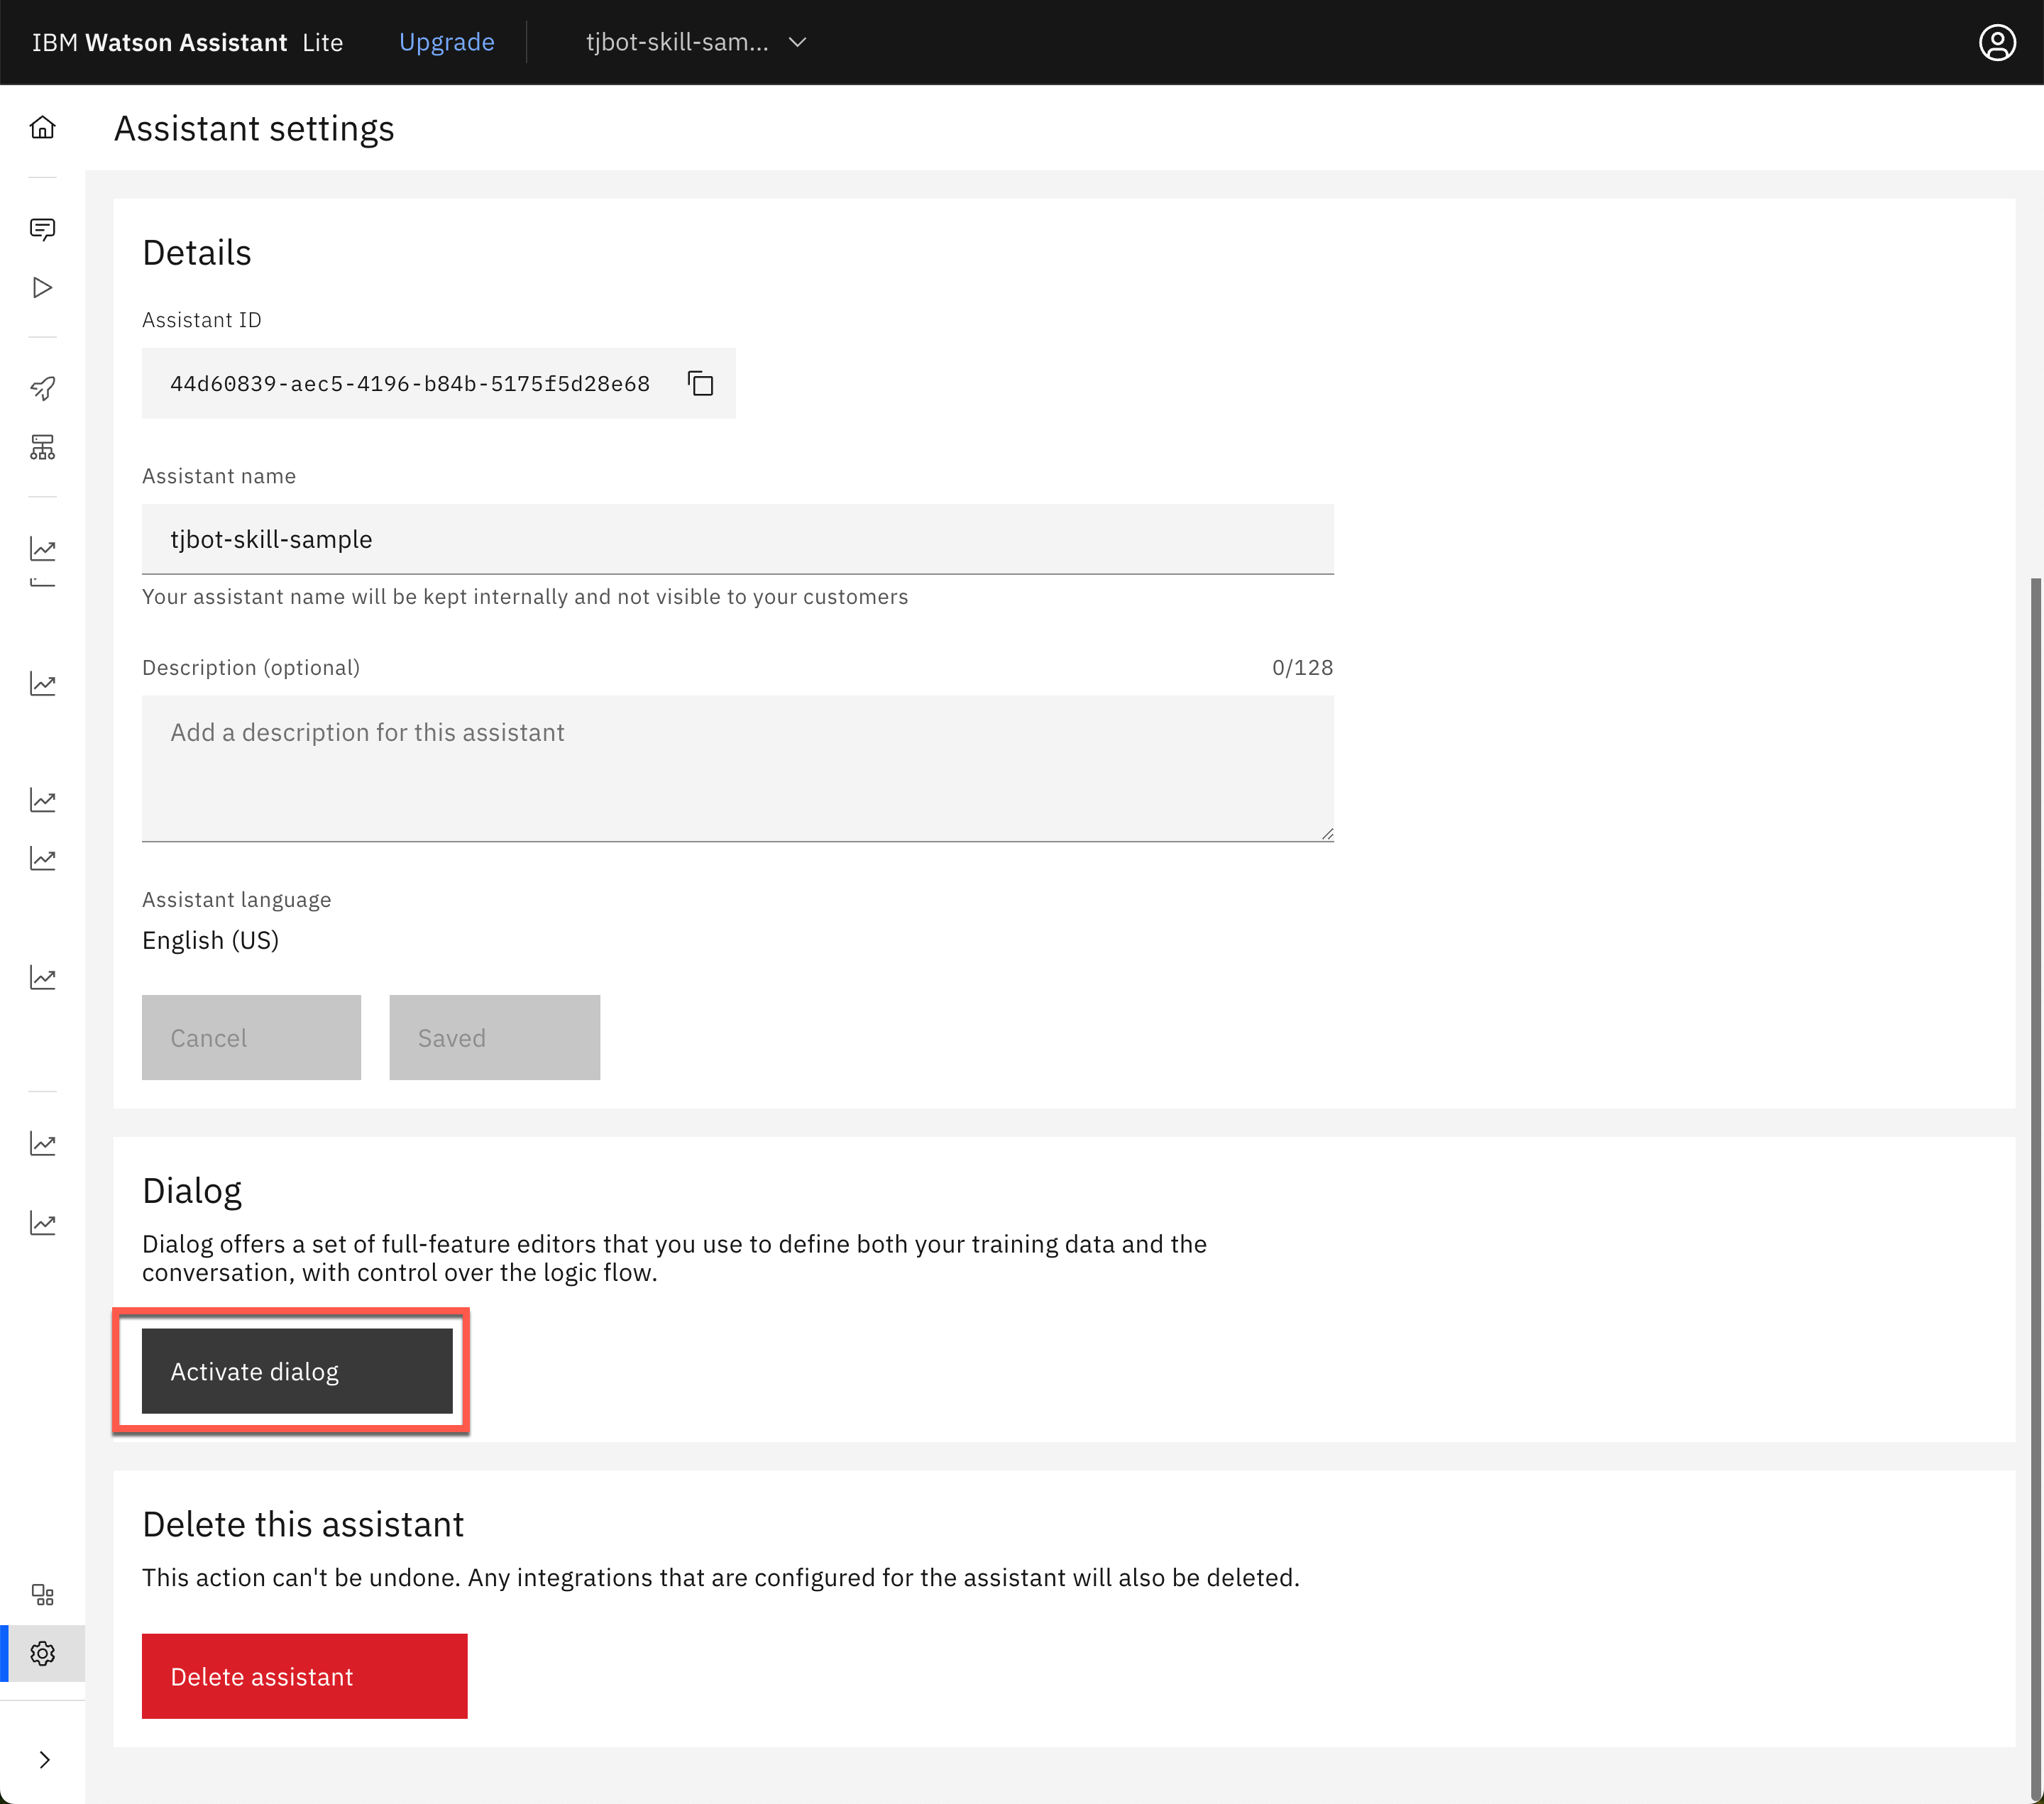
Scroll down and click on Activate dialog
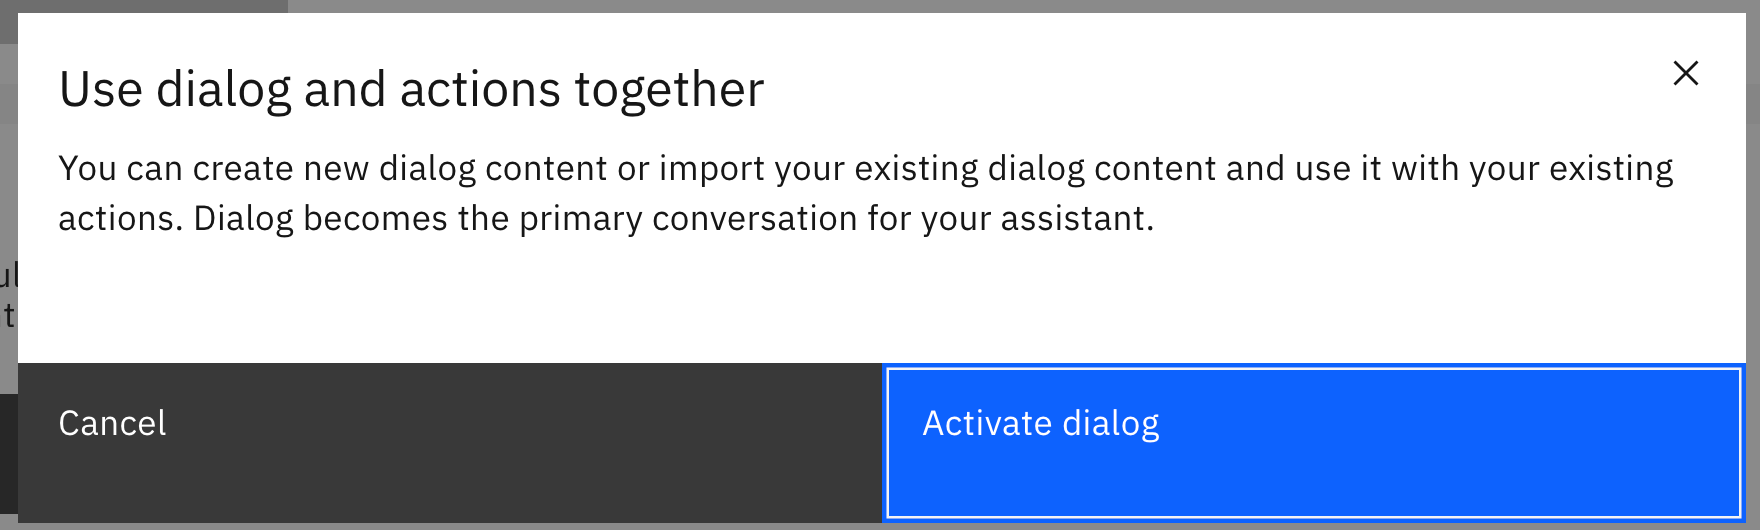
Click on Activate dialog.
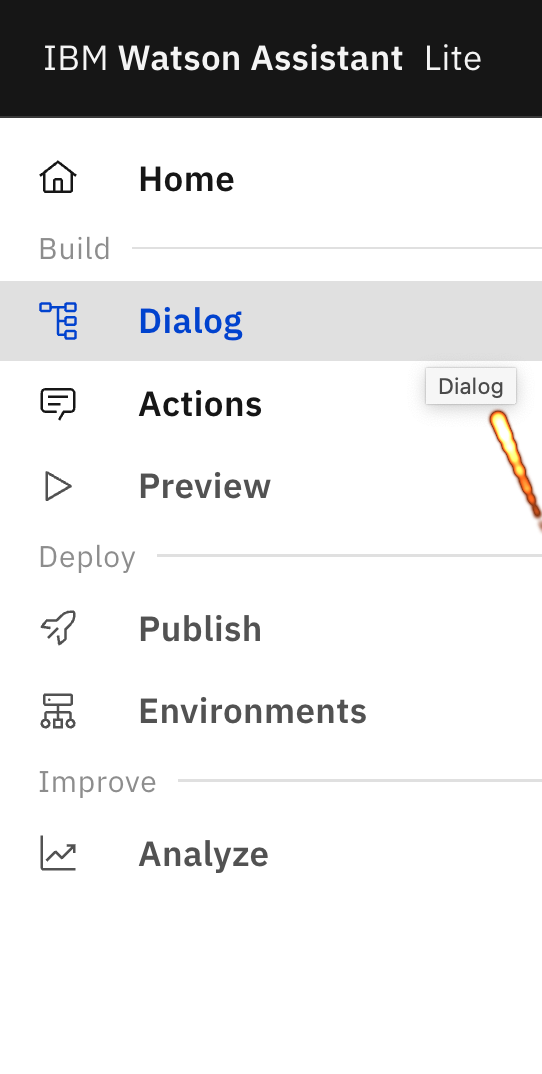
Hover over the icons to expand the left navigation bar and click on Dialog
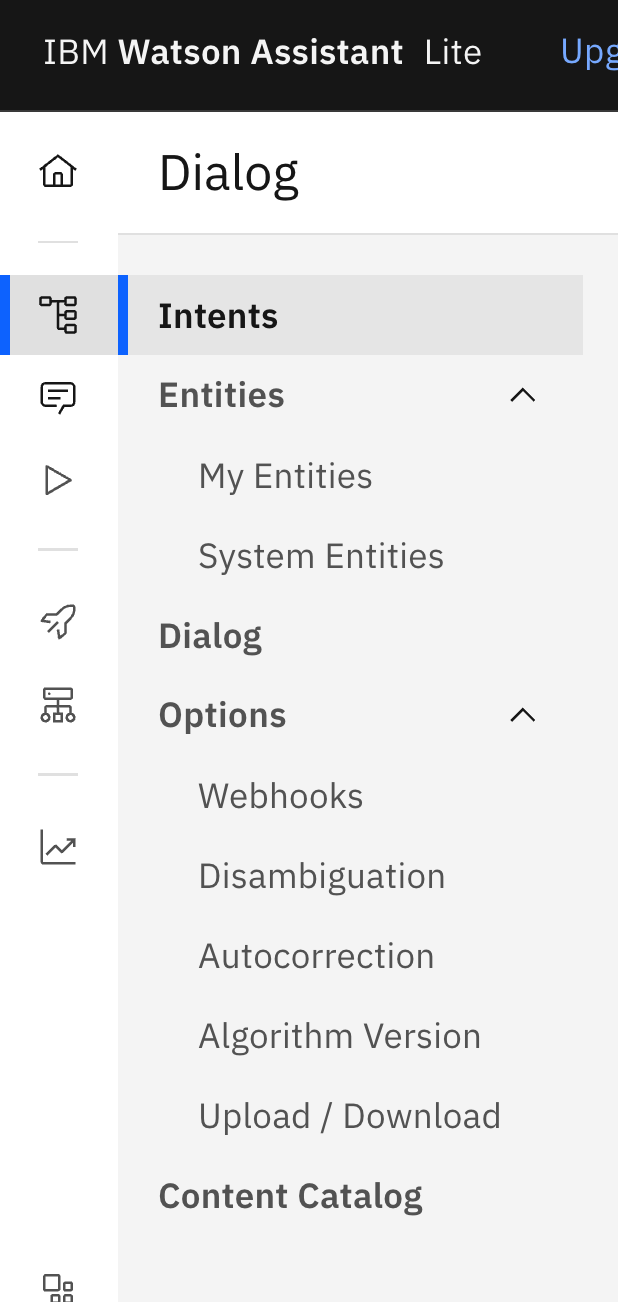
Under Options, Upload / Download
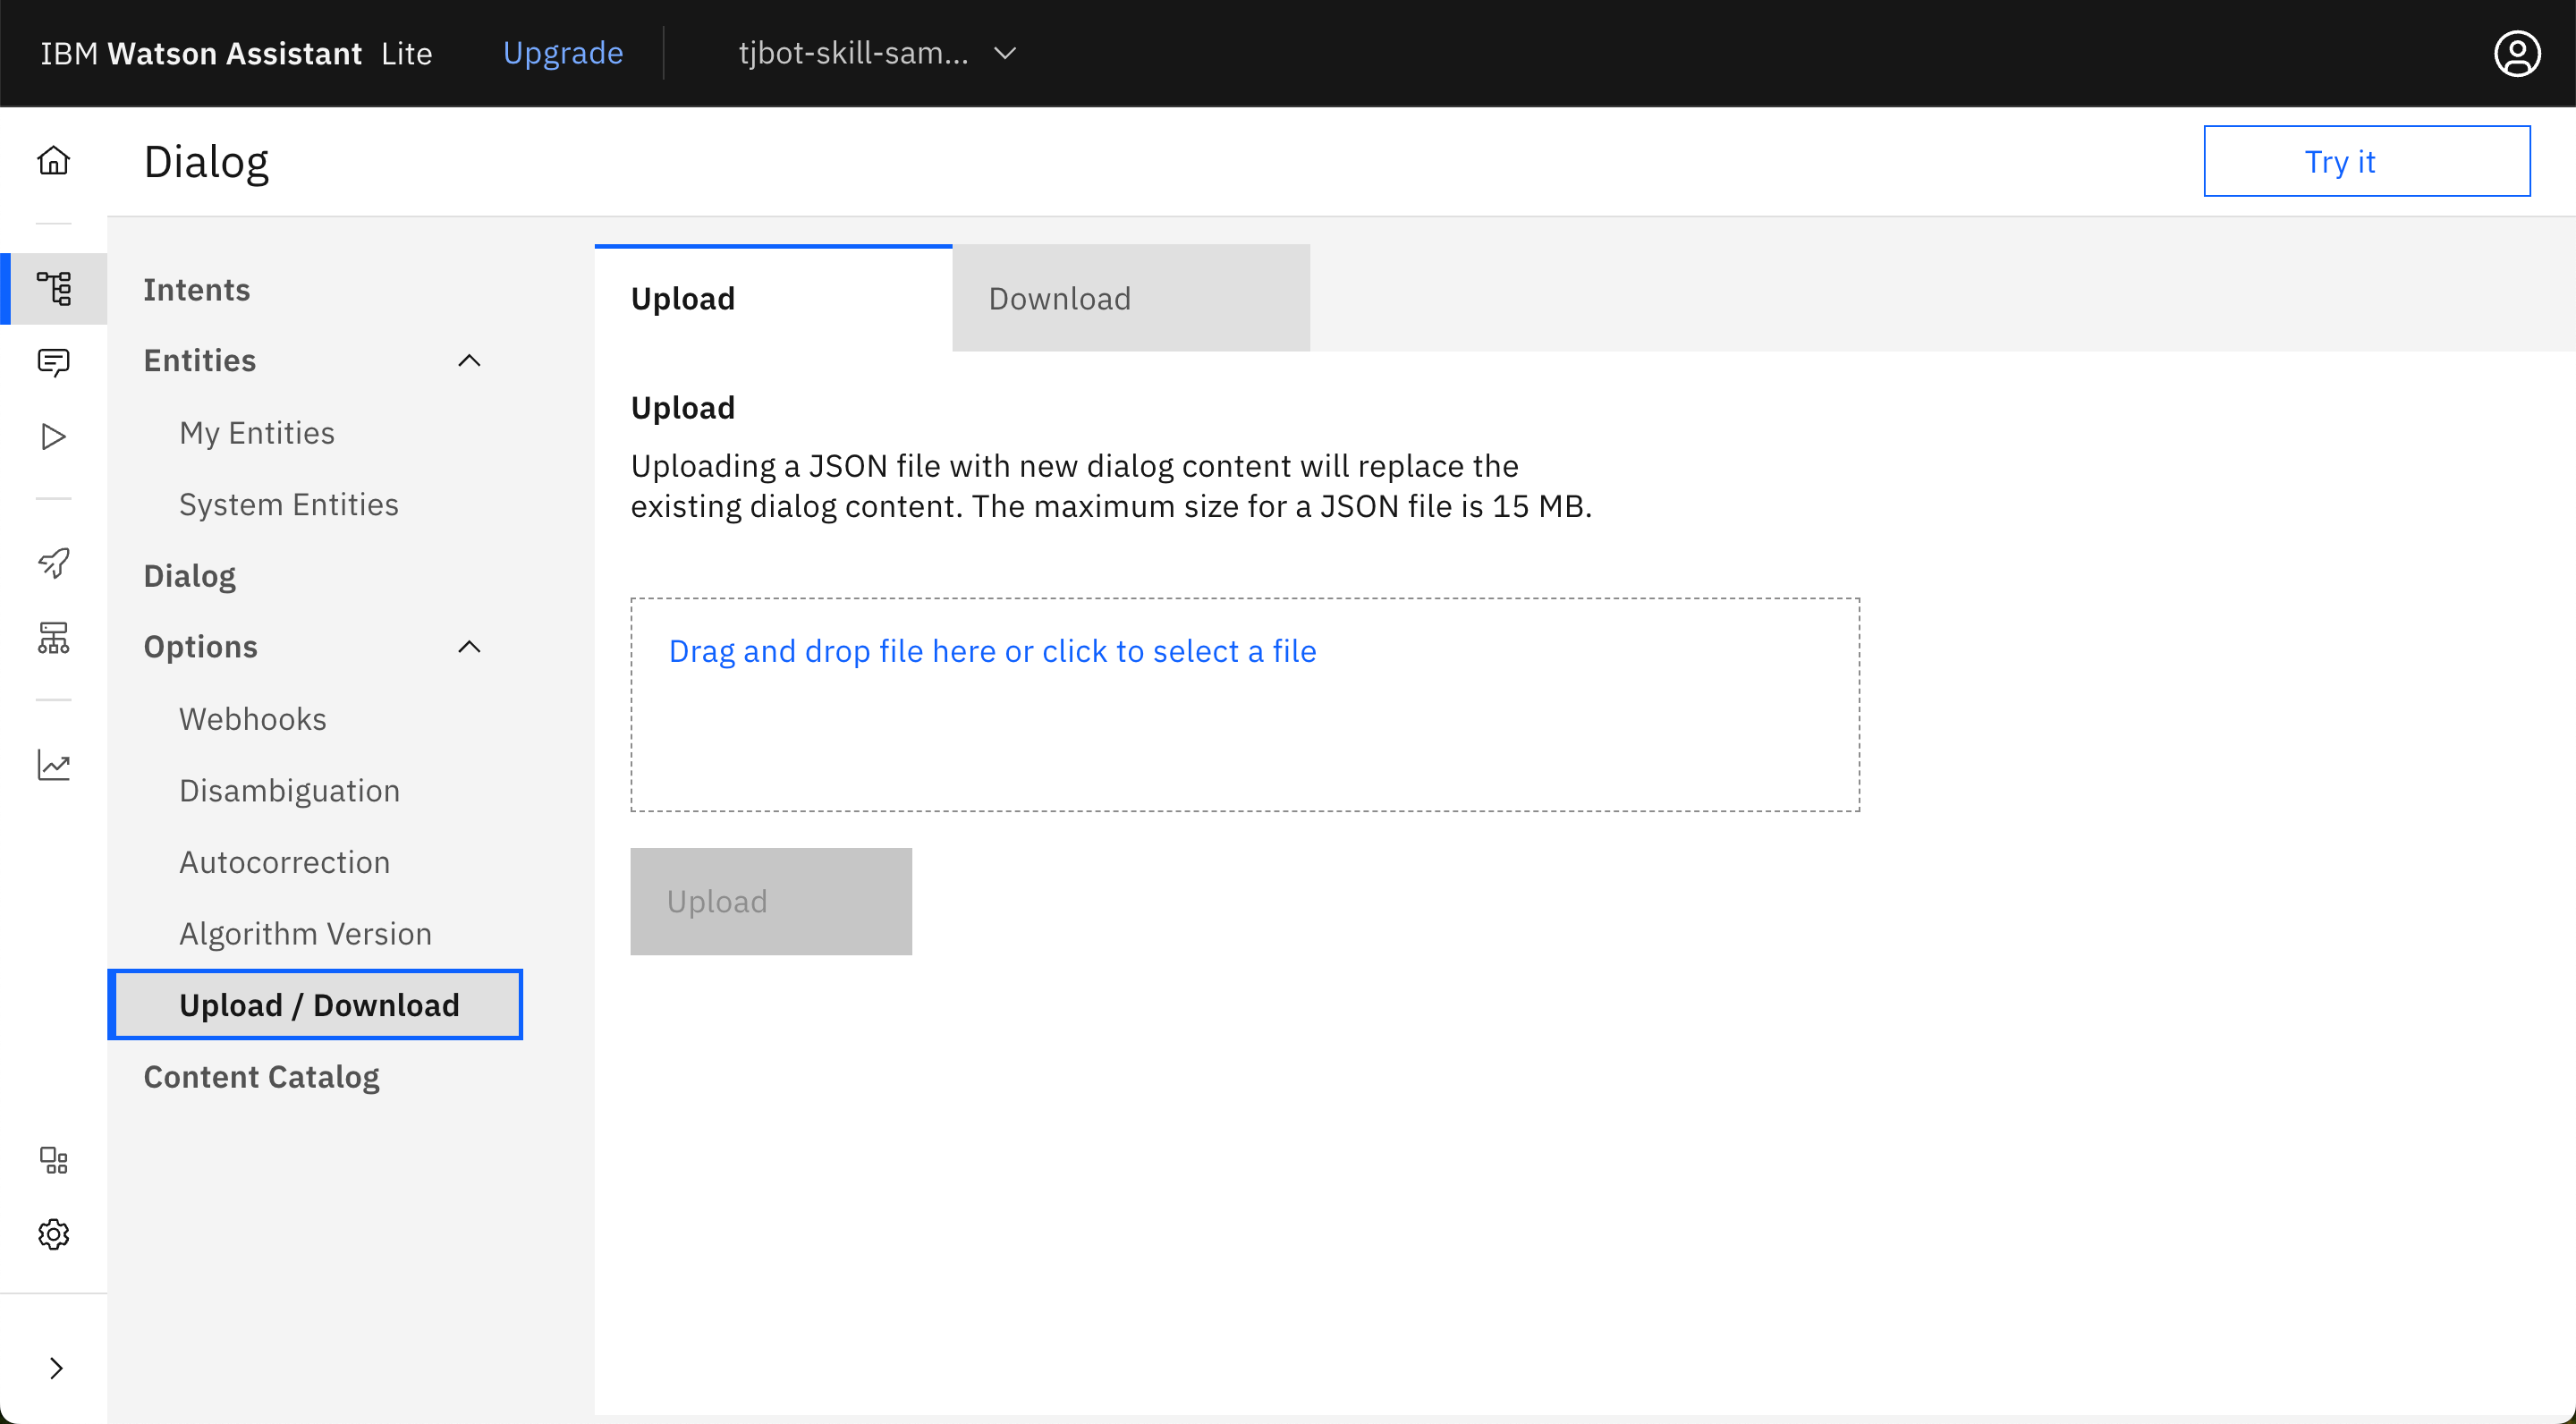
Upload tjbot-skill-sample.json from https://github.com/ibmtjbot/tjbot/recipes/conversation
Hover over House icon and the left navigation bar will expand.
Click on Assistant settings
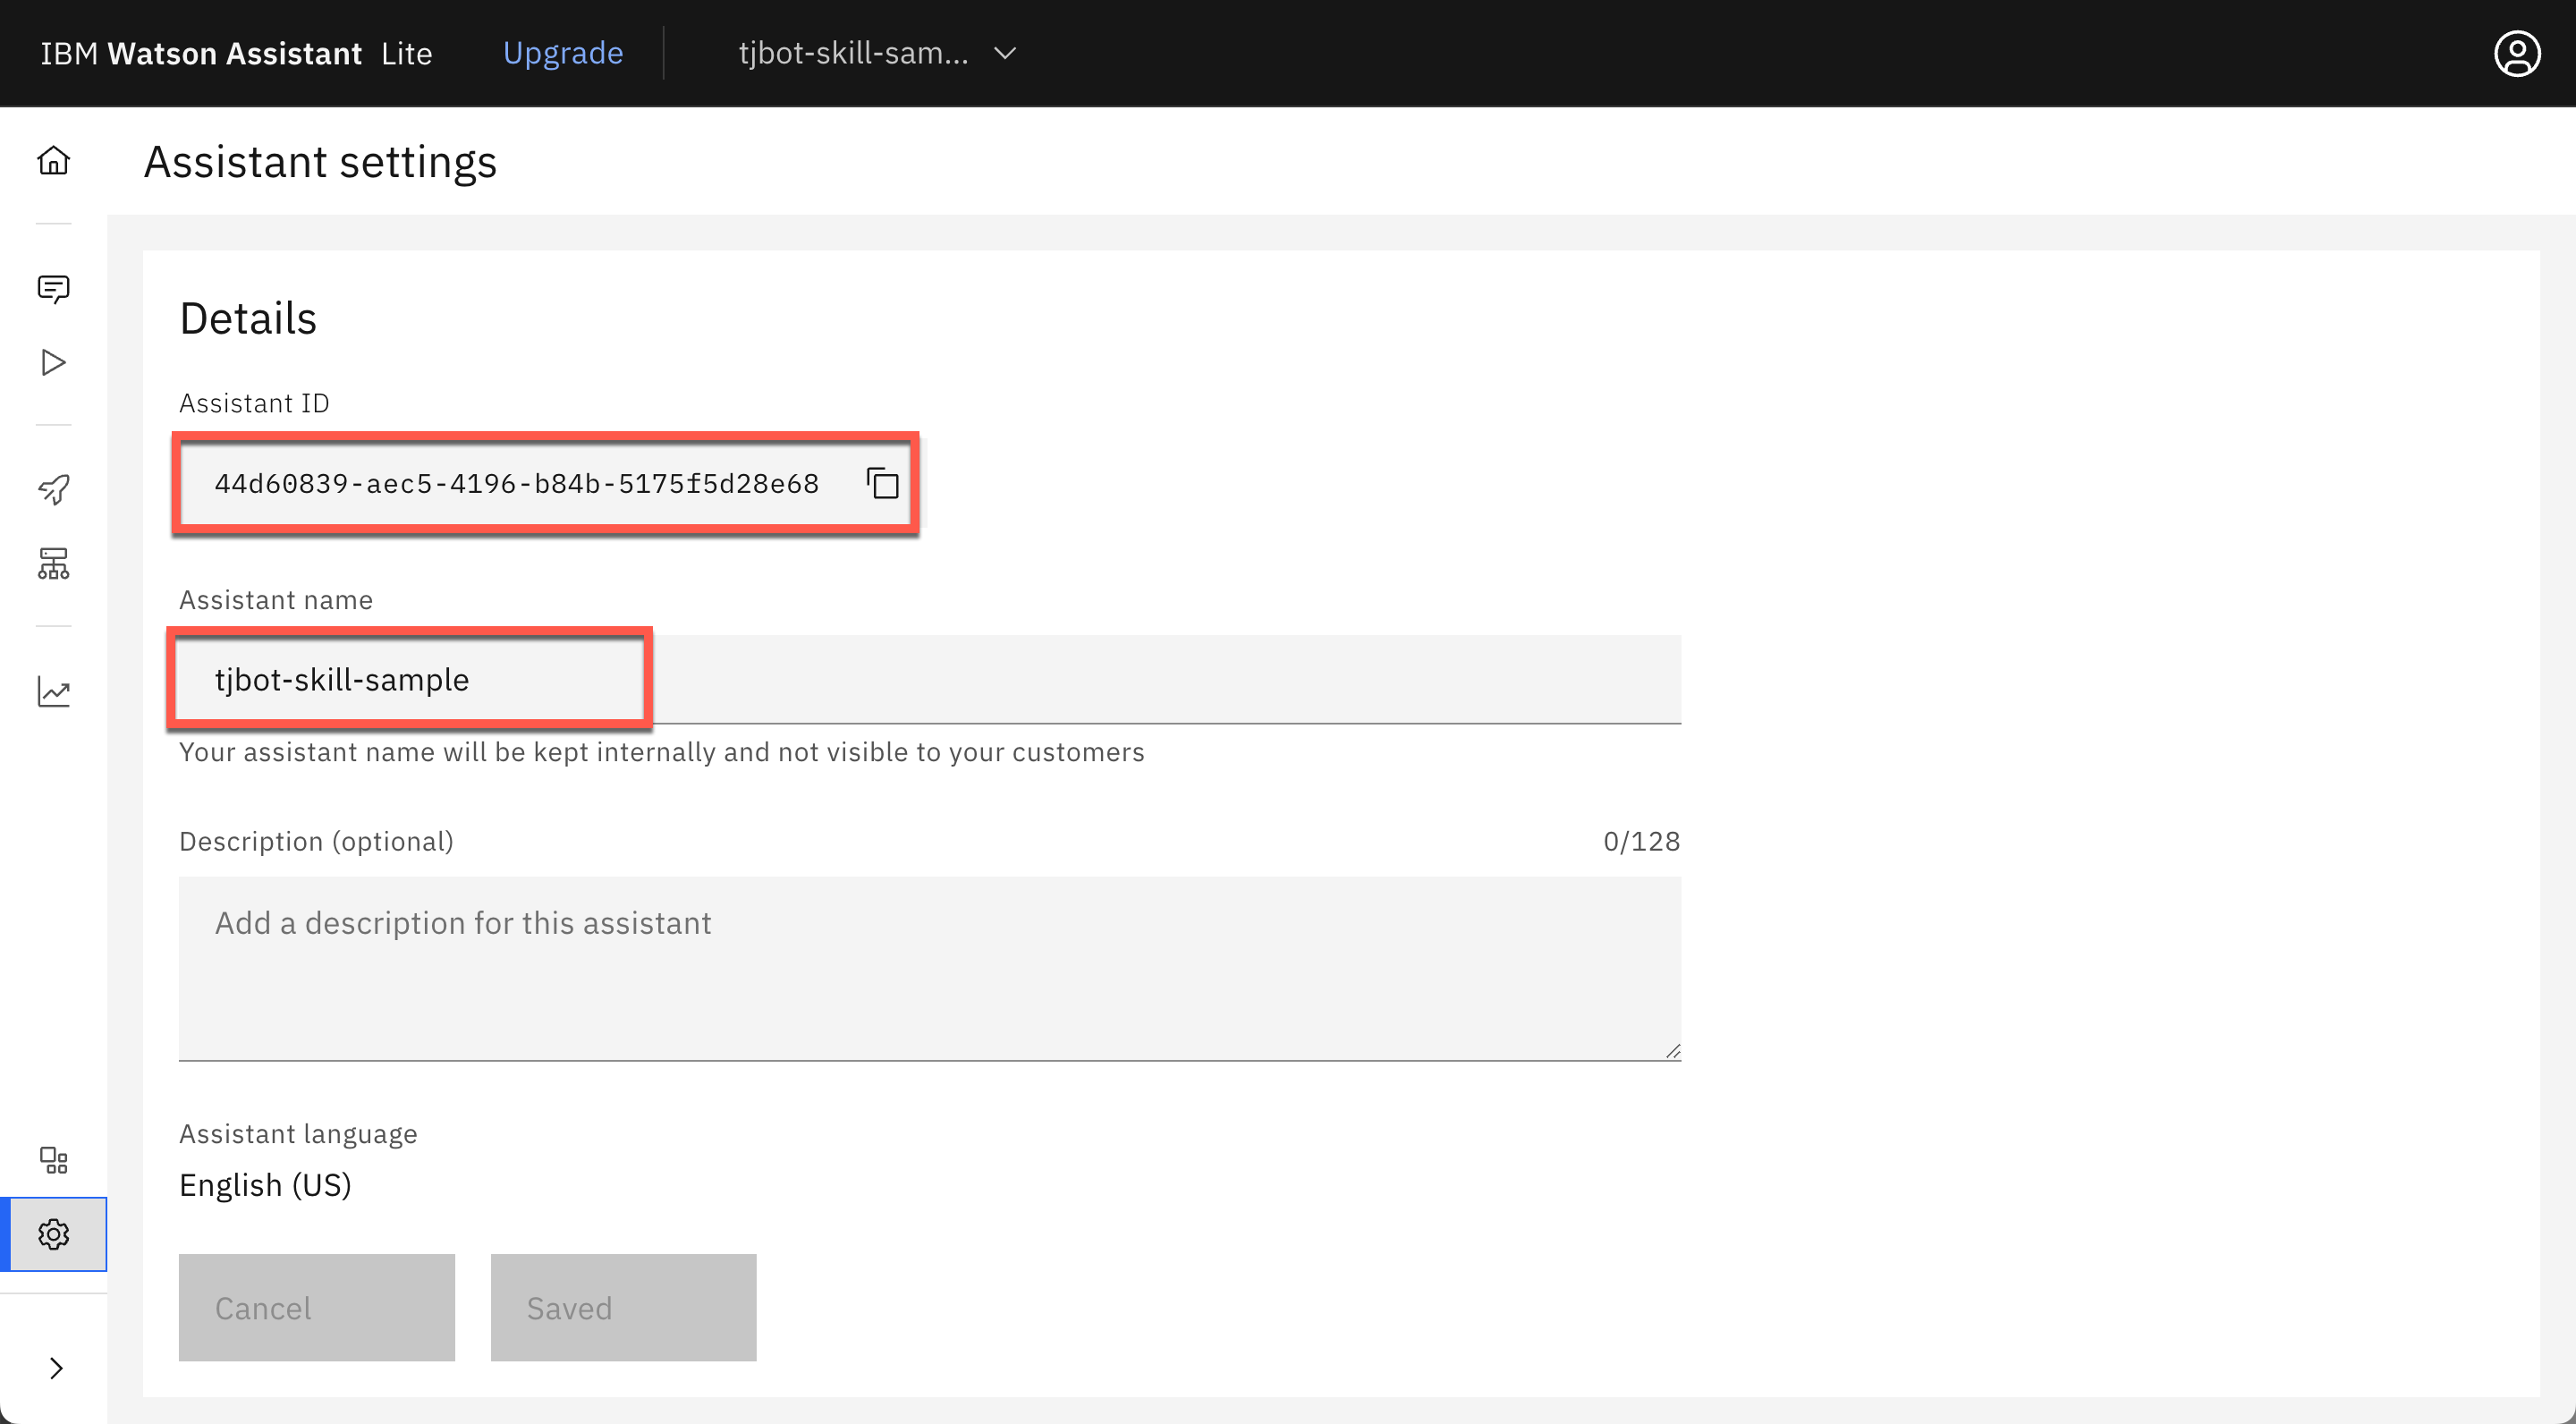
Copy the Assistant ID and Assistant name to a text file.
Let's look at what we just created. Click on the Workspaces we just created. A conversation is made up of Intents, Entities, and Dialog.
You must edit the tjbot-skill-sample.json file on the Raspberry Pi.
Change the "name" to "tjbot-skill-sample". The file is in /home/pi/Desktop/Project-TJ. The "name" must match the Assistant name. If you used a different name from "tjbot-skill-sample", use that name instead.
Logoff now.