-
-
Notifications
You must be signed in to change notification settings - Fork 334
Home
English | 简体中文
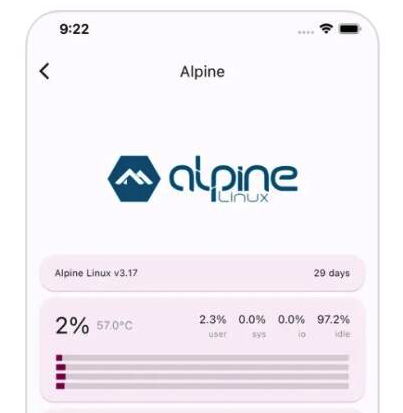
You can find the option to customize the logo in the server card settings (the settings page for setting ssh host and user). Fill in the URL of the image in it:

If your URL contains {DIST}, ServerBox will automatically replace it with the current Linux distribution name (e.g. debian):
https://example.com/{DIST}.png -> https://example.com/debian.png
Possible values are: debian,ubuntu,centos,fedora,opensuse,kali,wrt,armbian,arch,alpine,rocky,deepin (this list may not be up to date)
If it contains {BRIGHT}, ServerBox will automatically replace it with the current theme brightness (e.g. light / dark):
https://example.com/{BRIGHT}.png -> https://example.com/light.png
You can enter custom commands at the bottom of the server settings (in JSON format), the format is:
{
  "Command Name": "Command"
}
For example:
{
  "Memory": "free -h"
}
After setting this, you can see the output of the Memory command in the Custom Commands card on the server details page.
Special: If your command name is server_card_top_right, for example:
{
  "server_card_top_right": "grep Tsensor /proc/msp/pm_cpu | awk '{print $4}'"
}
In this case, the top right corner of the home server card will display the output of the above command, thus implementing "custom temperature acquisition" (Issues #313).
The format of the imported file is as follows:
[
  {
    "name": "Server1",
    "ip": "exmaple.com",
    "port": 22,
    "user": "root",
    "pwd": "password",
    // The name of the private key in App - Private Keys
    "keyId": "",
    "tags": ["tag1"],
    "alterUrl": "[email protected]",
    "autoConnect": false
  }
]
Then select the file in App - Backup - Bulk import servers.
- Clone the repository:
git clone https://github.com/lollipopkit/flutter_server_box - Install Flutter: Tutorial
- Compile:
- Windows:
flutter build windows - Linux:
flutter build linux - macOS:
flutter build macos
- Windows:
- Currently only Unix-like systems are supported, e.g. Linux, macOS, Android (Termux), no Windows.
- Check the SSH version, we recommend using the latest OpenSSH version.
Due to the variety of input methods, it may be "partially" incompatible, you can switch to visiblePassword in Settings - KeyboardType.
You can no longer input Chinese/Japanese/... after the above modification, but you can get a better experience.
There are serveral factors affecting this issue:
- Whether or not the SSH Server has set a time to live
- Whether the power saving optimization of ServerBox is disabled in the system settings.
Both the Home widget and the watchOS App need to configure ServerBox Monitor (because the environment of the two determines that they cannot use a "large amount" of memory, CPU, etc., and can only obtain simplified data provided by the server side through the network).
See ServerBox Monitor Wiki for configuration methods.
After the configuration is complete, you can follow the steps below to add the widget and watchOS App.
In order to use App push, you need to get a Token in the App, you can find it in the settings page of the App.
Attention: Self-compiled version (non-AppStore version) cannot use the App push service provided by this project, you need to modify the source code of this project and compile it yourself, or build your own push service.
- Add home widget
- Long press the widget and click
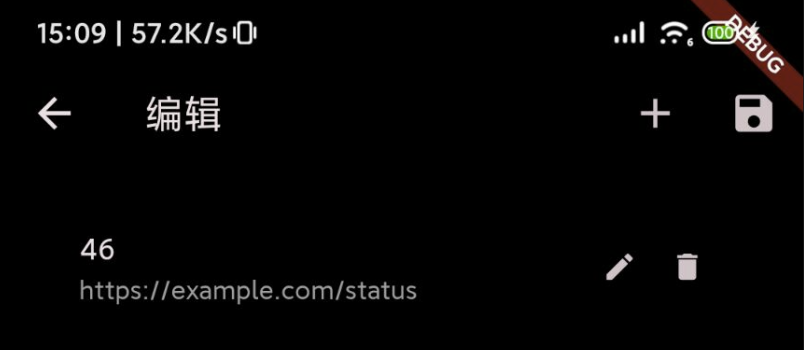
Edit Widget - Input
Url,such ashttps://server1.srvbox.example.com/status- Url must end with
/status, this is the api for getting status - Due to Apple's security policy, you must use https (except LAN IP)
- Url must end with
- Go back to the home screen
Attention:
- You can repeat the above steps to add multiple widgets, each widget can use a different link, which can display the status of different servers.
- Because of iOS restrictions, the fastest auto refresh rate is half an hour
- Add home widget
- Remember the
IDdisplay on the widget - Open the app settings page, click
Config home widget link -
(v1.0.930+) Add a new key-value pair, the key is your ID, and the value is your link
- For example:

- For example:
- Save
- Back to home screen, and click the widget to refresh.
Attention:
- You can repeat the above steps to add multiple widgets, each widget can use a different link, which can display the status of different servers.
- Open the settings page of iPhone app, click
iOS Settings-Watch app - Add
urlsto the json. The compelete json likes:{ "urls": [ "https://server1.srvbox.example.com/status", "https://server2.srvbox.example.com/status" ] } - Click
okbutton in the bottom right corner, wait for the watch app to refresh
In some views, long press can open more functions, for example:
- Long press the server card on the home page, then you can suspend, shutdown, or edit the server.
- Long press the setting item in the drawer on the home page to enter JSON edit mode.
- In the SSH terminal, long press and slide to select characters.
First of all, hiding some settings is to keep the setting interface simple, and also to take into account the needs of a few people (highly customizable). Secondly, wrong settings may cause the App to fail to open, please make a backup.
- Q: How to find it?
- A: Just long press the setting item in the drawer on the home page to open it.
- Q: Where to find the customizable settings?
- A: You can find all of them in /lib/data/store/setting.dart, please note the type of each setting item.
There are some (because they may not be updated in time) available hidden settings below:
/// Whether to display the old UI of the server Tab page
/// Default:false
late final serverTabUseOldUI = StoreProperty(
  box,
  'serverTabUseOldUI',
  false,
);
/// Timeout for connecting to the server, etc. (seconds)
/// Default:5
late final timeout = StoreProperty(
  box,
  'timeOut',
  5,
);
/// Whether to save/use history records (SFTP path, etc.)
/// Default:true
late final recordHistory = StoreProperty(
  box,
  'recordHistory',
  true,
);
/// Text scaling factor
/// Default:1.0(100%)
/// Attention:the type is double
late final textFactor = StoreProperty(
  box,
  'textFactor',
  1.0,
);
Example: Turn on the old UI of server Tab page
- First find the place where the setting is defined in /lib/data/store/setting.dart.
It can be found that the name of the setting item is
/// Discussion #146
late final serverTabUseOldUI = StoreProperty(
  box,
  'serverTabUseOldUI',
  false,
);
serverTabUseOldUI, the type isbool, and the default value isfalse. - Add the following key-value pair to the JSON editor of the setting item and save it.
"serverTabUseOldUI": true
- Return to the server Tab page, wait a few seconds, and you will see the effect.
You can find the option to edit the virtual keys in the settings page.
- In it, you can turn on and off, and sort.
- Some icons that may be unclear are also explained in it.