-
Notifications
You must be signed in to change notification settings - Fork 1
OBI socket

The hardware used is a 9€ power socket I bought from a hardware store ('OBI') in Germany. It seems to be a newer revision than the other OBI wifi sockets I found on the interwebs. The plastic case says something about EUROMATE GmbH.
But the basics are the same: LEDs, a button, a relay and an ESP8266. Yay.
To open the case your best option is a tri-wing bit. Or a power drill.
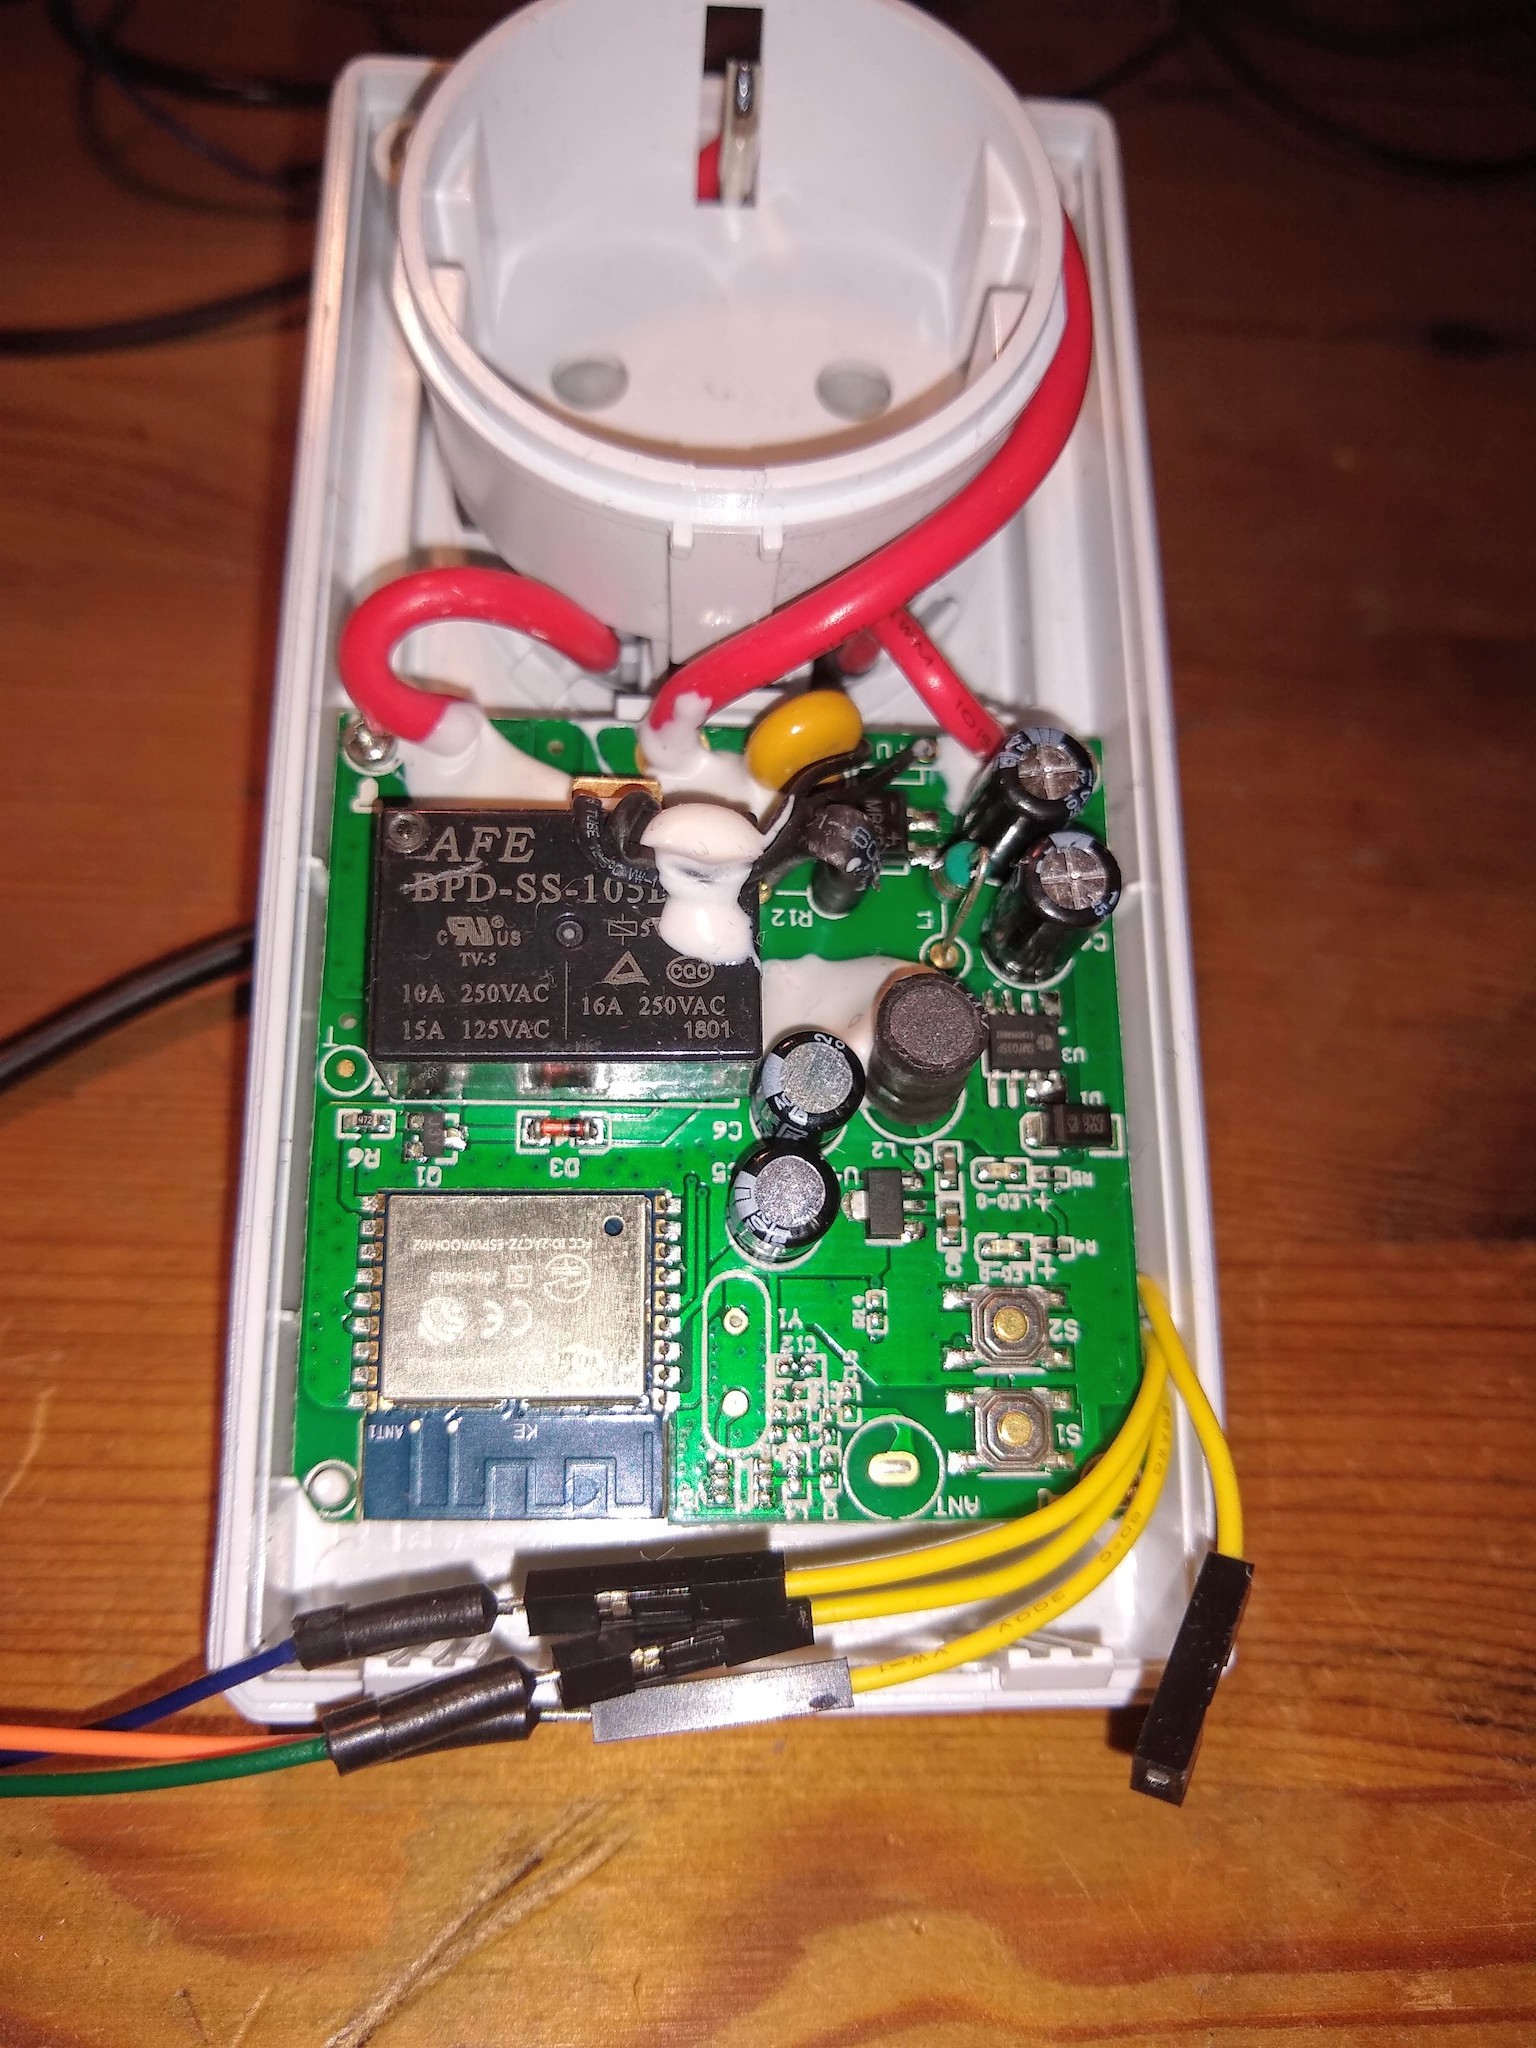
The design is based around an ESP8266 WROOM-02 module (Datasheet).
On the supply side there is an SM7035P buck converter supplying ~5V to the relay coils and a 1117 LDO for 3,3V supply.
| ESP Port | Desc. |
|---|---|
| IO5 | S1, On/Off switch |
| Reset | S2, reset |
| IO12 | green LED |
| IO13 | red LED |
| IO4 | relay |


During development / flashing connect a cable to the solder points marked with 5V in order to power the ESP in a safe way when the socket's case is open. Using the 5V supply (120-150mA will be enough) ensures that the relay will work.
Another option is probably to supply 3.3V directly to the solder point marked with 3.3V but I haven't tested that. Of course, the relay will not work in this case.
If you are brave (or stupid) you can also power the socket directly from mains.
However...
Much safer: Supplying 5V to the 5V pin (or the high side of the 1117, the cathode of D1 or pins 7/8 of SM7035P).
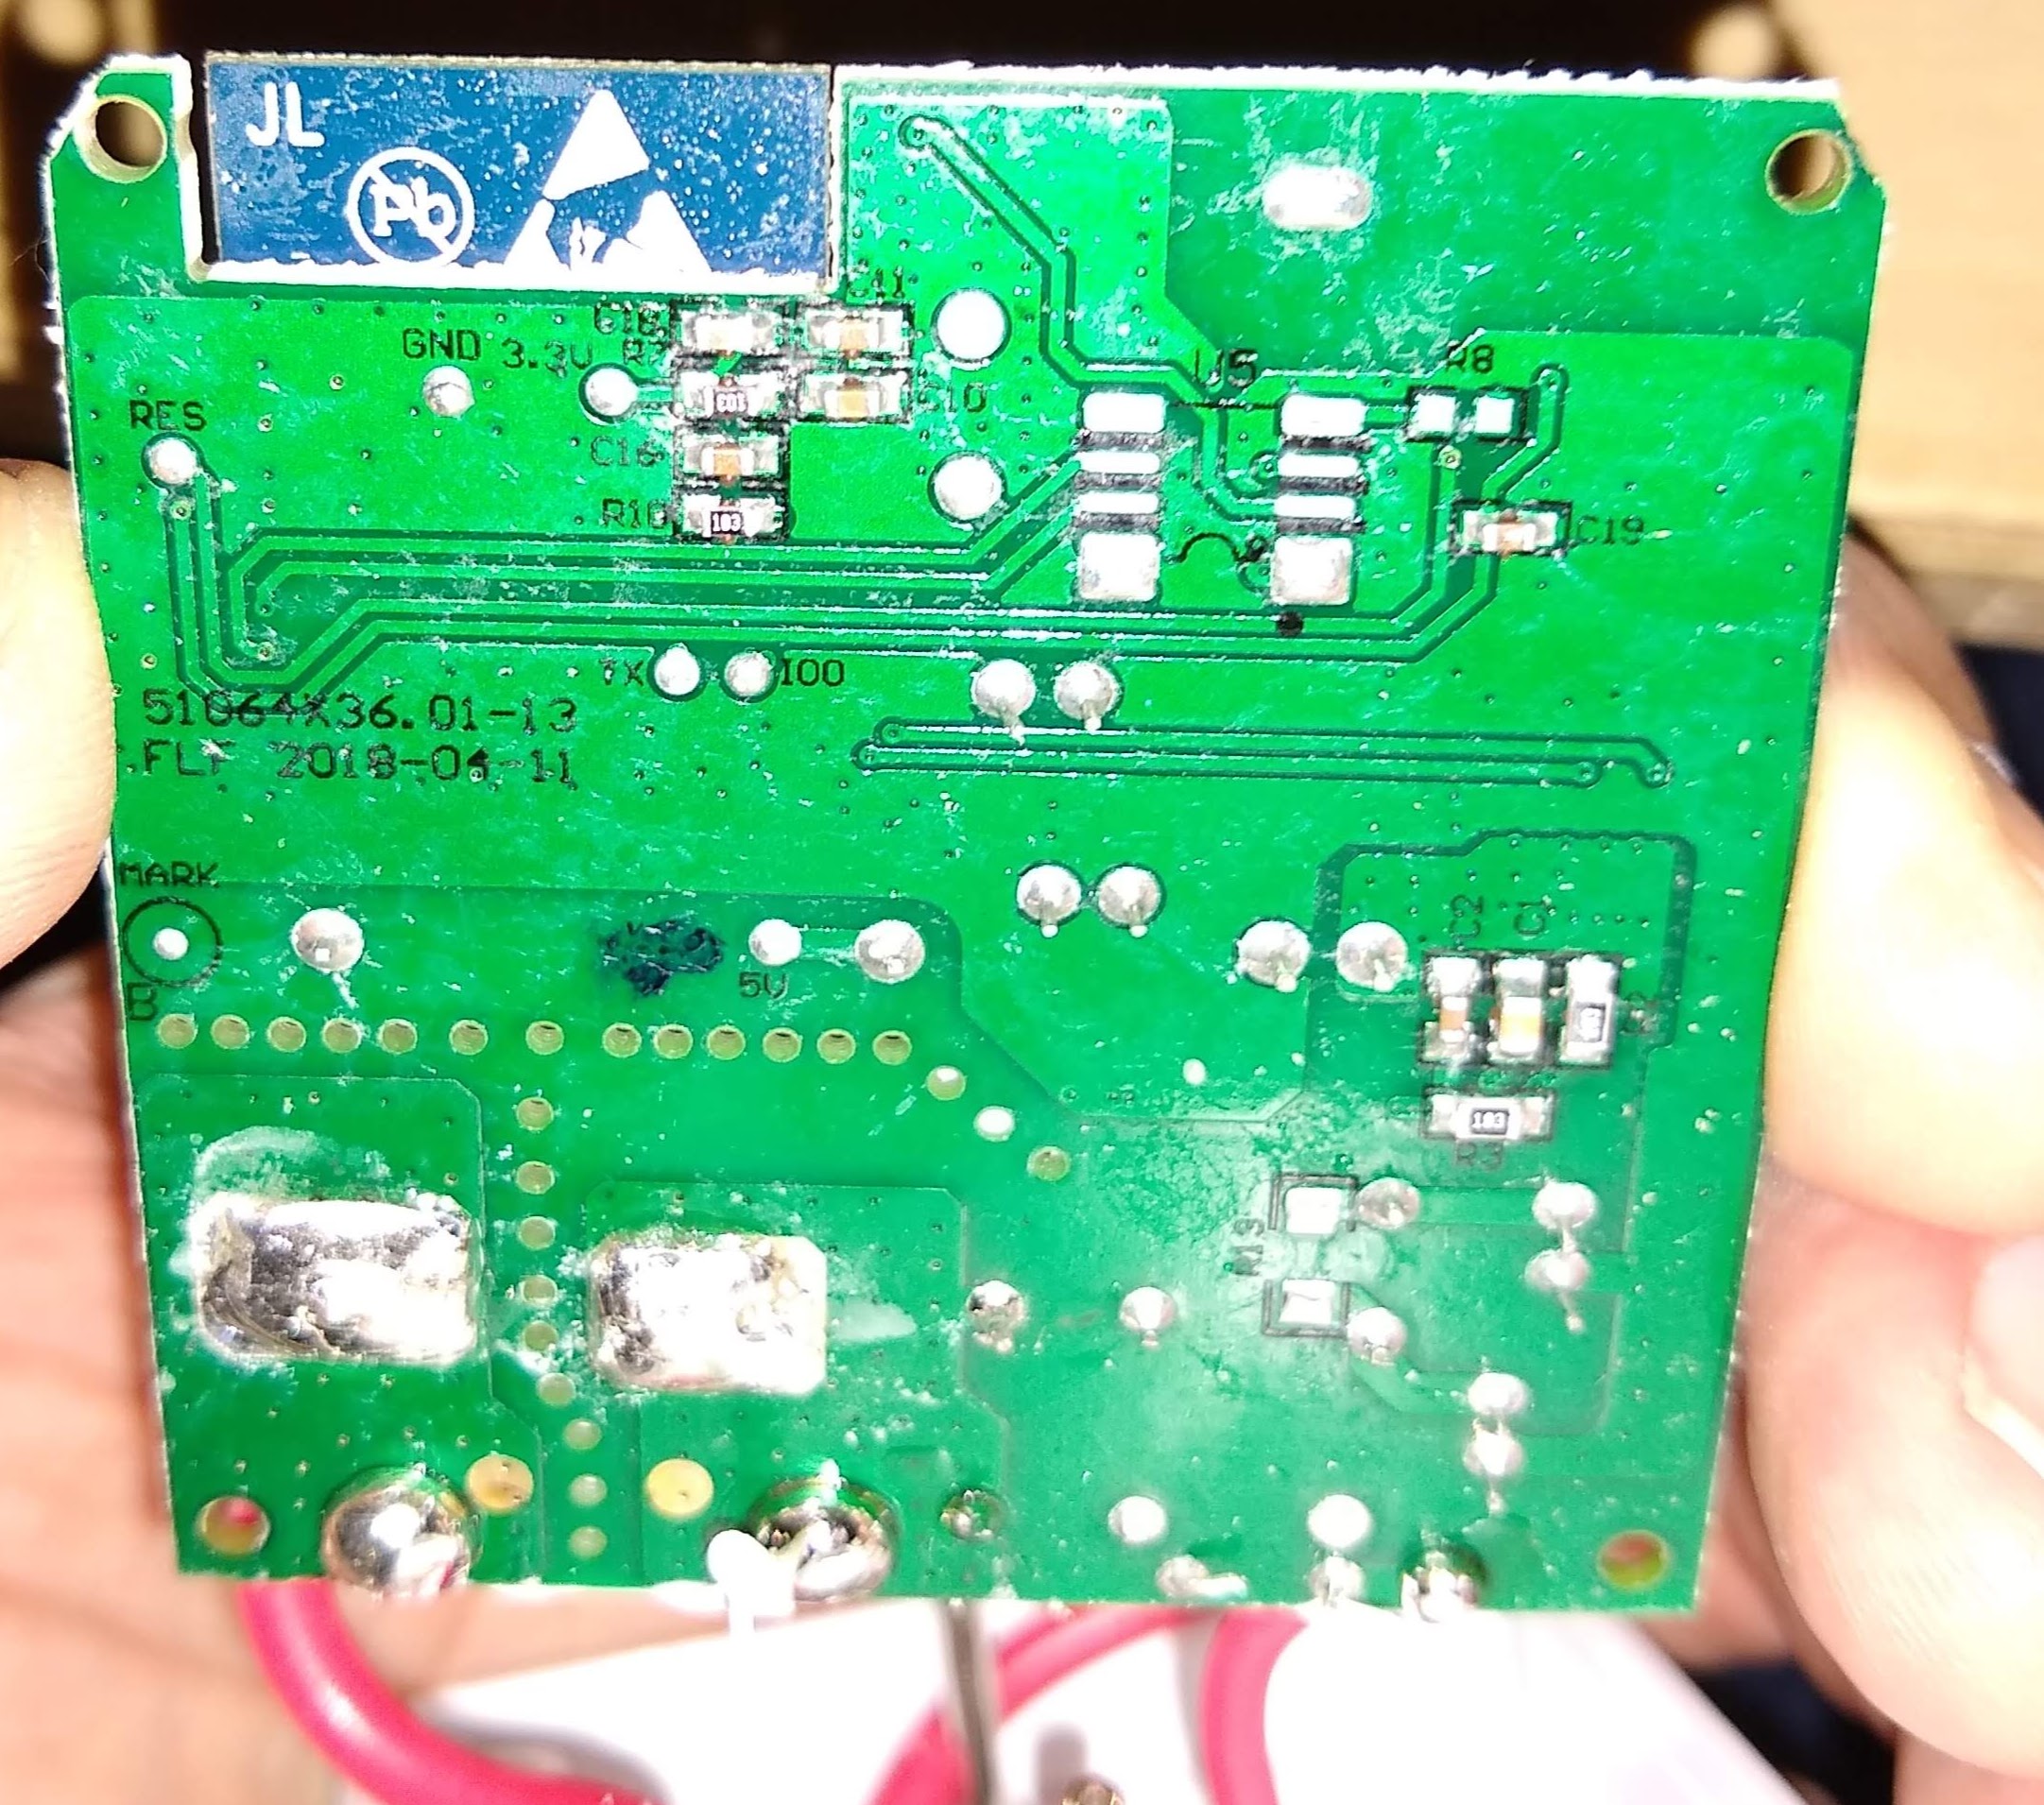
As you can see, there is no obvious serial port connection available. But the designers were kind enough to provide connections on the bottom side of the pcb that are easy to solder.
In addition to RX/TX/GND (from top to bottom) you are going to need a wire connected to IO0.
IO0 is required to be pulled to GND during reset (S2) in order to put the ESP into UART download mode. E.g. by briefly connecting it to the ESP8266 shield.

I used breadboard jumper cables. The 5V cable is missing in the photo, I added it a bit later... ;-)

