Makes it possible to reference any combination of channels to any other.
This plugin can be added via the Open Ephys GUI Plugin Installer. To access the Plugin Installer, press ctrl-P or ⌘P from inside the GUI. Once the installer is loaded, browse to the "Virtual Reference" plugin and click "Install."
-
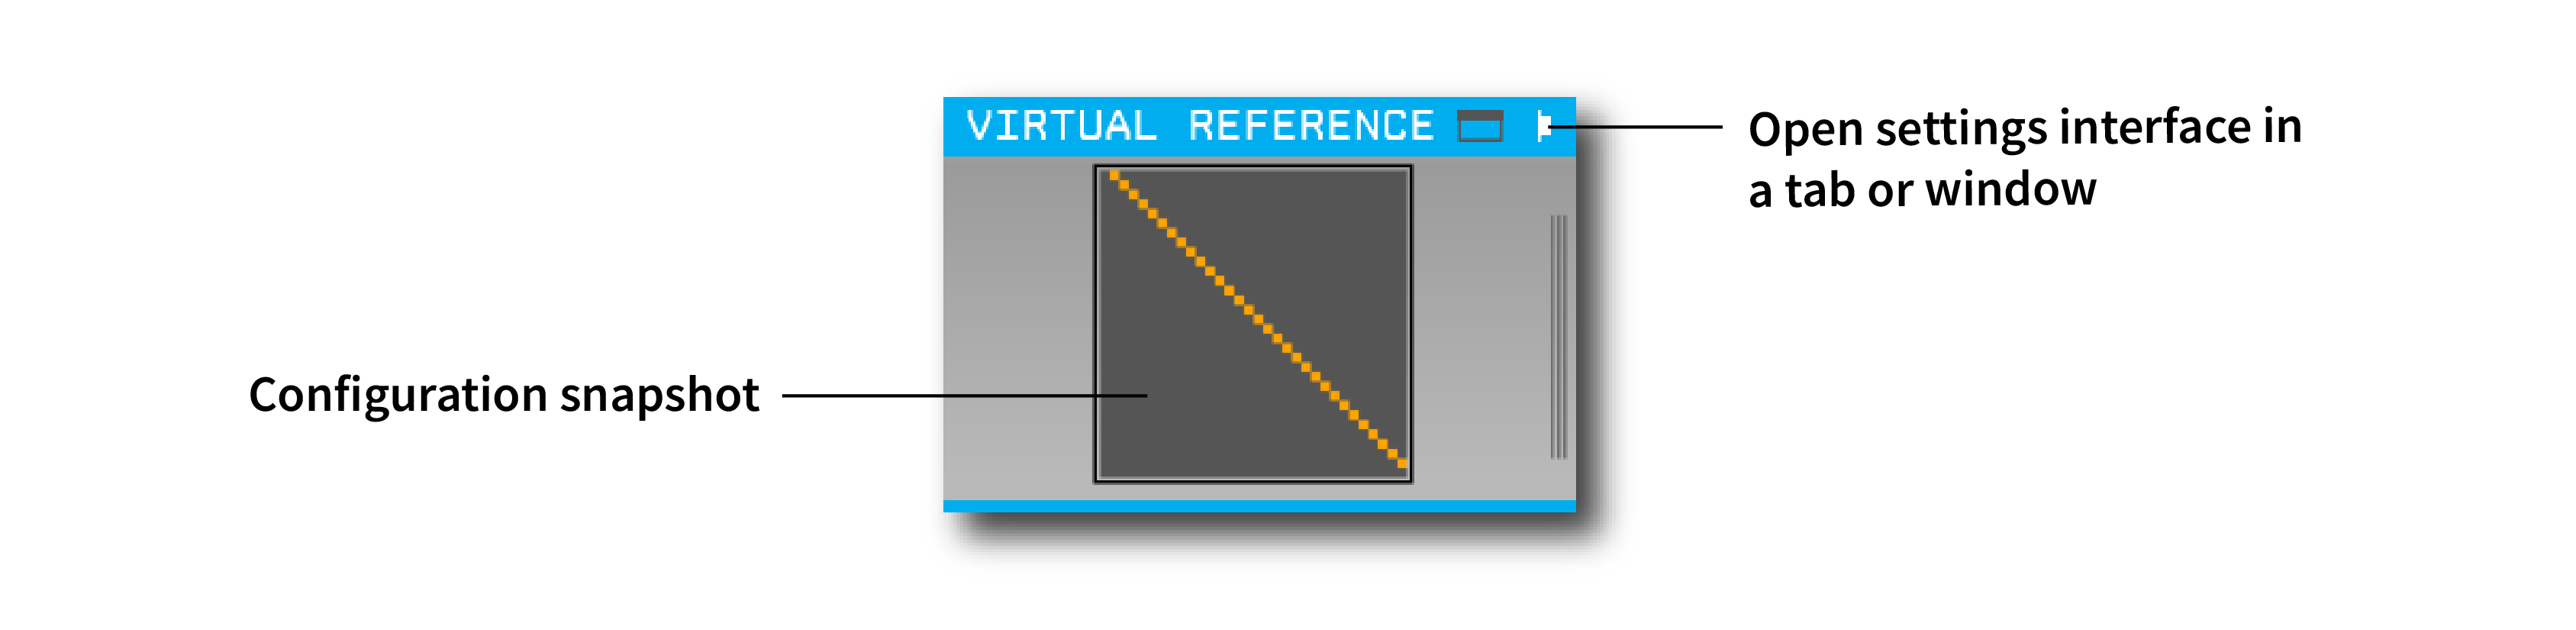
Shows a preview of the current state of reference matrix for the selected stream.
-
All of the configuration occurs inside the plugin’s visualizer. To access it, click on one of the buttons in the upper right of the plugin editor to open the settings interface in a tab or window.
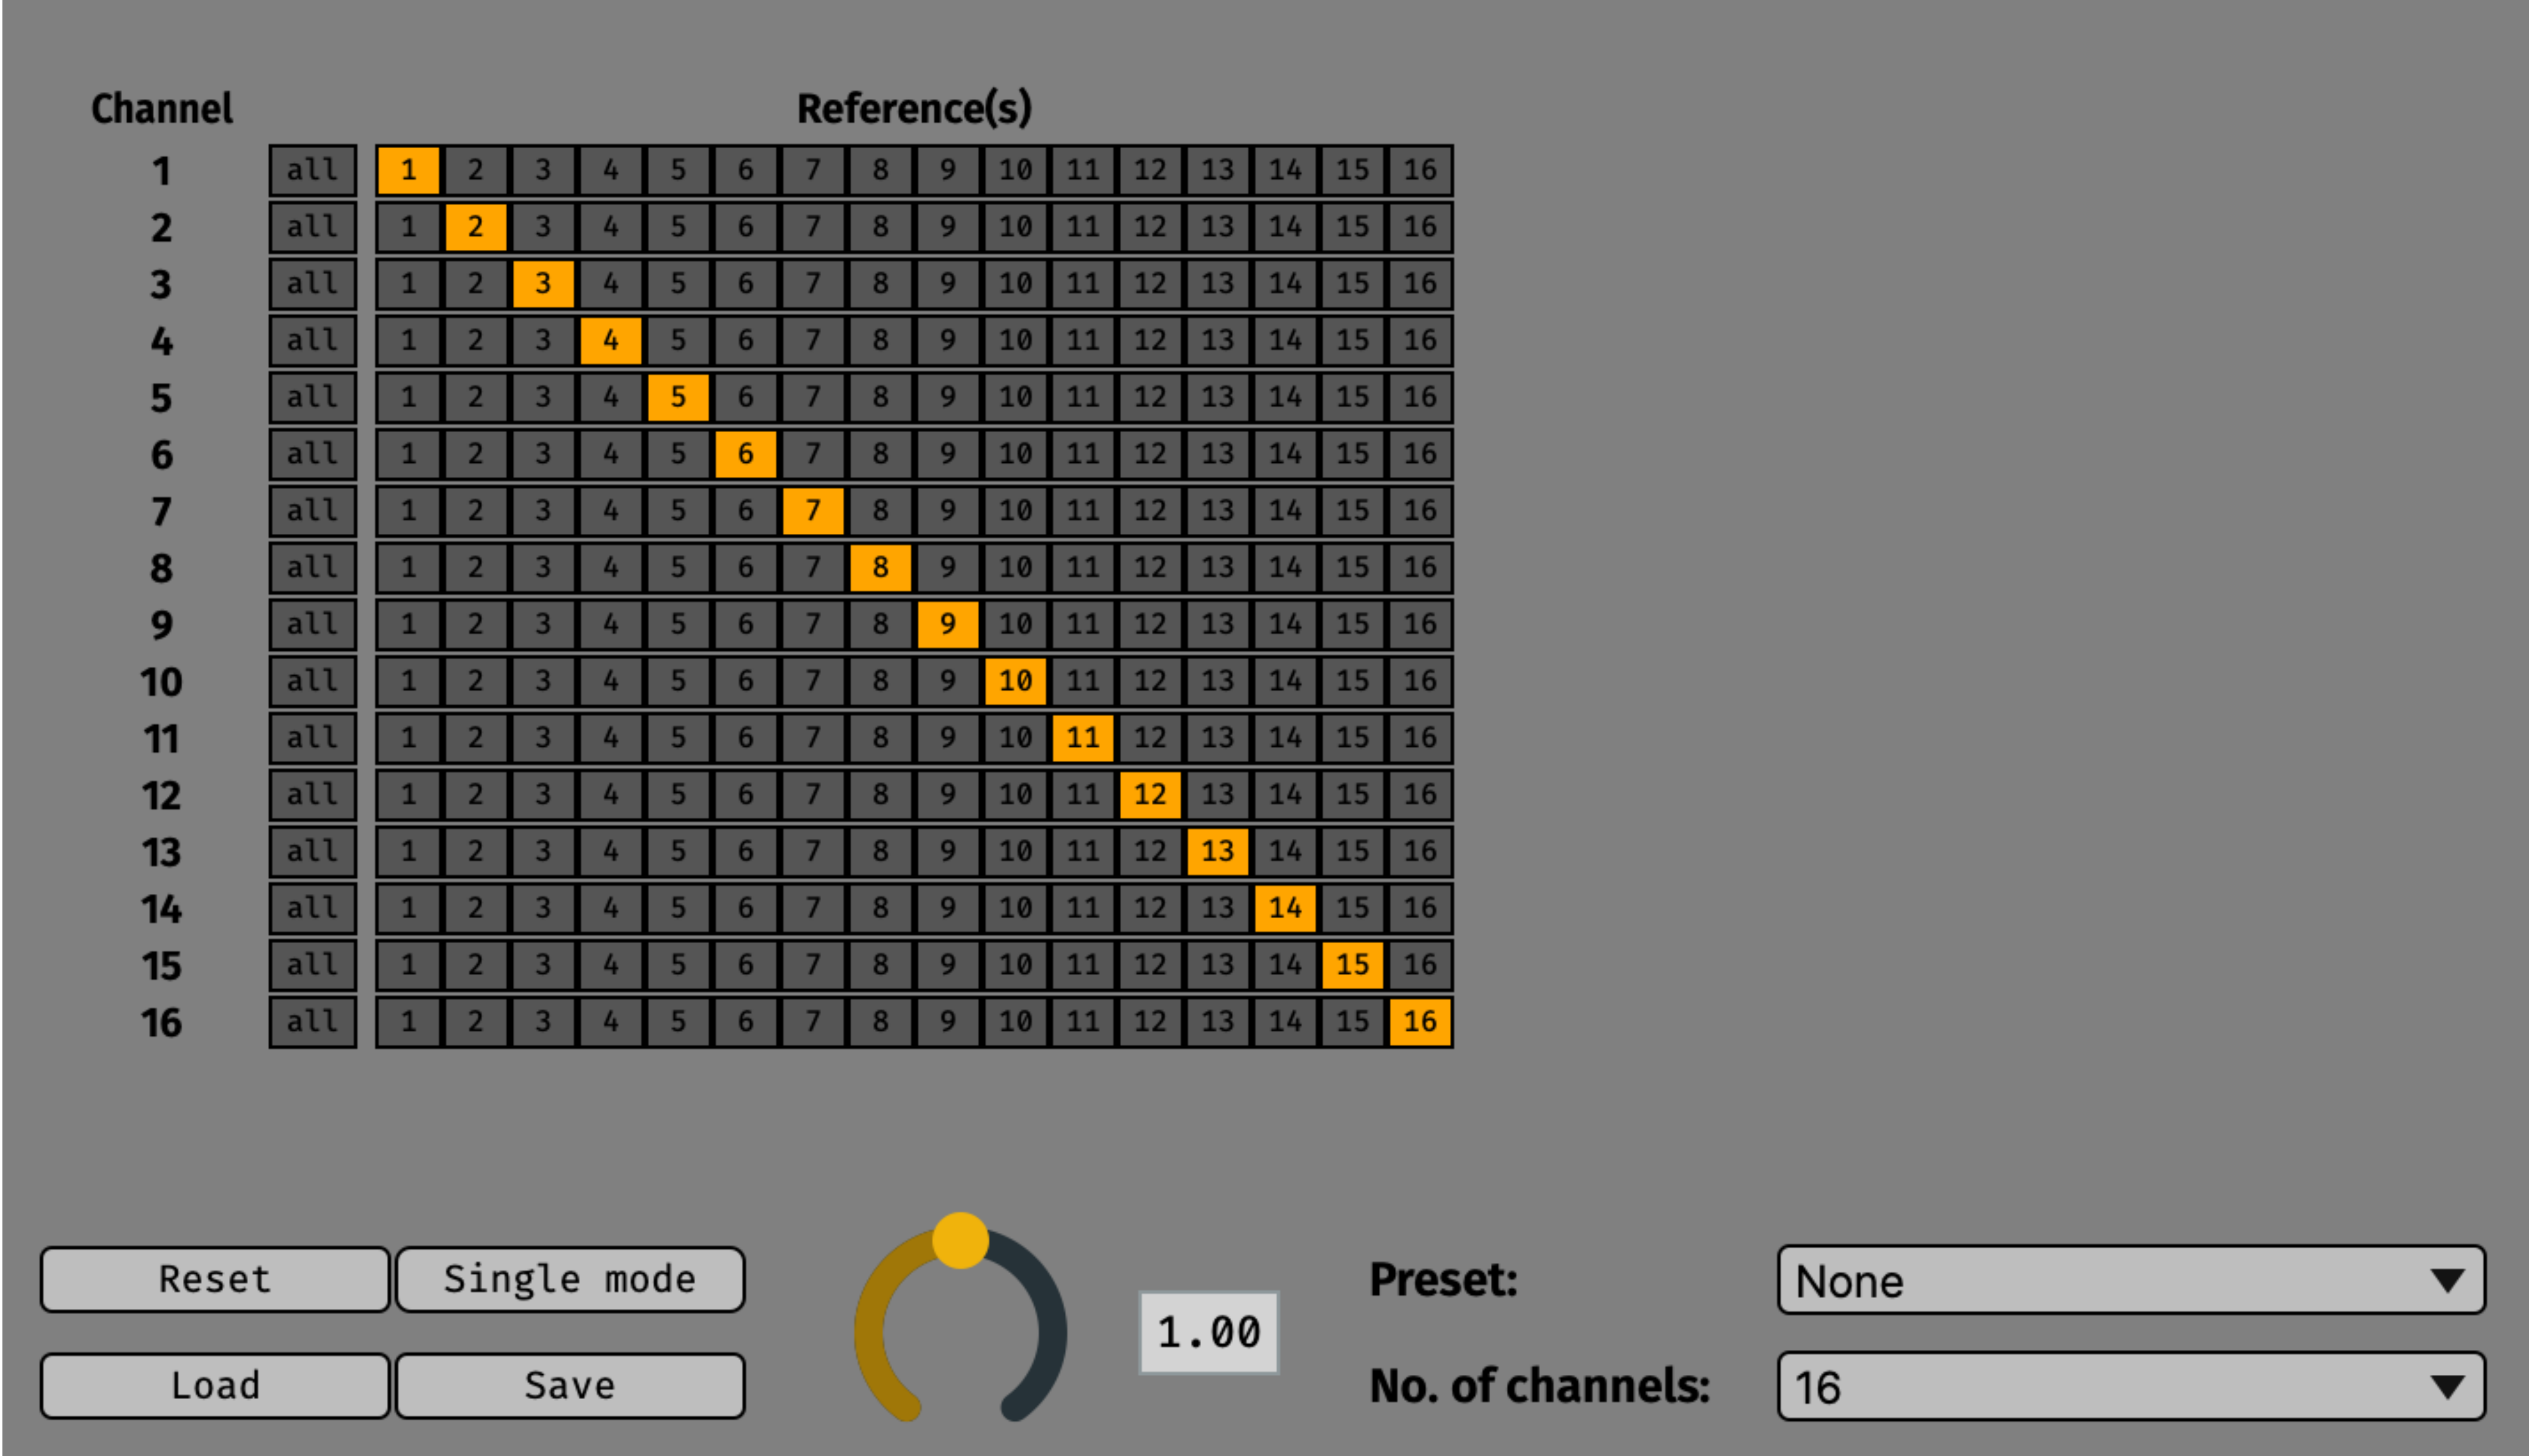
The main settings interface consists of a matrix with one row for each input channel and one column for each potential reference channel. Selecting all the channels in a row is equivalent to using a common average reference for that input channel. Selecting only one channel in a row is the equivalent of using a single digital reference. When no channels are selected in a row, the data for the incoming channel will be unchanged.
The bottom of the settings interface presents several additional options:
- Reset: Removes all reference settings, restoring the plugin to its default state.
- Single mode: Allows only one channel per row to be selected at a time.
- Save: Saves the reference settings to a config file.
- Load: Loads the reference settings from a config file.
- Gain slider: Changes the multiplier used on the reference channels before subtracting from the input channel (default = 1).
- Preset: Select from several useful pre-defined configurations.
- No. of channels: Sets the maximum number of channels used for the preset configurations.
First, follow the instructions on this page to build the Open Ephys GUI.
Important: This plugin is intended for use with the latest version of the GUI (0.6.0 and higher). The GUI should be compiled from the main branch, rather than the former master branch.
Then, clone this repository into a directory at the same level as the plugin-GUI, e.g.:
Code
├── plugin-GUI
│   ├── Build
│   ├── Source
│   └── ...
├── OEPlugins
│   └── virtual-reference
│       ├── Build
│       ├── Source
│       └── ...
Requirements: Visual Studio and CMake
From the Build directory, enter:
cmake -G "Visual Studio 17 2022" -A x64 ..Next, launch Visual Studio and open the OE_PLUGIN_virtual-reference.sln file that was just created. Select the appropriate configuration (Debug/Release) and build the solution.
Selecting the INSTALL project and manually building it will copy the .dll and any other required files into the GUI's plugins directory. The next time you launch the GUI from Visual Studio, the Virtual Reference plugin should be available.
Requirements: CMake
From the Build directory, enter:
cmake -G "Unix Makefiles" ..
cd Debug
make -j
make install
This will build the plugin and copy the .so file into the GUI's plugins directory. The next time you launch the compiled version of the GUI, the Virtual Reference plugin should be available.
From the Build directory, enter:
cmake -G "Xcode" ..Next, launch Xcode and open the virtual-reference.xcodeproj file that now lives in the “Build” directory.
Running the ALL_BUILD scheme will compile the plugin; running the INSTALL scheme will install the .bundle file to /Users/<username>/Library/Application Support/open-ephys/plugins-api. The Virtual Reference plugin should be available the next time you launch the GUI from Xcode.