-
Notifications
You must be signed in to change notification settings - Fork 0
How to integrate security provider
Table of Contents
In this tutorial you will learn how to integrate the security provider to enable a login mechanism
This tutorial requires you to complete the following steps / tutorials:
mkdir <workspace directory>
cd <workspace directory>
git clone https://github.com/phovea/phovea_server.git -b develop
git clone https://github.com/phovea/phovea_security_flask.git -b develop
mkdir myapp
cd myapp
yo phovea:init-app
# add extra phovea_security_flask module dependency
cd ..
yo phovea:workspace
npm i
docker-compose up -d
npm run start:myapp
# adapt code, see belowFirs step is to setup a new workspace and application in which we can integrate the login logic. In addition to the new application myapp, both phovea_server and phovea_security_flask are needed in the workspace for the server side.
mkdir <workspace directory>
cd <workspace directory>
git clone https://github.com/phovea/phovea_server.git -b develop
git clone https://github.com/phovea/phovea_security_flask.git -b develop
mkdir myapp
cd myapp
yo phovea:init-app
In the end the wizard should print something like:

cd ..
yo phovea:workspace
npm i
docker-compose up -d
npm run start:myappThe previous step created a simple application that we use as a starting point. The next step is to integrate the login menu into the app.
Please edit the file myapp/src/index.ts according to the given template:
// ...

import LoginMenu from 'phovea_security_flask/src/LoginMenu';
import {currentUser, isLoggedIn} from 'phovea_core/src/security';

const header = createHeader(
  <HTMLElement>document.querySelector('#caleydoHeader'),
  { appLink: new AppHeaderLink(APP_NAME) }
);

const menu = new LoginMenu(header);
header.insertCustomRightMenu(menu.node);

menu.on(LoginMenu.EVENT_LOGGED_IN, () => {
  console.assert(isLoggedIn());
  console.log(currentUser());
});

menu.on(LoginMenu.EVENT_LOGGED_OUT, () => {
  console.assert(!isLoggedIn());
});
// ...
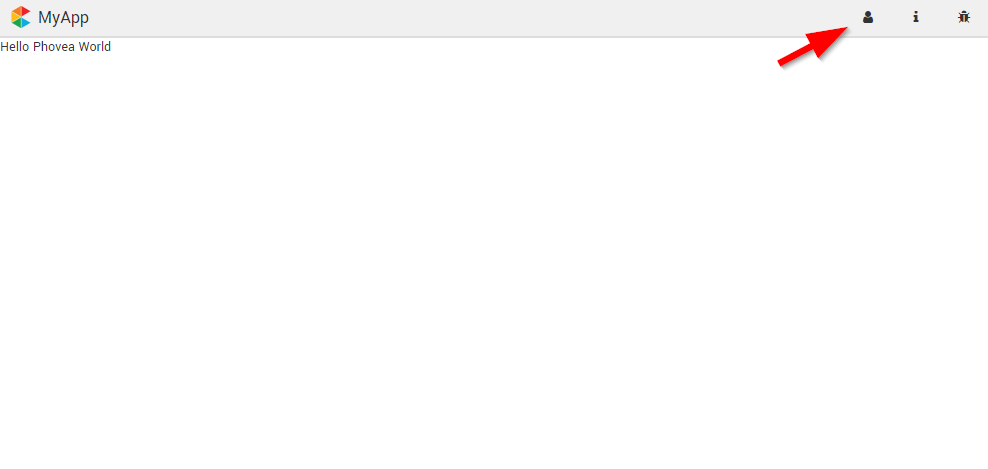
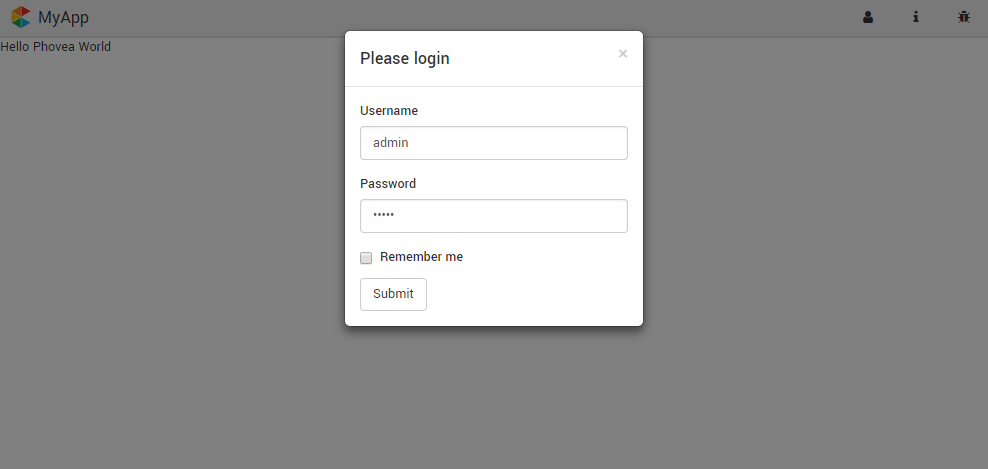
We extend the Phovea app header by adding a login menu element to the right menu. The LoginMenu handles the whole login process and fires two events: LoginMenu.EVENT_LOGGED_IN and LoginMenu.EVENT_LOGGED_OUT accordingly. After updating the application a new item pops up in the right menu bar as in the following screenshots:


The previous example already showed a simple usage of the currently logged in user on the client side. The relevant module is security.ts from phovea core. Its most important functions are:
-
isLoggedIn(): boolean -
currentUser(): IUser|nullreturns the currently logged in user or null if not logged in
-
currentUserNameOrAnonymous(): stringreturns the named of the currently logged in user or 'anonymous' otherwise
-
canRead(item: ISecureItem): booleanchecks whether the currently logged in user has the permission to read the given secure item
-
canWrite(item: ISecureItem): booleanchecks whether the currently logged in user has the permission to write the given secure item
On the server side a similiar module exists: security.py providing similar features during processing an REST API request. Its most important functions are:
-
is_logged_in(): bool -
current_user(): Userreturn the currently logged in user or the anonymous user object instead
-
current_username: strreturn the currently logged in user name or 'anonymous' otherwise
-
can_read(item): boolean -
can_write(item): boolean -
login_required(f)decorator (
@login_required) which requires that the user is logged in before executing the function
The phovea_security_flask module is a generic implementation for handling security in phovea based on flask-login, i.e. cookies and user sessions.
In addition, security stores are used to actually verify user given by username and password. phovea_security_flask comes with a default implementation based on an encrypted configuration.
phovea_security_store_ldap is an implementation based on LDAP.
The default security provider will be used if no other one is included in the build. Users are configured in the configuration file of the application. By default, two users are defined in the default configuration located at config.json.
- admin/admin
- sam/sam
Salt and passwords can be generated using the encryptor.py utility script.
As an alternative the dummy store supports configuring the users via environment variables. During startup it looks for all environment variables starting with PHOVEA_USER_. For each matching environment variable a user is generated. The environment variable has to follow the following pattern
PHOVEA_USER_<username>=<salt>;<encrypted_password>[;<role>]*e.g. for the configured admin account:
PHOVEA_USER_admin=dcf46ce914154a44b1557eba91c1f50d;e464485eeeca97927191bd77e38137cc5870c53efb05c8ec027faa8d47f0c0ee23e733ea5e494cb045ca46b0f3b6f695b7261a34f46ba3797cde67724d78522a;adminLessons learned:
- How to integrate security provider in own application
- How to add the login menu to your app header
- How to check the security on the client side
- How to check the security on the server side
- How to add a new user to the default security store
- How to use a different security store