FYSETC S3 H7 Firmware Guide
Contents
This installation process is based on the KIAUH installation scripts.
- Please follow the KIAUH Download and Installation instructions to set it up.

Warning
Never change jumpers or hot plug things while the board is powered on.
The easiest way to flash the board is before installing it into the Ebox and connecting anything else to it. If it is already mounted then proceed with no. 1. below.
-
If you are using the Serial UART connector to the PI GPIO pins, please disconnect that first.
-
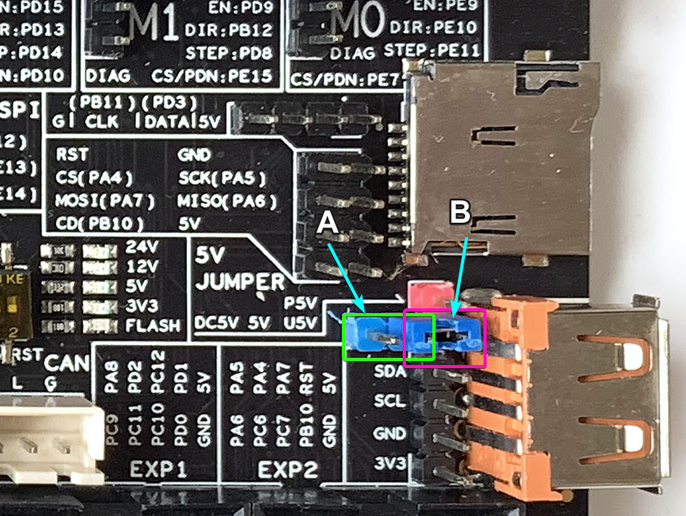
If your board already receives 24V power then set the blue jumper in position A
- If you board is powered by USB then set it to position B
- Make sure to switch it to back to position A when finishing installing the board and connecting it to the PSU
-
-
Connect the board to the PI (USB C cable on the board side, USB A on the PI side)
To flash the firmware the board has to be booted into USB DFU mode.
-
Power the board and make sure the 5V and 3.3V leds are active
-
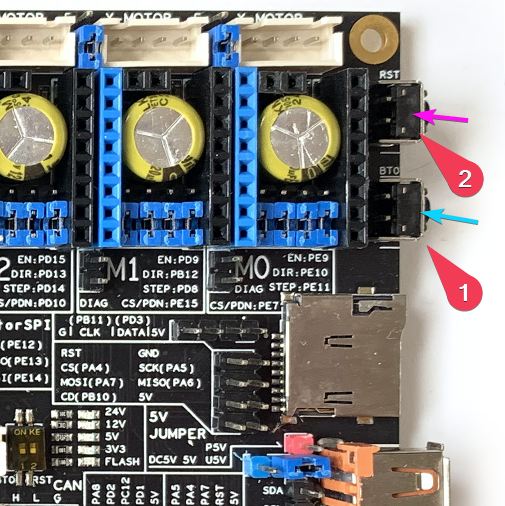
Hold the Boot (1) momentary switch and then press the RST (2) one. Release both buttons.
-
-
Open a SSH connection to the PI and run:
lsusb-

- The board should show up as DFU Mode. If it doesn't, repeat the procedure at step no. 2.
- Start KIAUH
~/kiauh/kiauh.sh
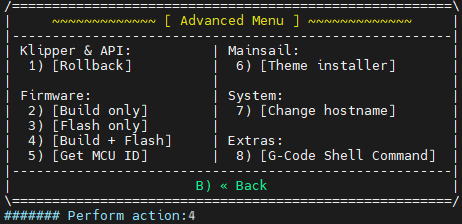
- Select [Advanced] (4) from the menu
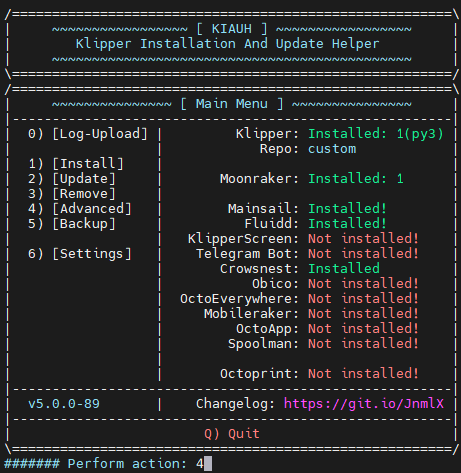
And then [Build + FLash] (4)
- Set the firmware to the following settings, then press Q to finish and save the settings with Y when prompted.
- If you connect the board to the PI though the Serial UART interface then switch the communication to: Serial Communication interface (USART1 PA10/PA9)
[*] Enable extra low-level configuration options
   Micro-controller Architecture (STMicroelectronics STM32)
   Processor model (STM32H723)
   Bootloader offset (No bootloader)
   Clock Reference (25 Mhz crystal)
   Communication interface (USB (on PA11/PA12))
   USB ids (leave default)
() GPIO pins to set at micro-controller startup

- Proceed with the flashing process and select the options highlighted below:
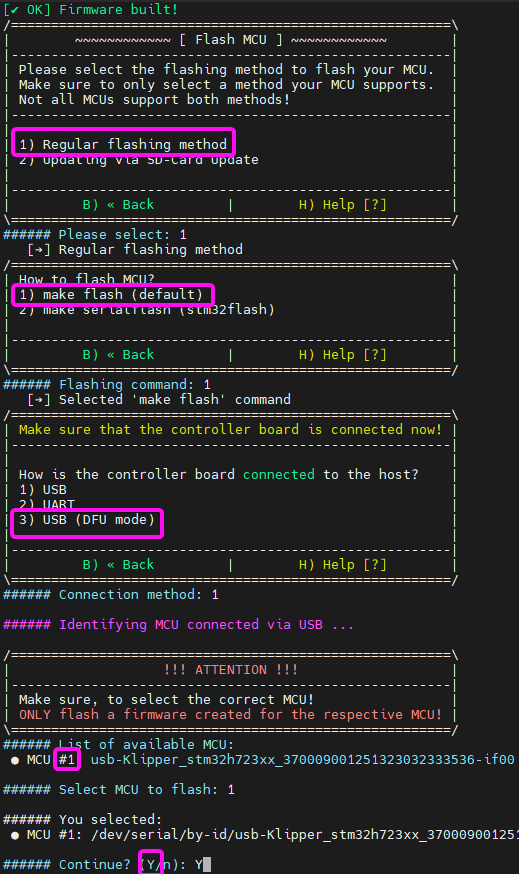
Note: your MCU #1 ID might differ than the one above which has been previously flashed
- Proceed with the flashing procedure.
- Ignore the other error messages and check to see if the file download process was successful.

- Quit KIAUH and reset the board. If you flashed for a serial UART connection, please remove the USB and reconnect the UART cable.
- Run:
ls /dev/serial/by-id/*andlsusb(for USB connection)
- If the firmware flashing process was successful then you should see the following device listed:
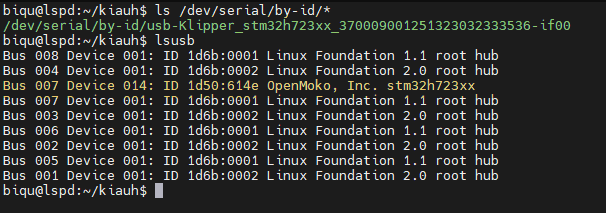
P.S. Remember to switch the 5V power jumper back if needed
- Run
sudo apt-get remove brttyto remove a possible brtty serial conflict - Launch the raspi configuration
sudo raspi-config- Select “Interface Options” > “Serial Port” to enable UART, then answer Yes to Serial HW and No to Serial Console if asked
- Enter
sudo nano /boot/cmdline.txt - Delete "console=serial10,115200" if present
- Reboot
sudo reboot now